
January 7th, 2005: Whow. Okay, so I've been really lax in actually finishing up any of this big writing project I started.
So where am I right now? Well, I finished my boat in mid July. It took until mid August to get the bugs in the rigging worked out. I got a fair bit of solid sailing in over the summer and I'm just starting to feel comfortable out there on the seat.
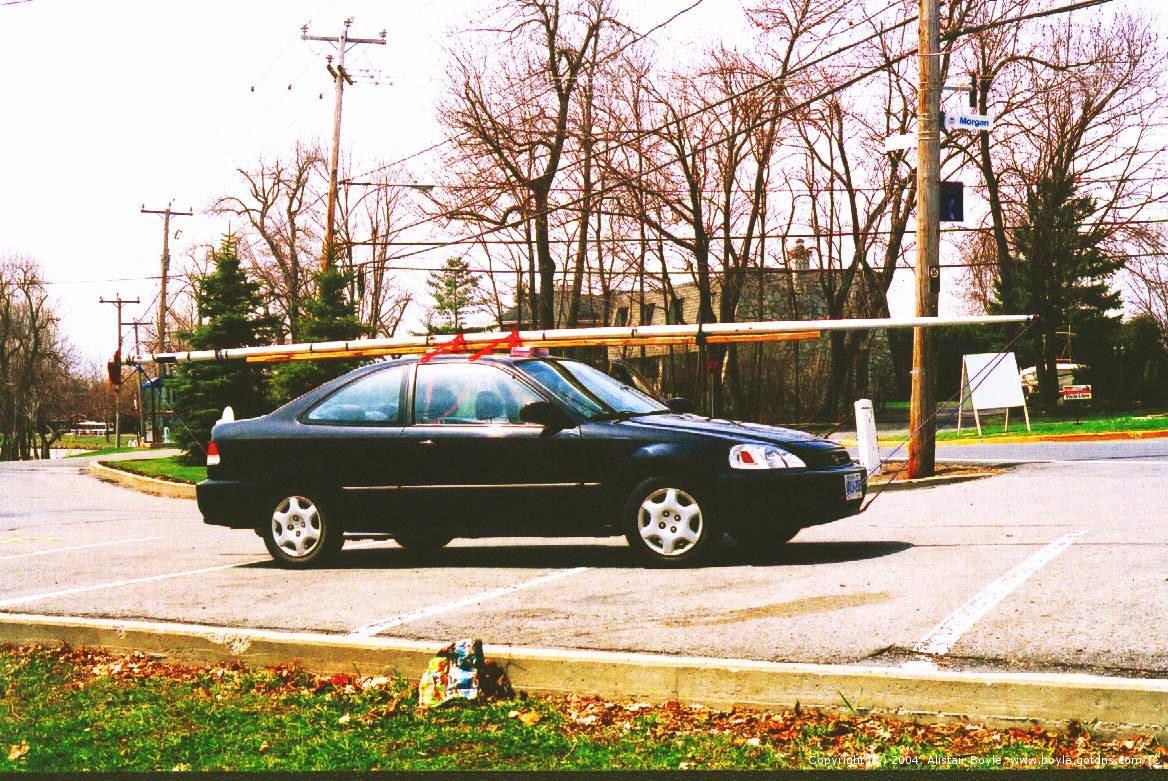
The boat looks fantastic. I'm sailing with an aluminum mast and no spinnaker yet as I decided to get sailing rather than spend another summer in the garage working. Now that I've got it in the water I realize I really don't need that extra complication for a while yet. Though its hard to keep up with the I14s and Laser5000s with out one... my fellow Ottawa Skiff Racing Fleet sailors.
The skiff fleet was something that was started 3 years ago as a joke between my best friend, Matt and I, and has since blossomed into a substantial organization promoting the sailing of skiffish boats such as the I14, 49er, and Laser5000, with 8 or 9 boats now, and growing steadily each year. My IC (hopefully AC sometime) is the only International Canoe but I can hope that some day in the future there will be another brave soul in Ottawa who will take up the challenge. Anyways, pretty awesome growth for a joke...
Those additional boat upgrade projects will have to wait until I have a garage again, though. I got rid of the garage I had been renting, a rather costly thing. So now I have to wait till I actually own my own garage, which will be about the same time I buy a house - perhaps in a year or two. The boat is currently stored in a fellow sailors shed just out of town (Thanks Harvey!) and safe for the winter. At least until a tree falls on the shed or something...
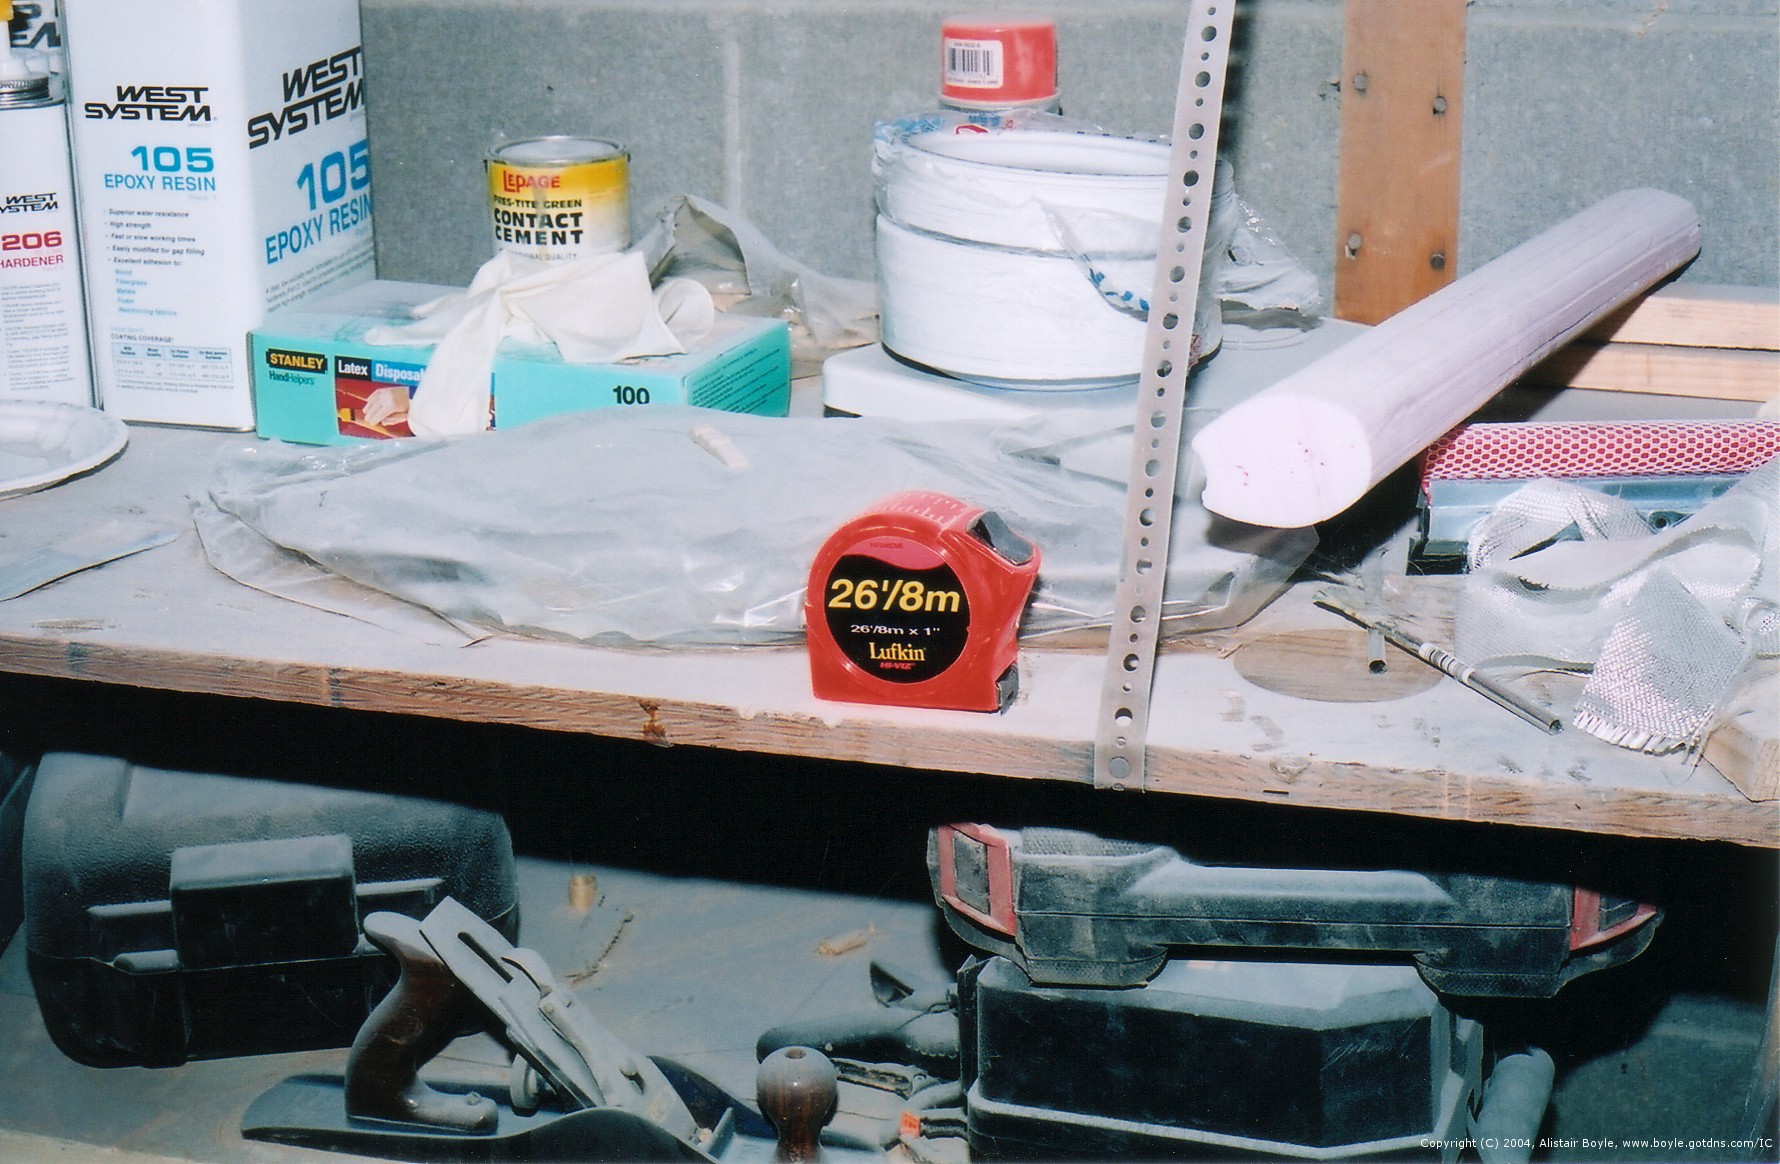
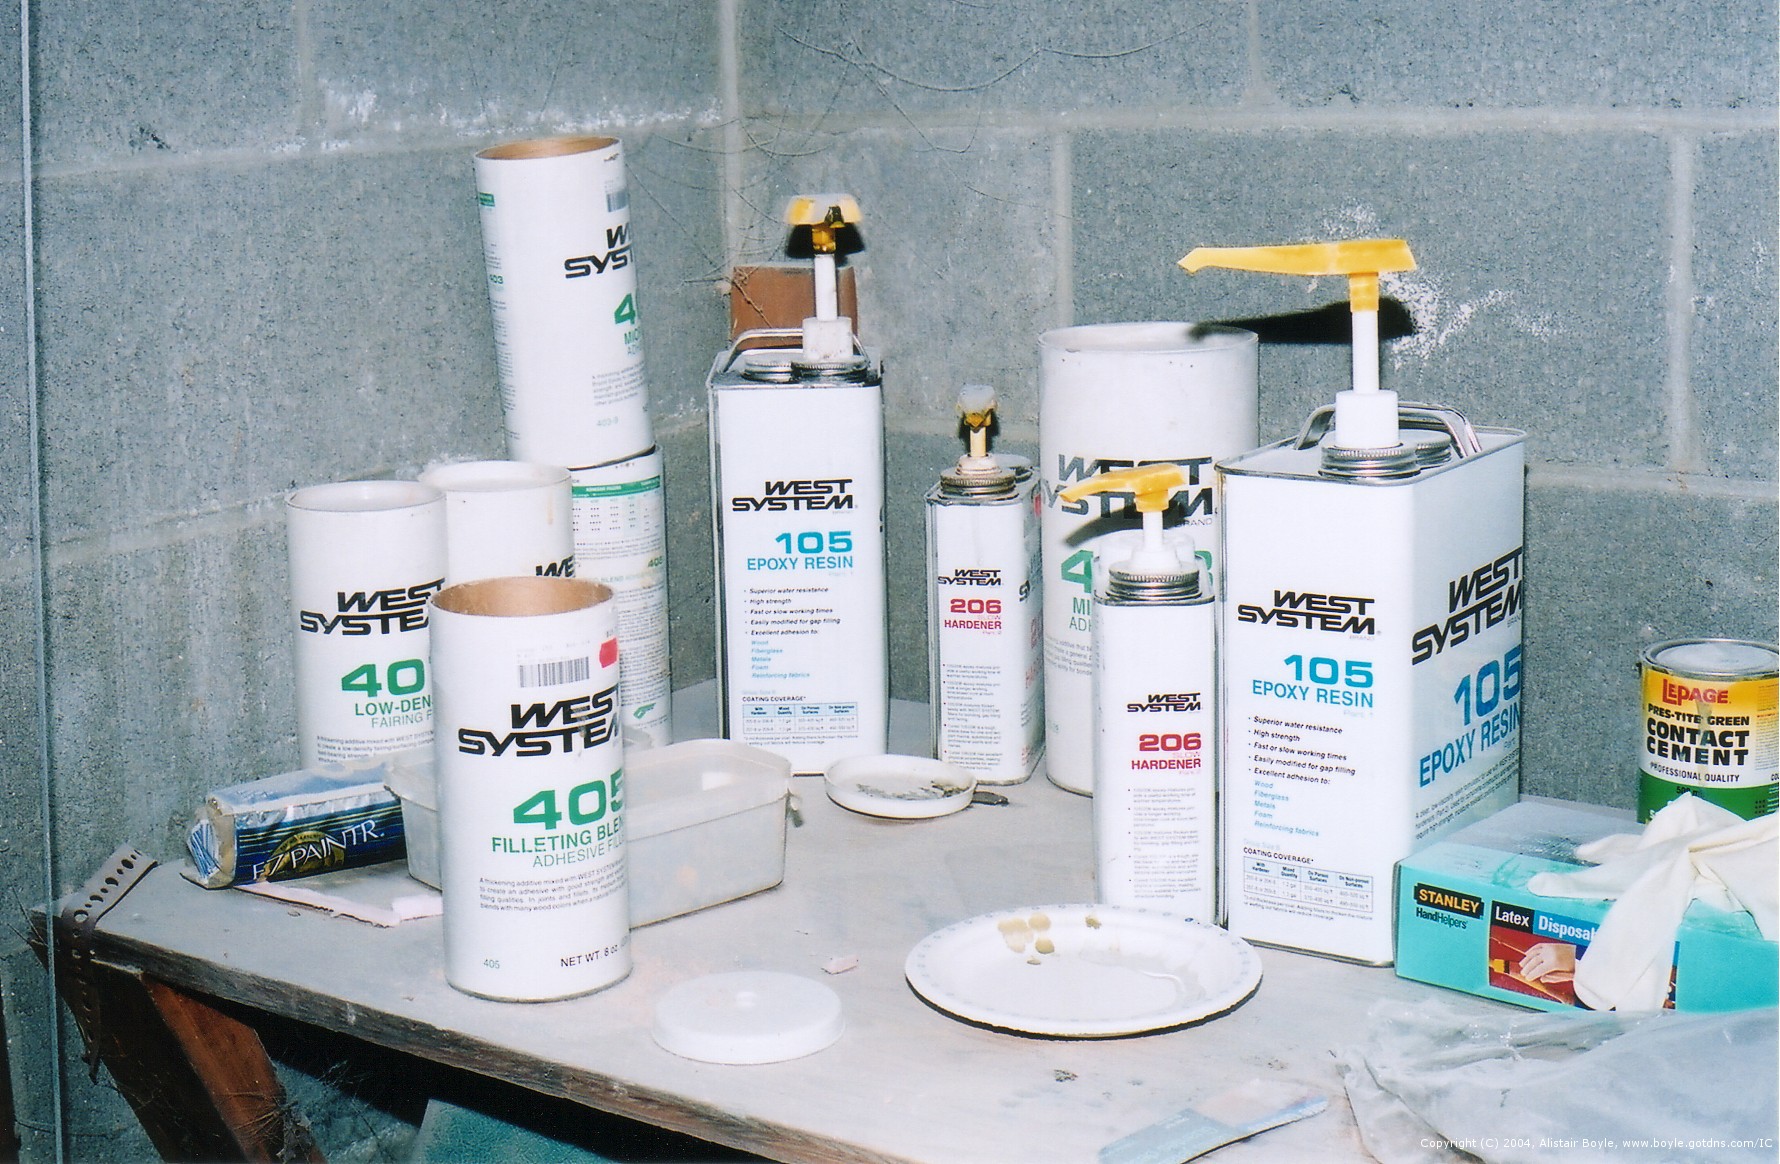
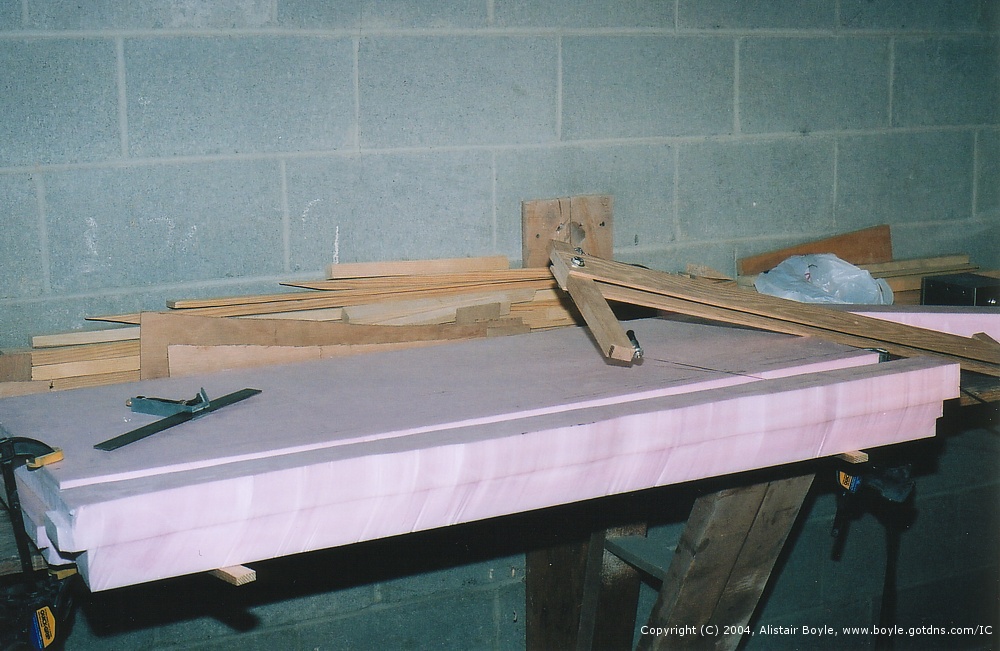
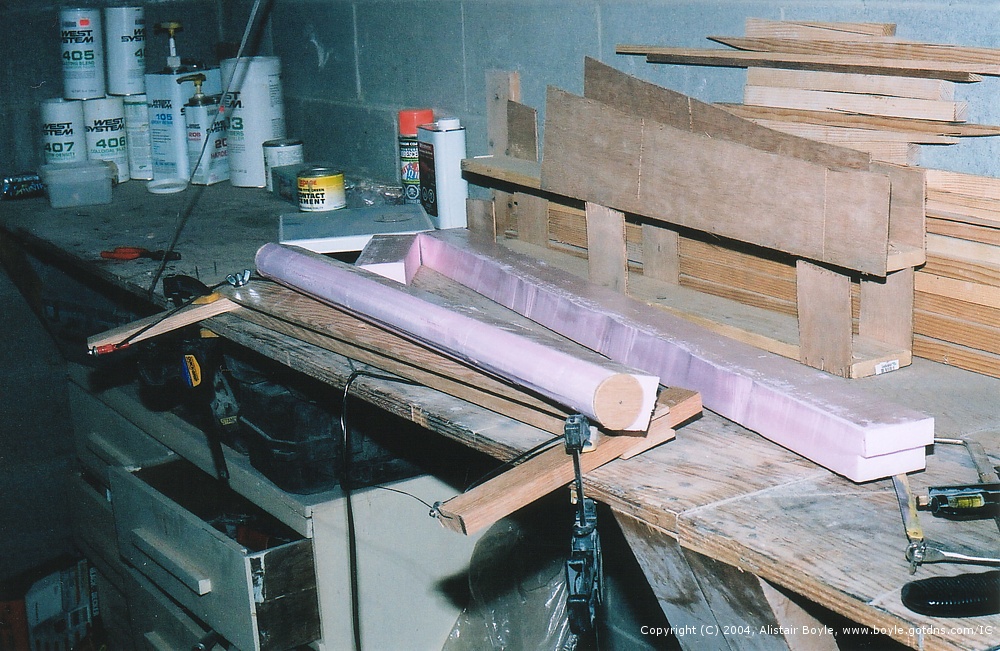
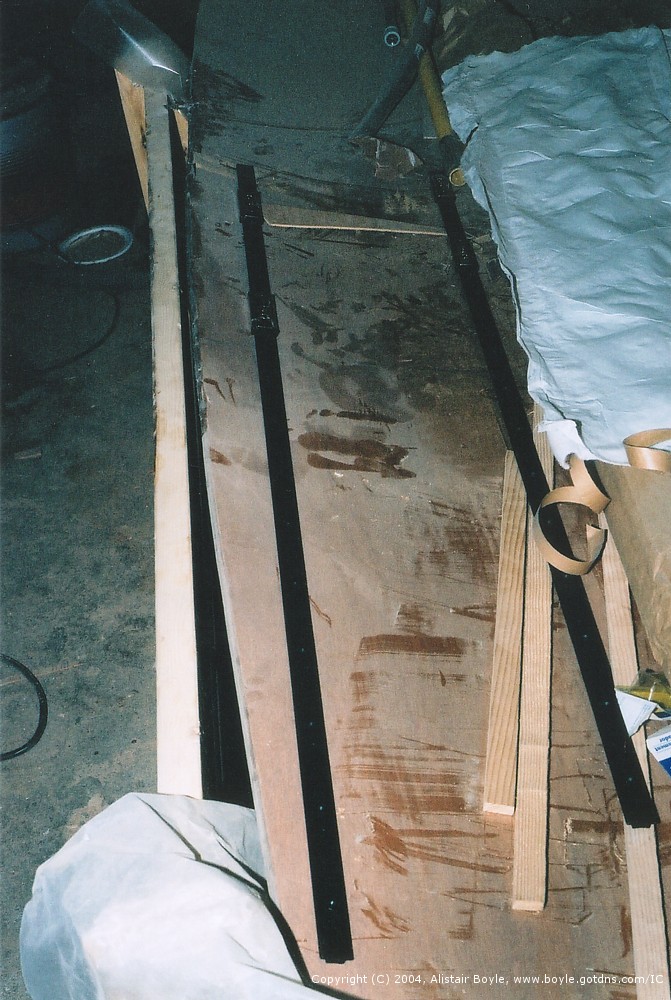
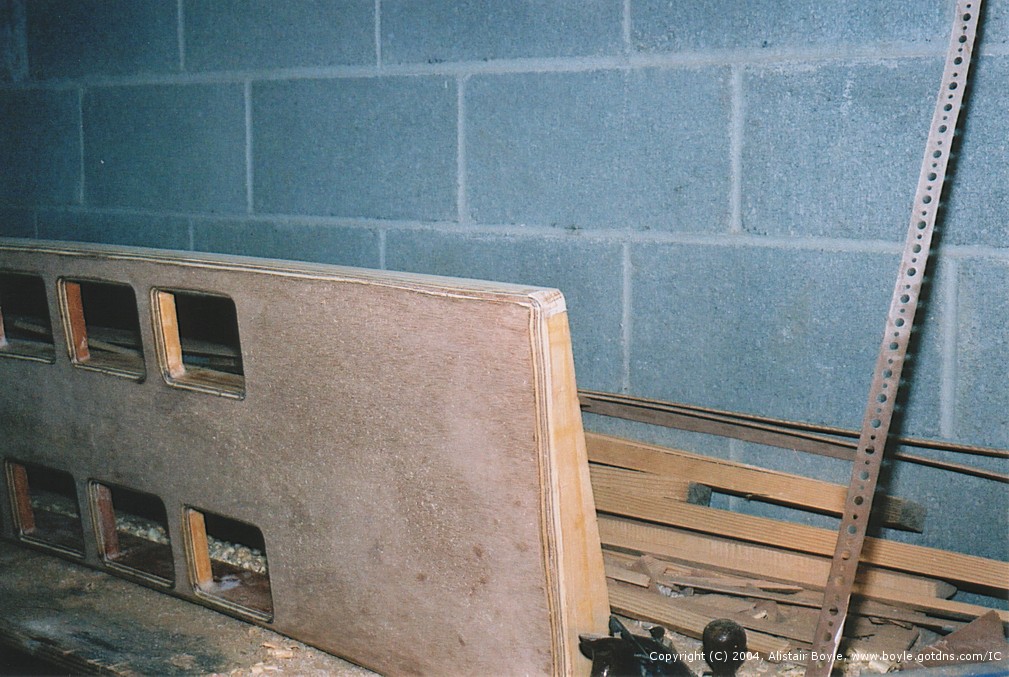
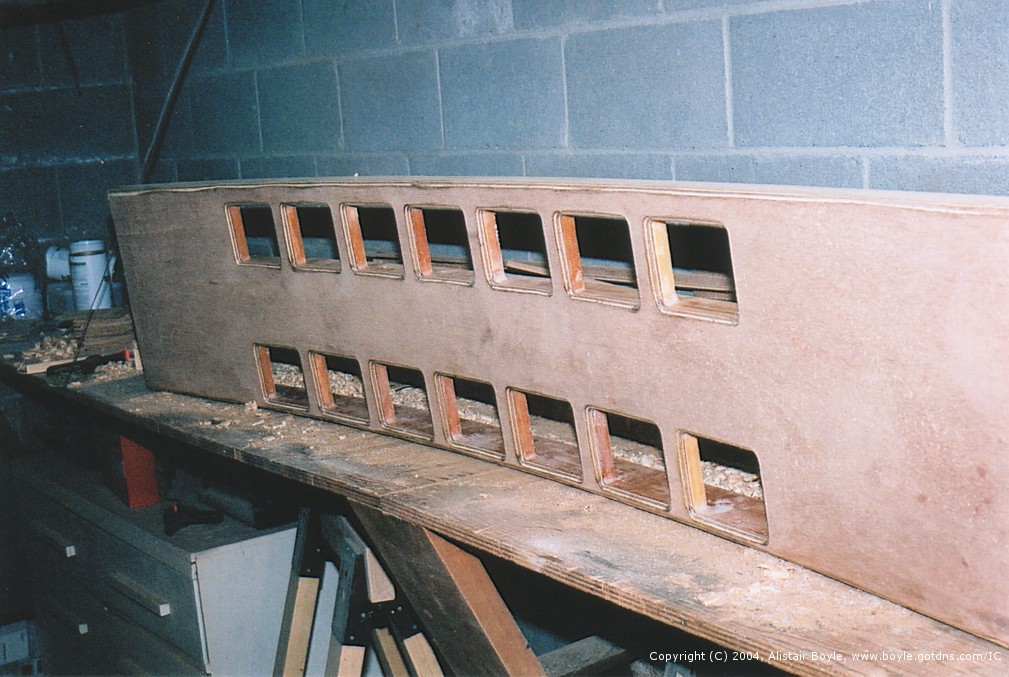
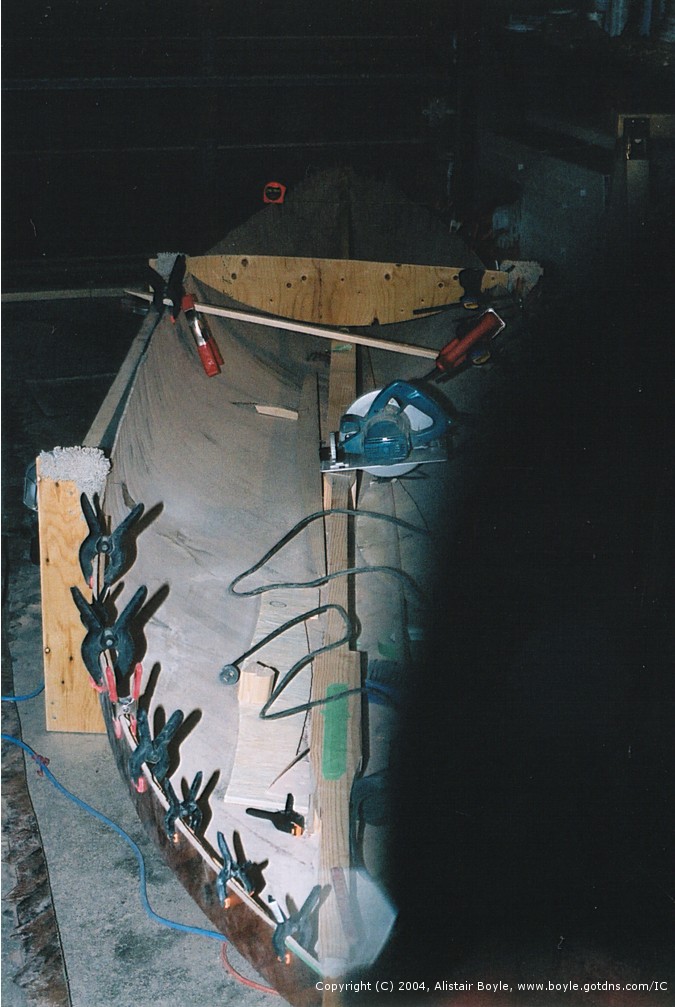
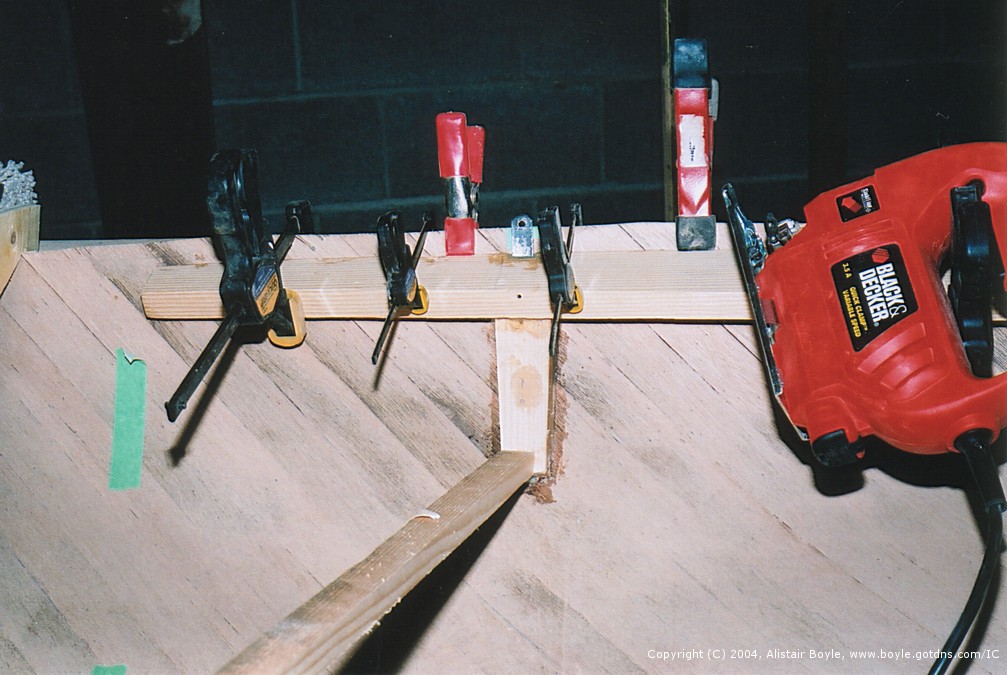
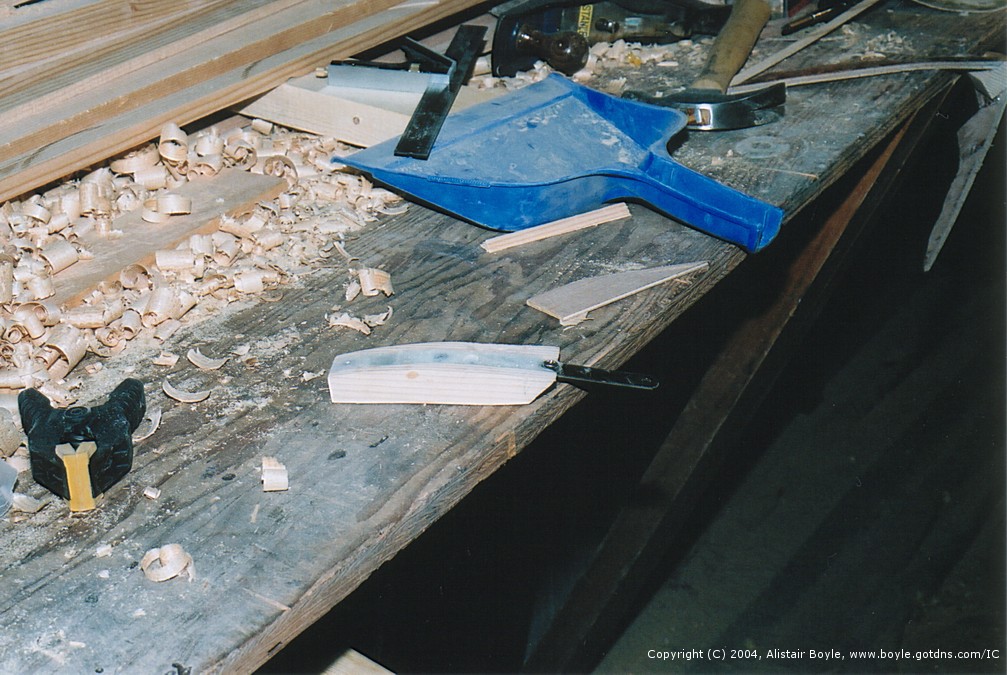
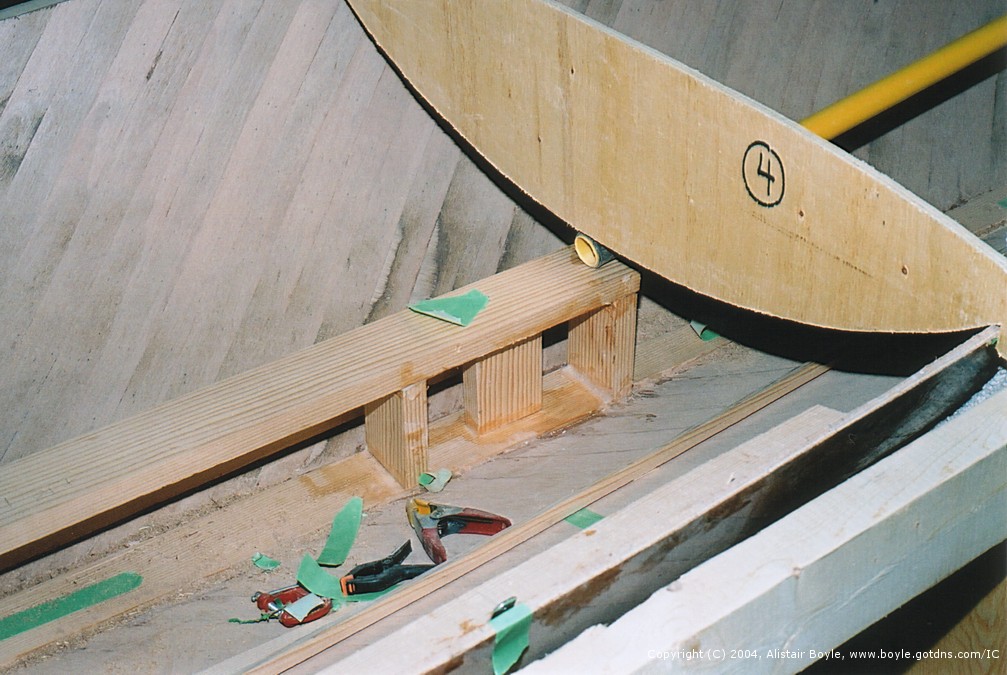
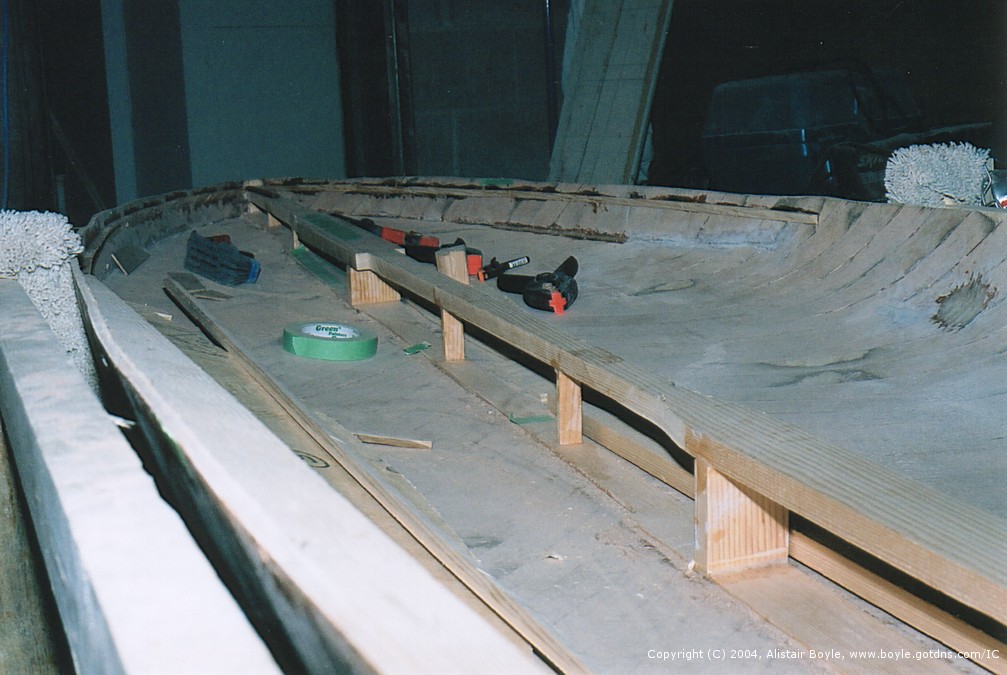
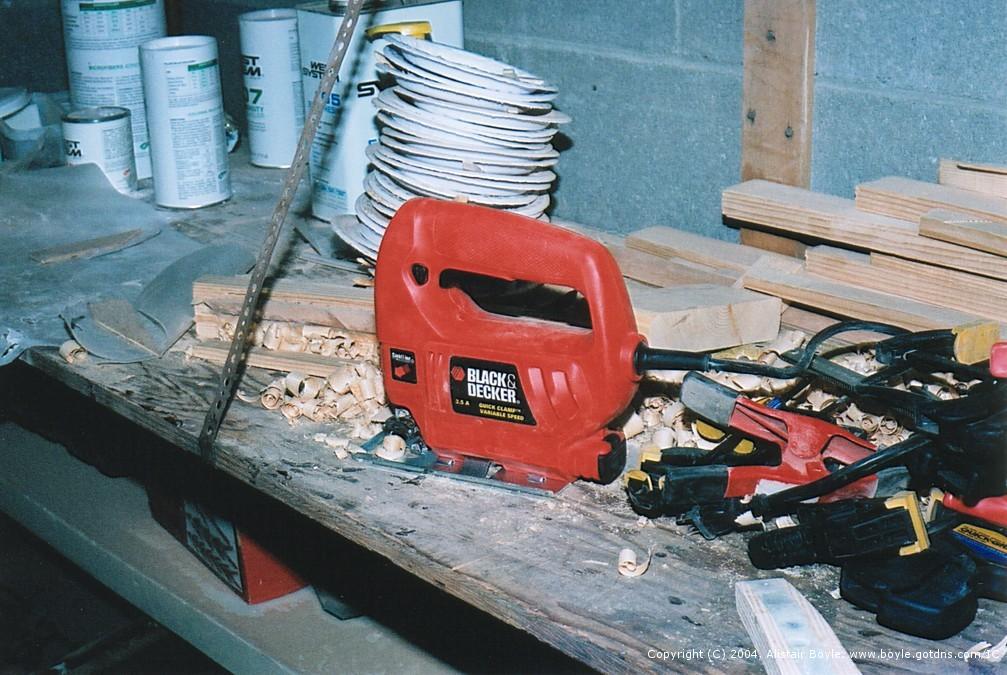
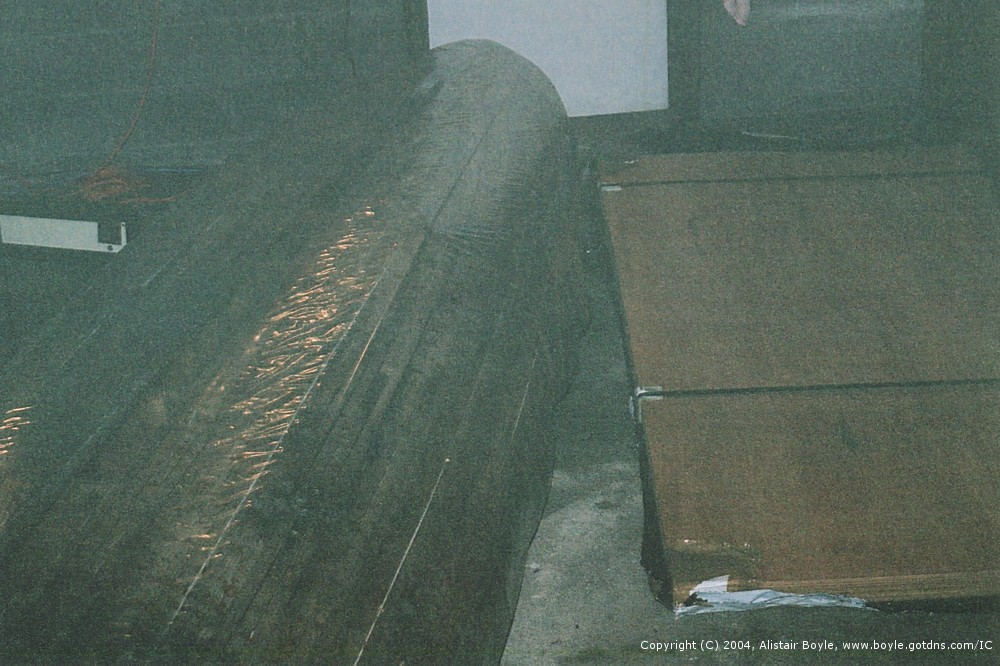
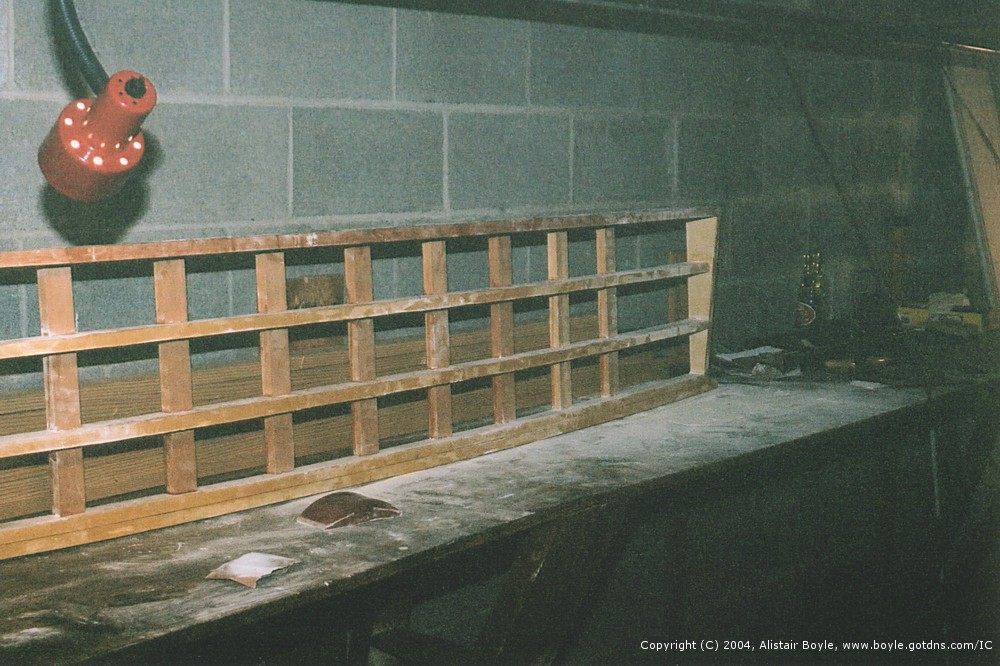
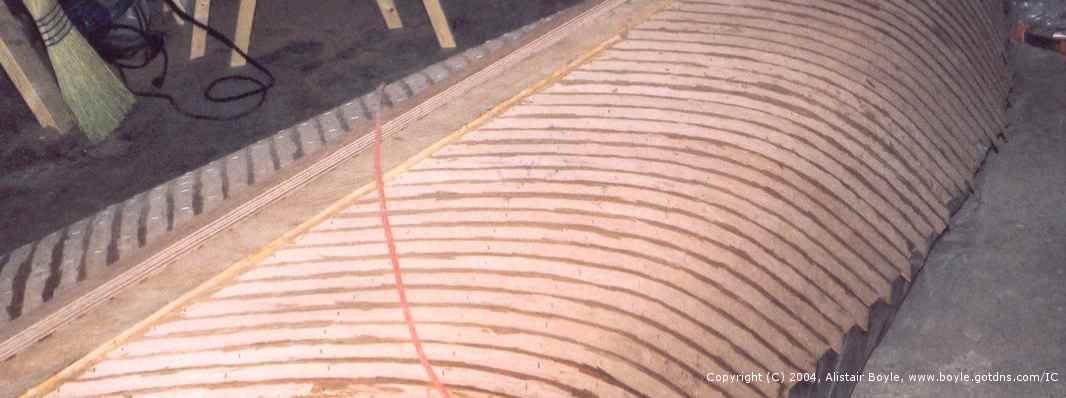
May 2nd, 2004: Another batch of pictures here.


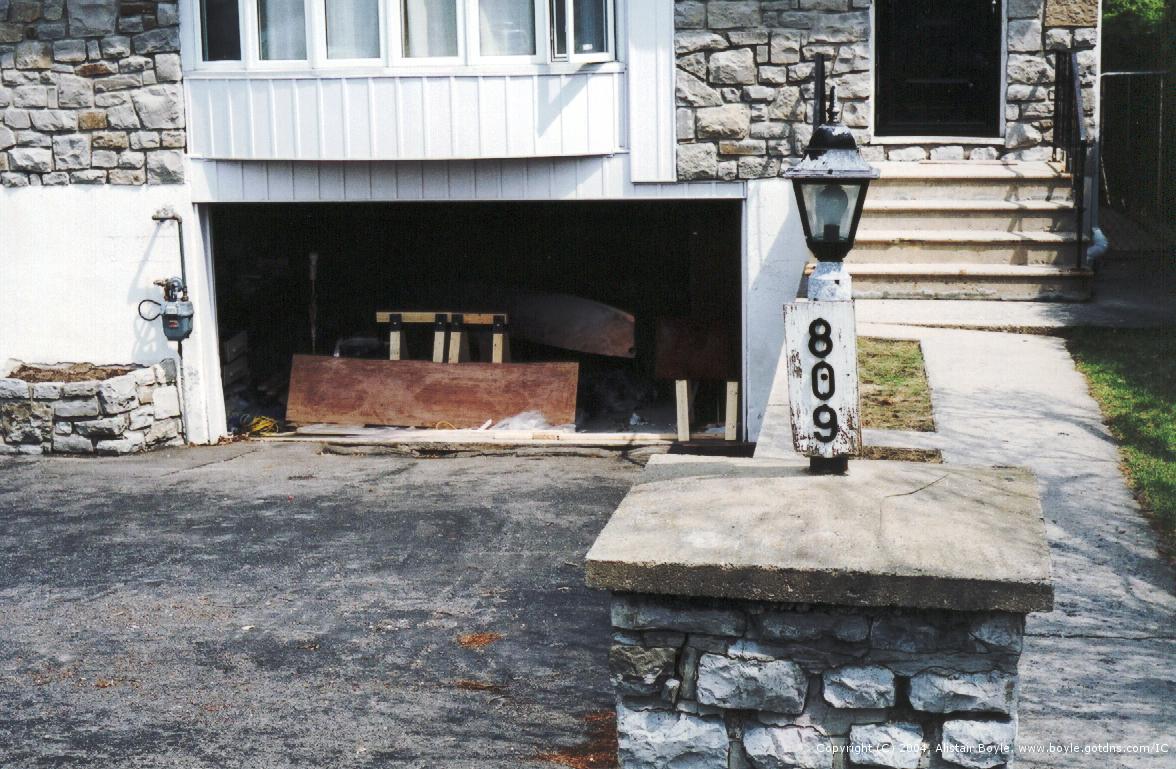
April 27th, 2004: Another batch of pictures here. I have another roll of film with two pictures left, so there should be more pictures up soon too.
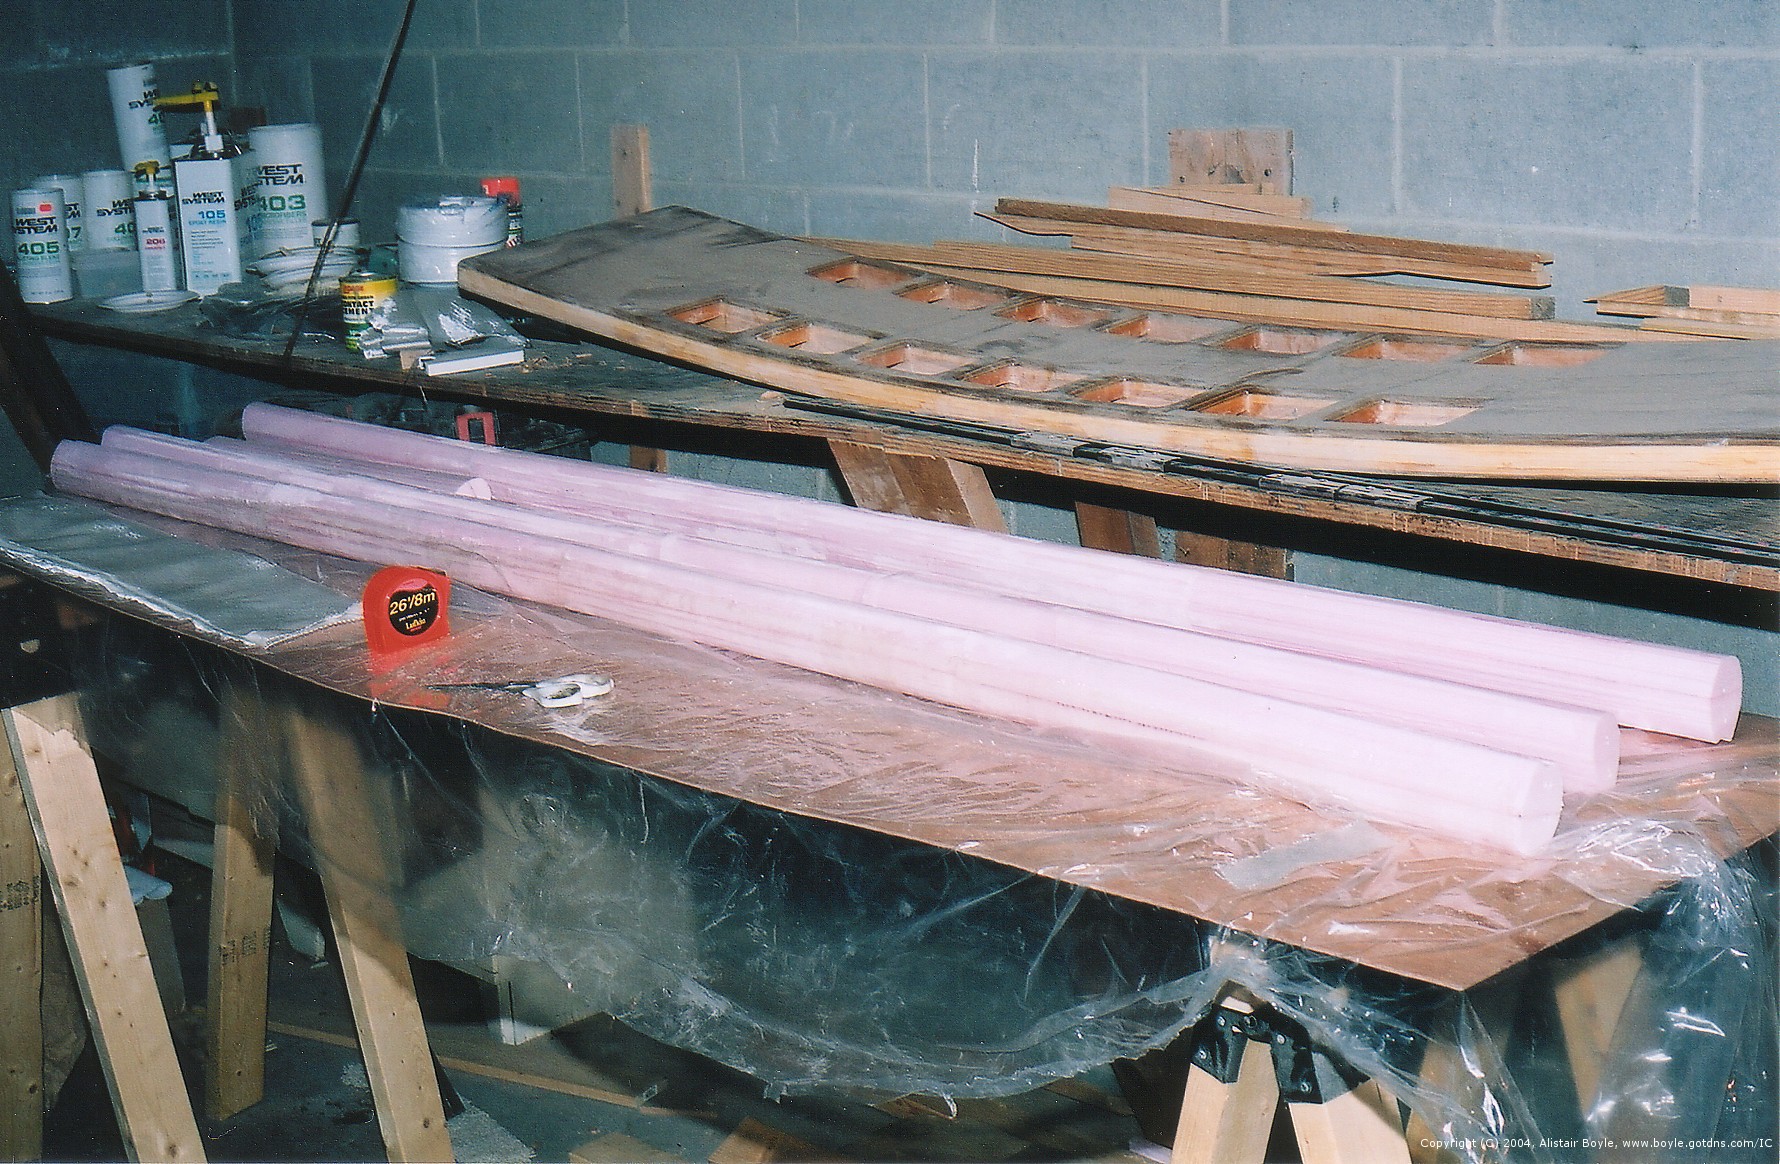
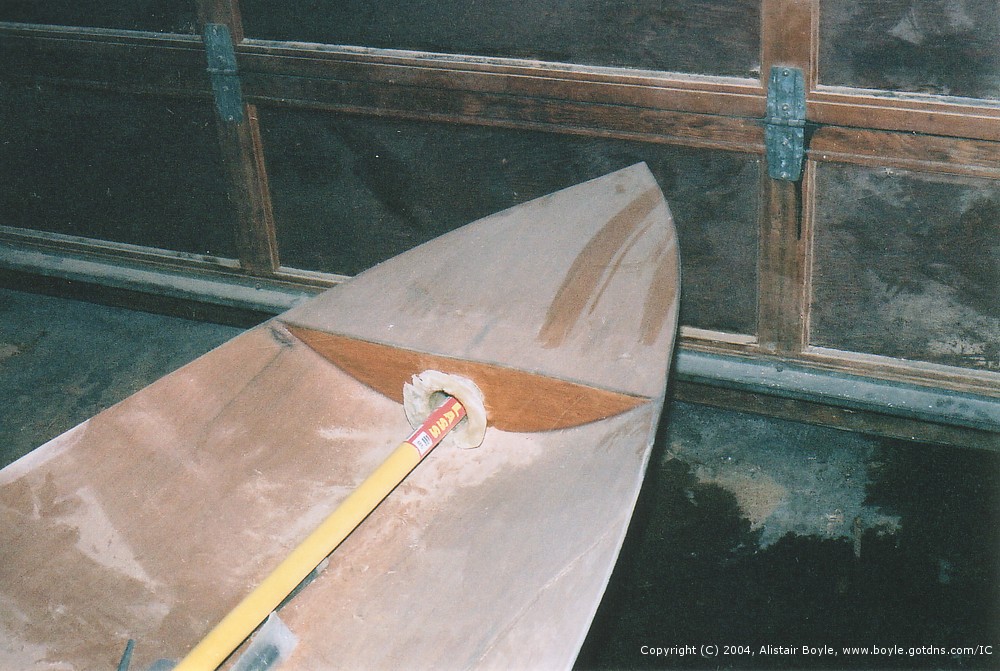
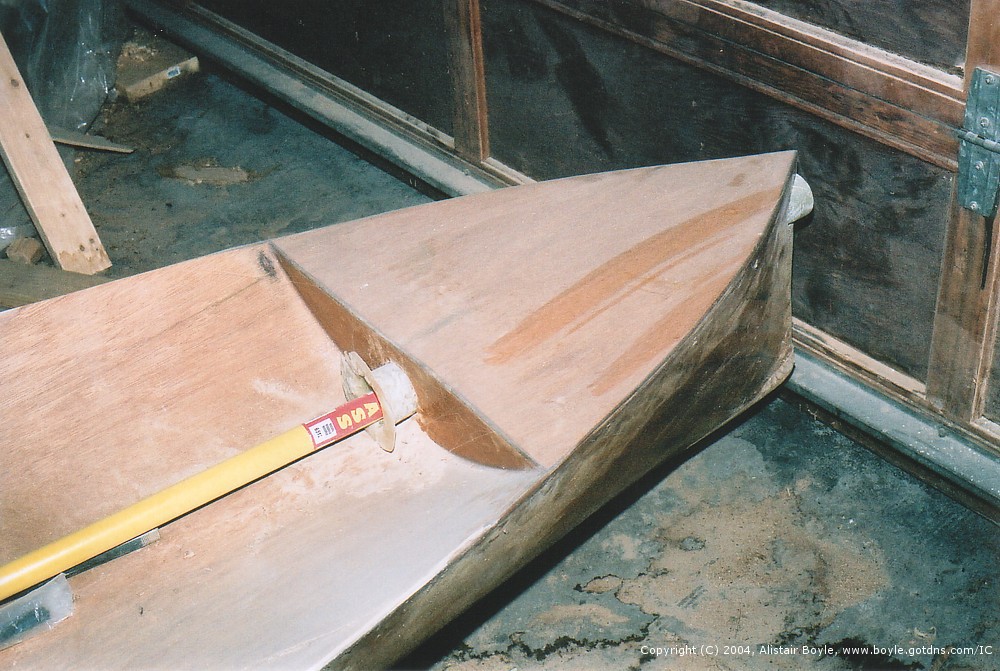
Things have been moving along rather swiftly lately. Not fast enough for the start of the season though. I've decided to cover over the holes for the bow sprit, so I can go sailing this year. I've also picked up a used aluminum mast in Montreal for $460CAN, so I can fiddle around with trying to get my carbon mast done over the summer, but still get out sailing. The anticipation is running high!
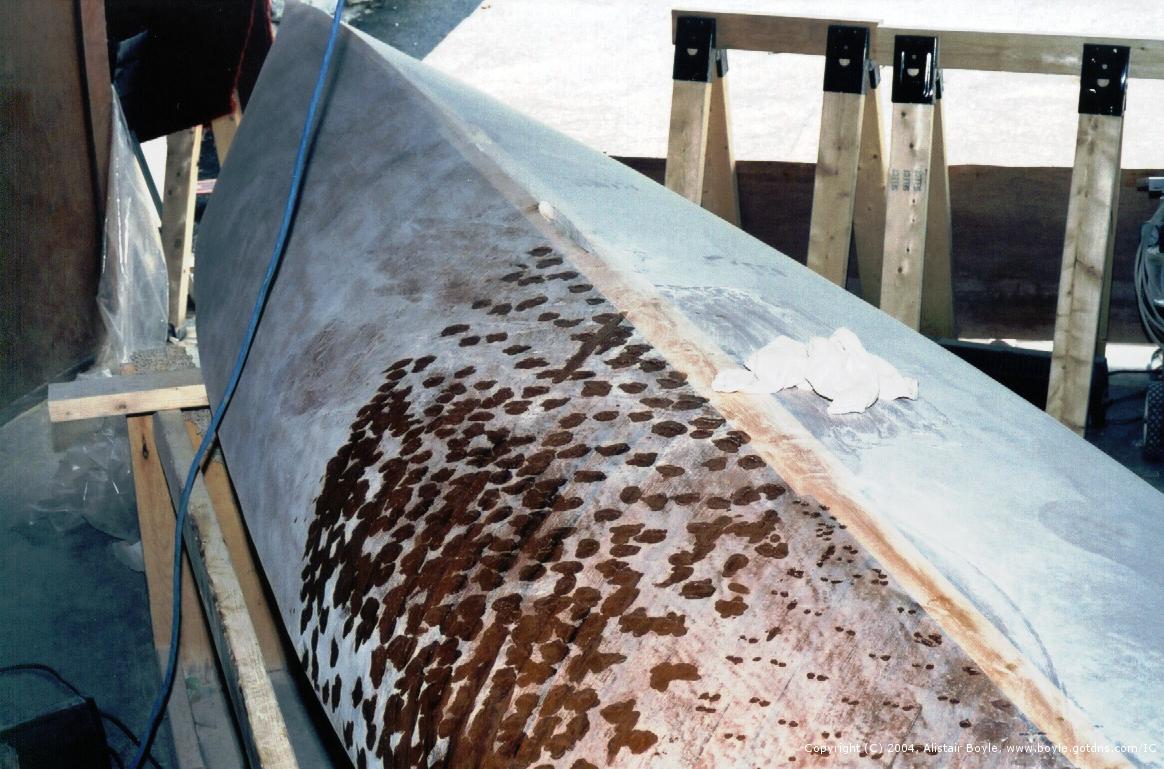
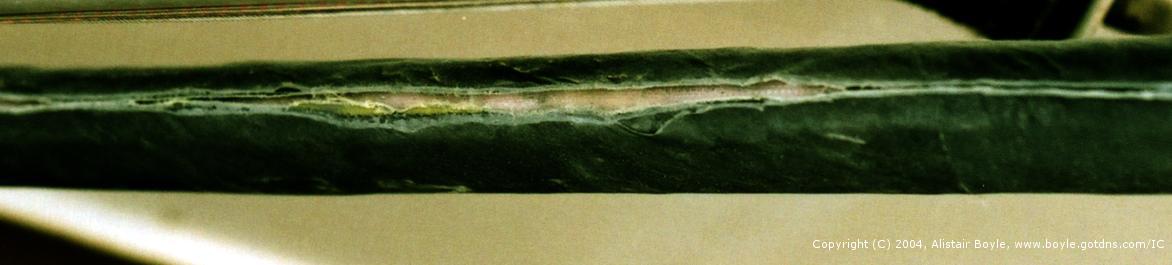
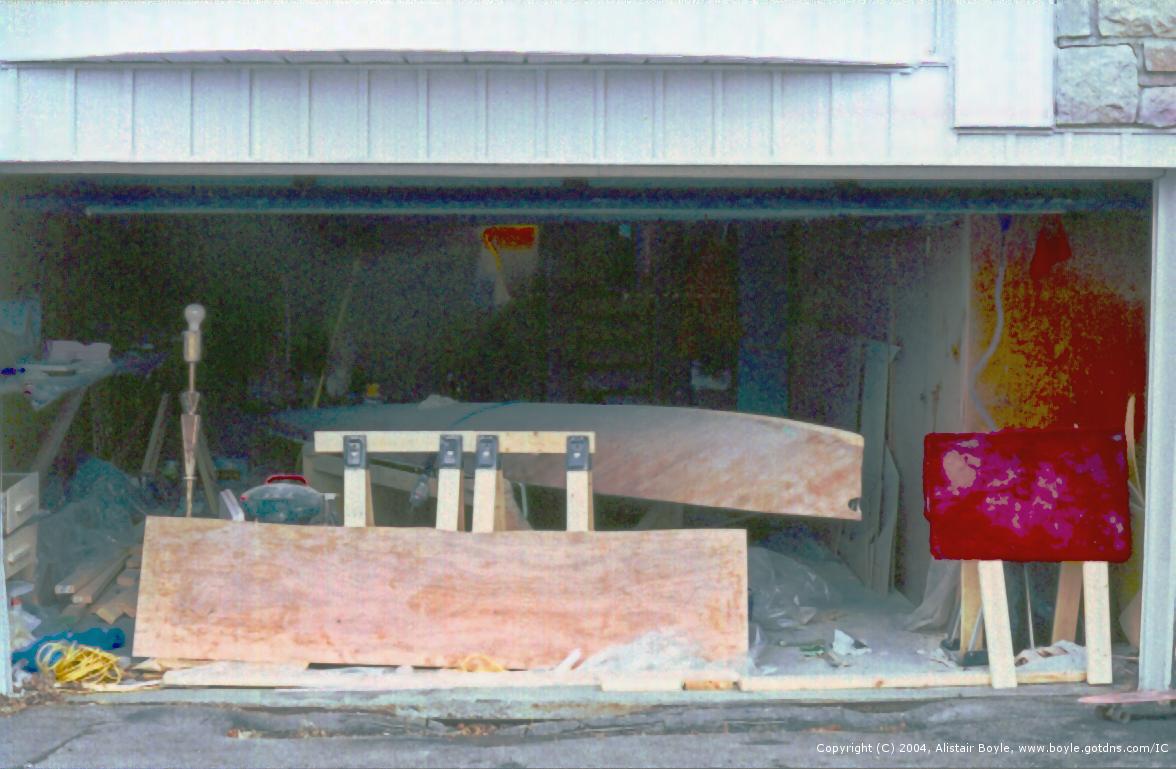
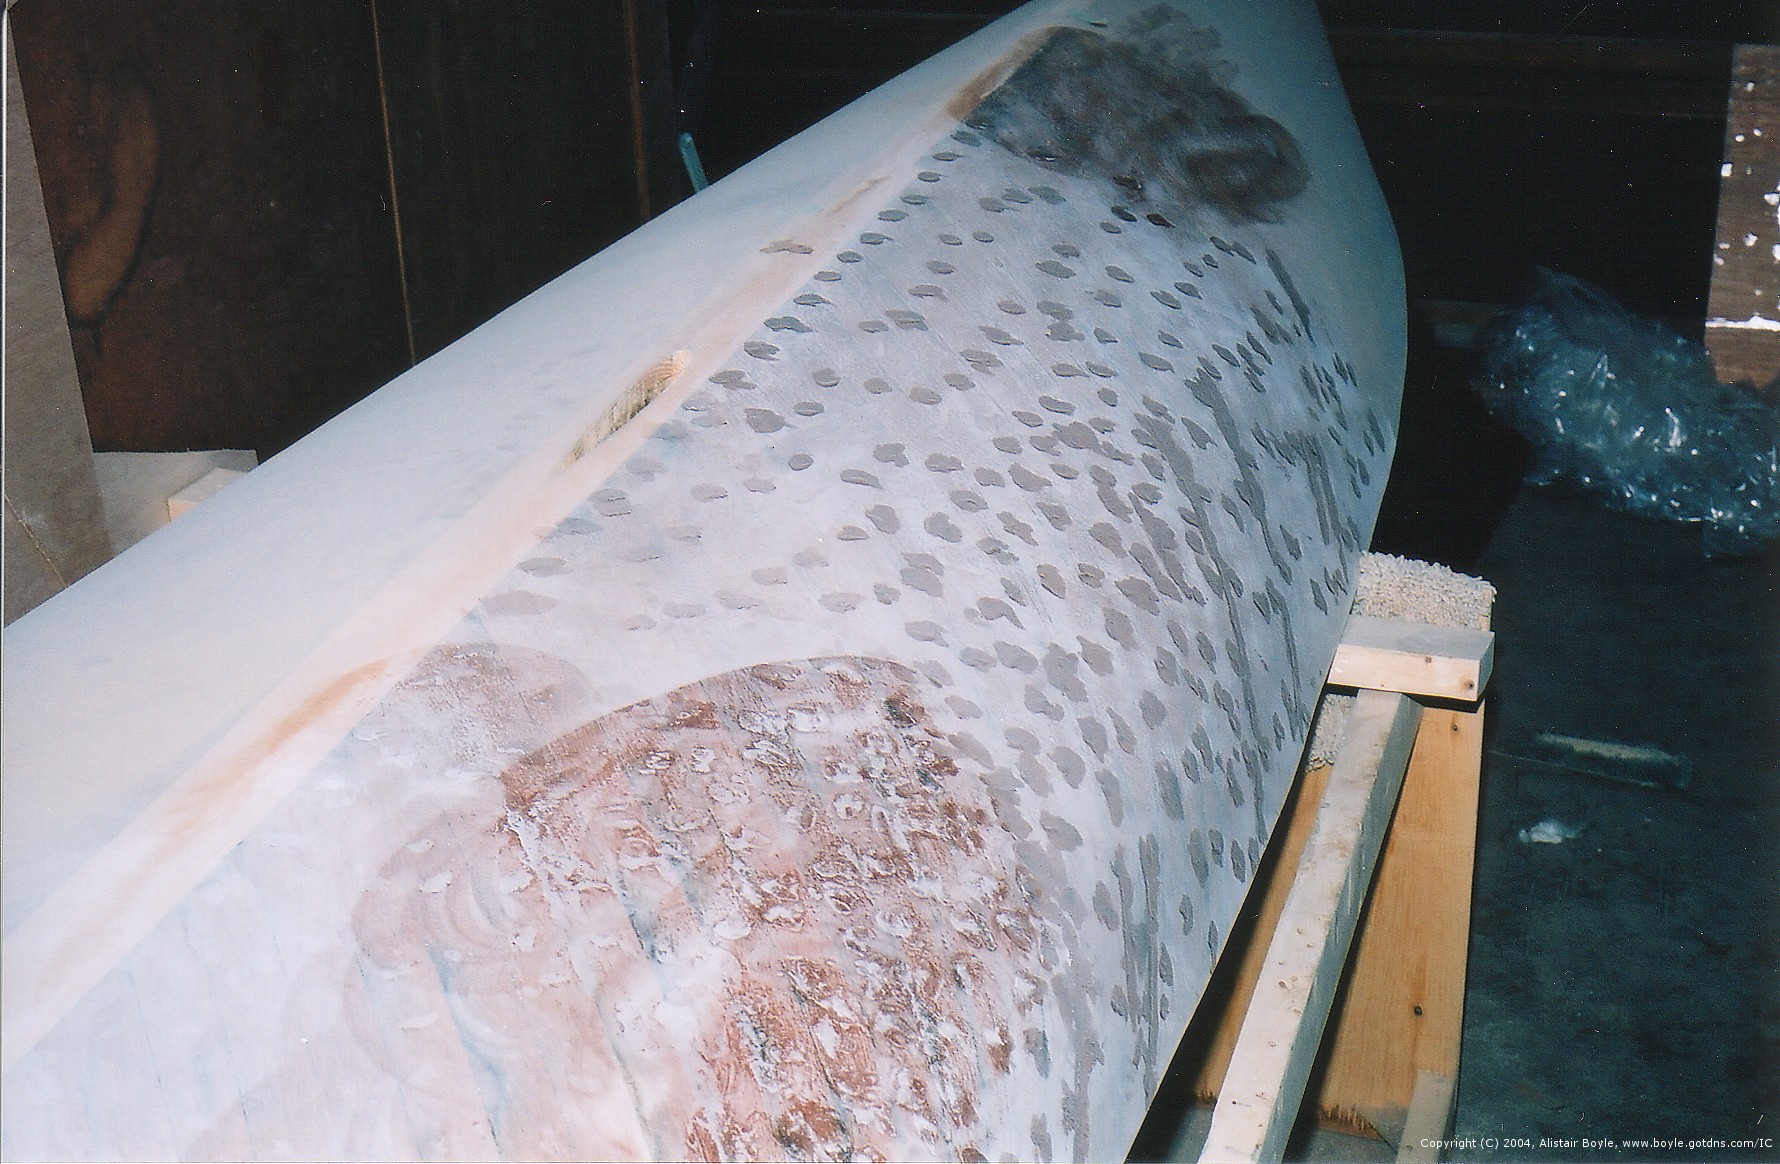
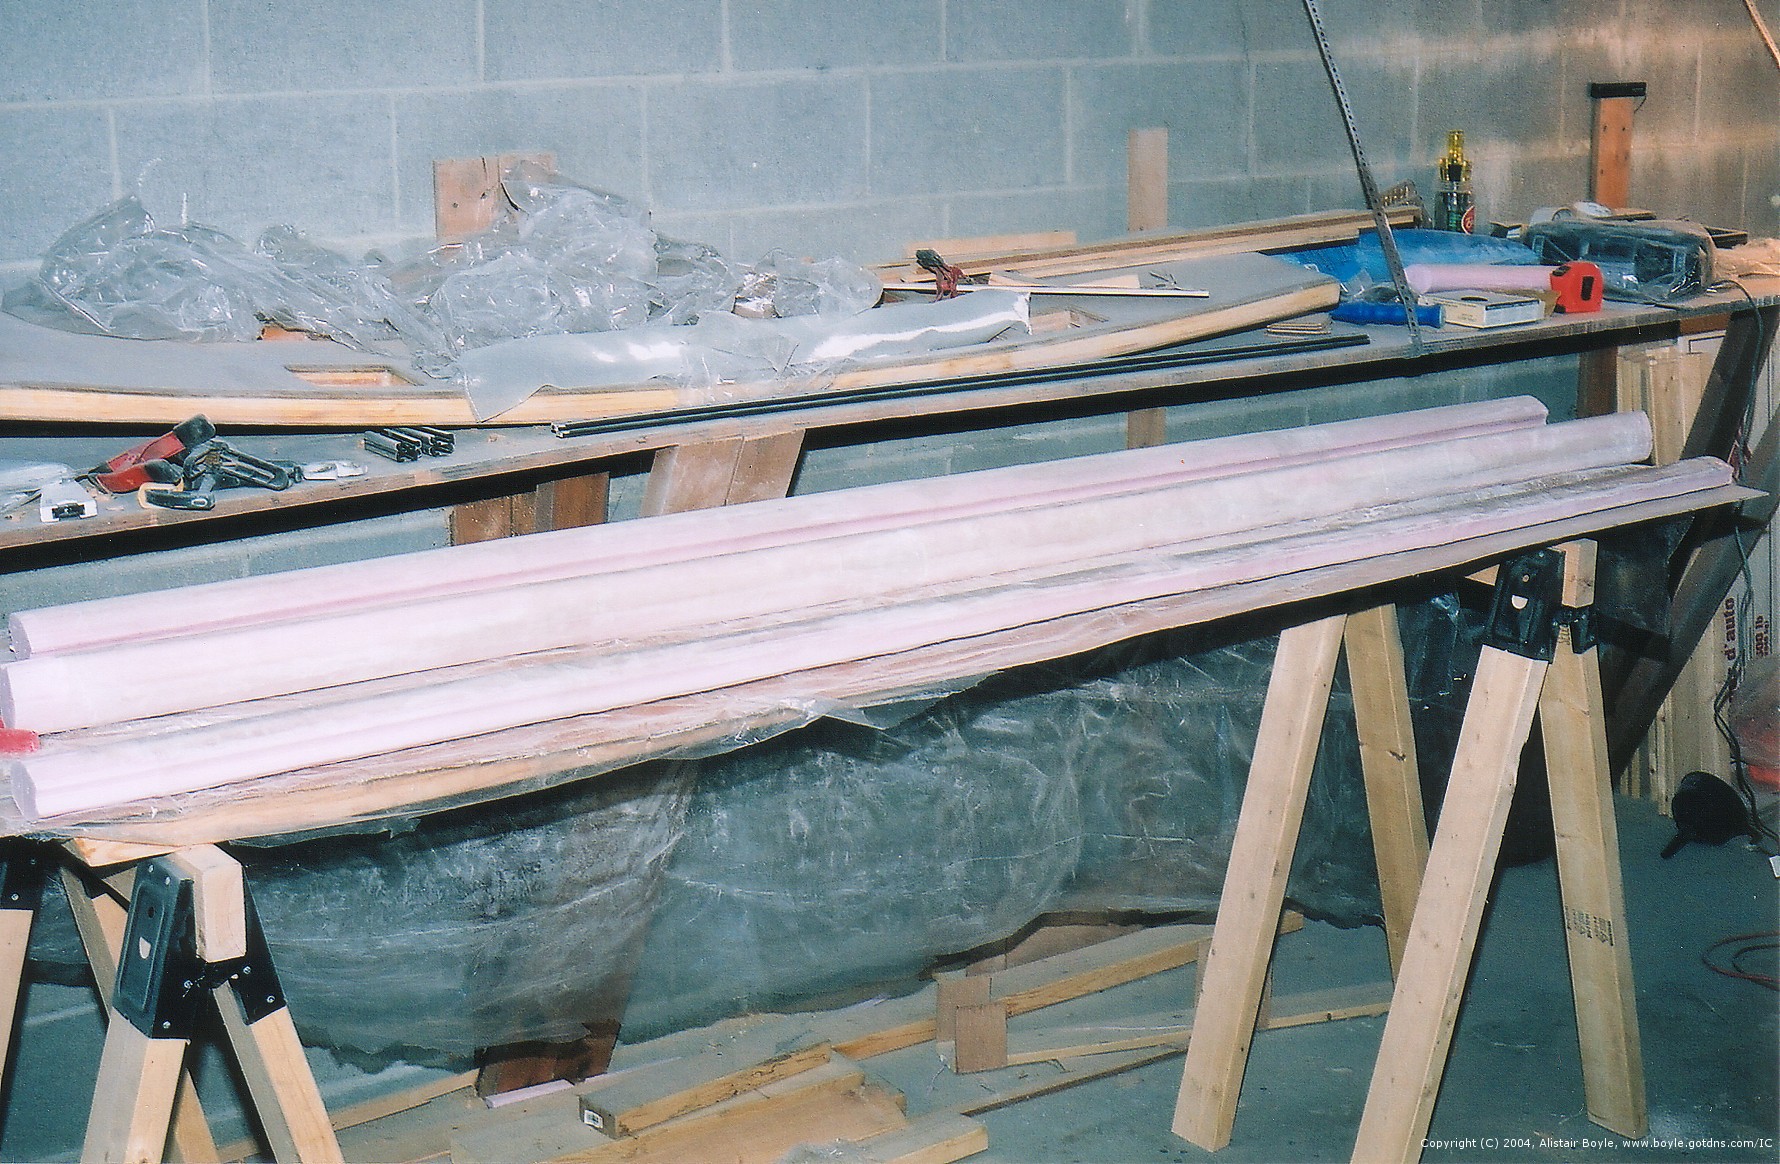
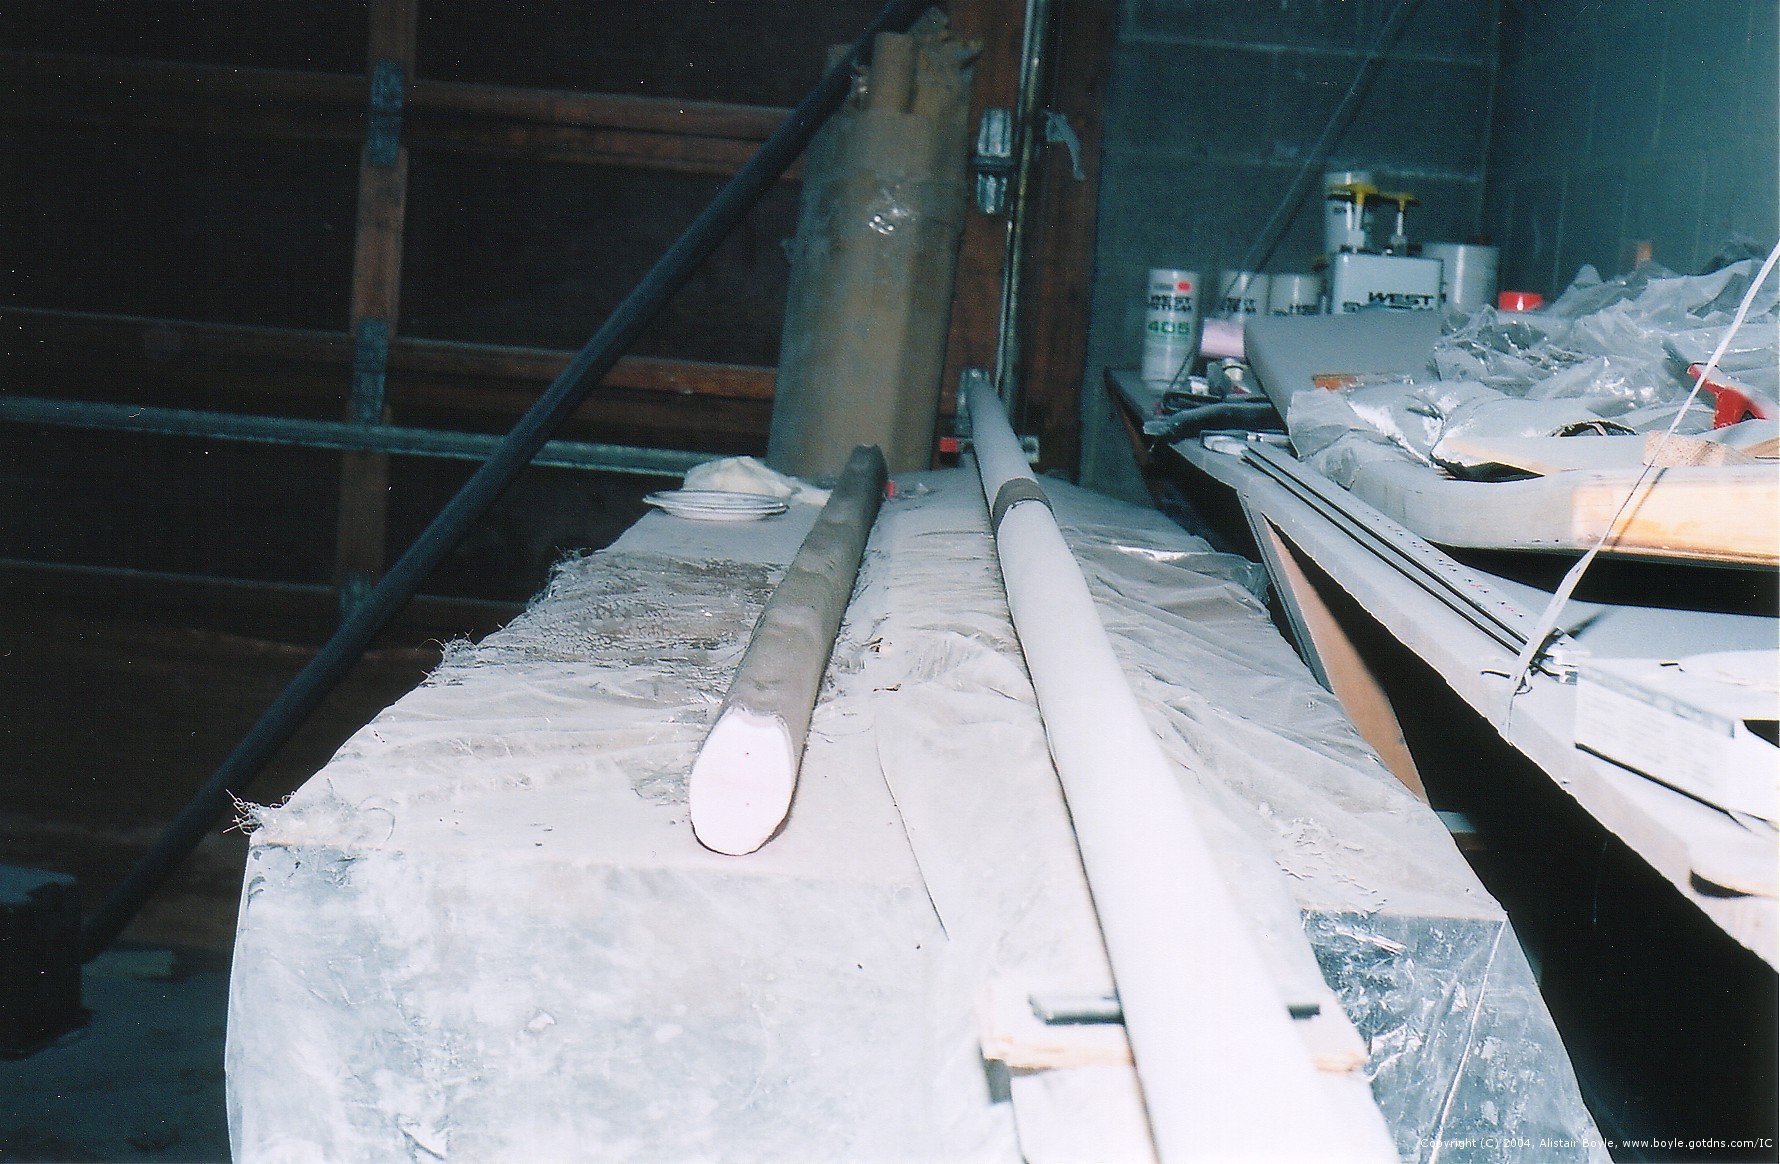
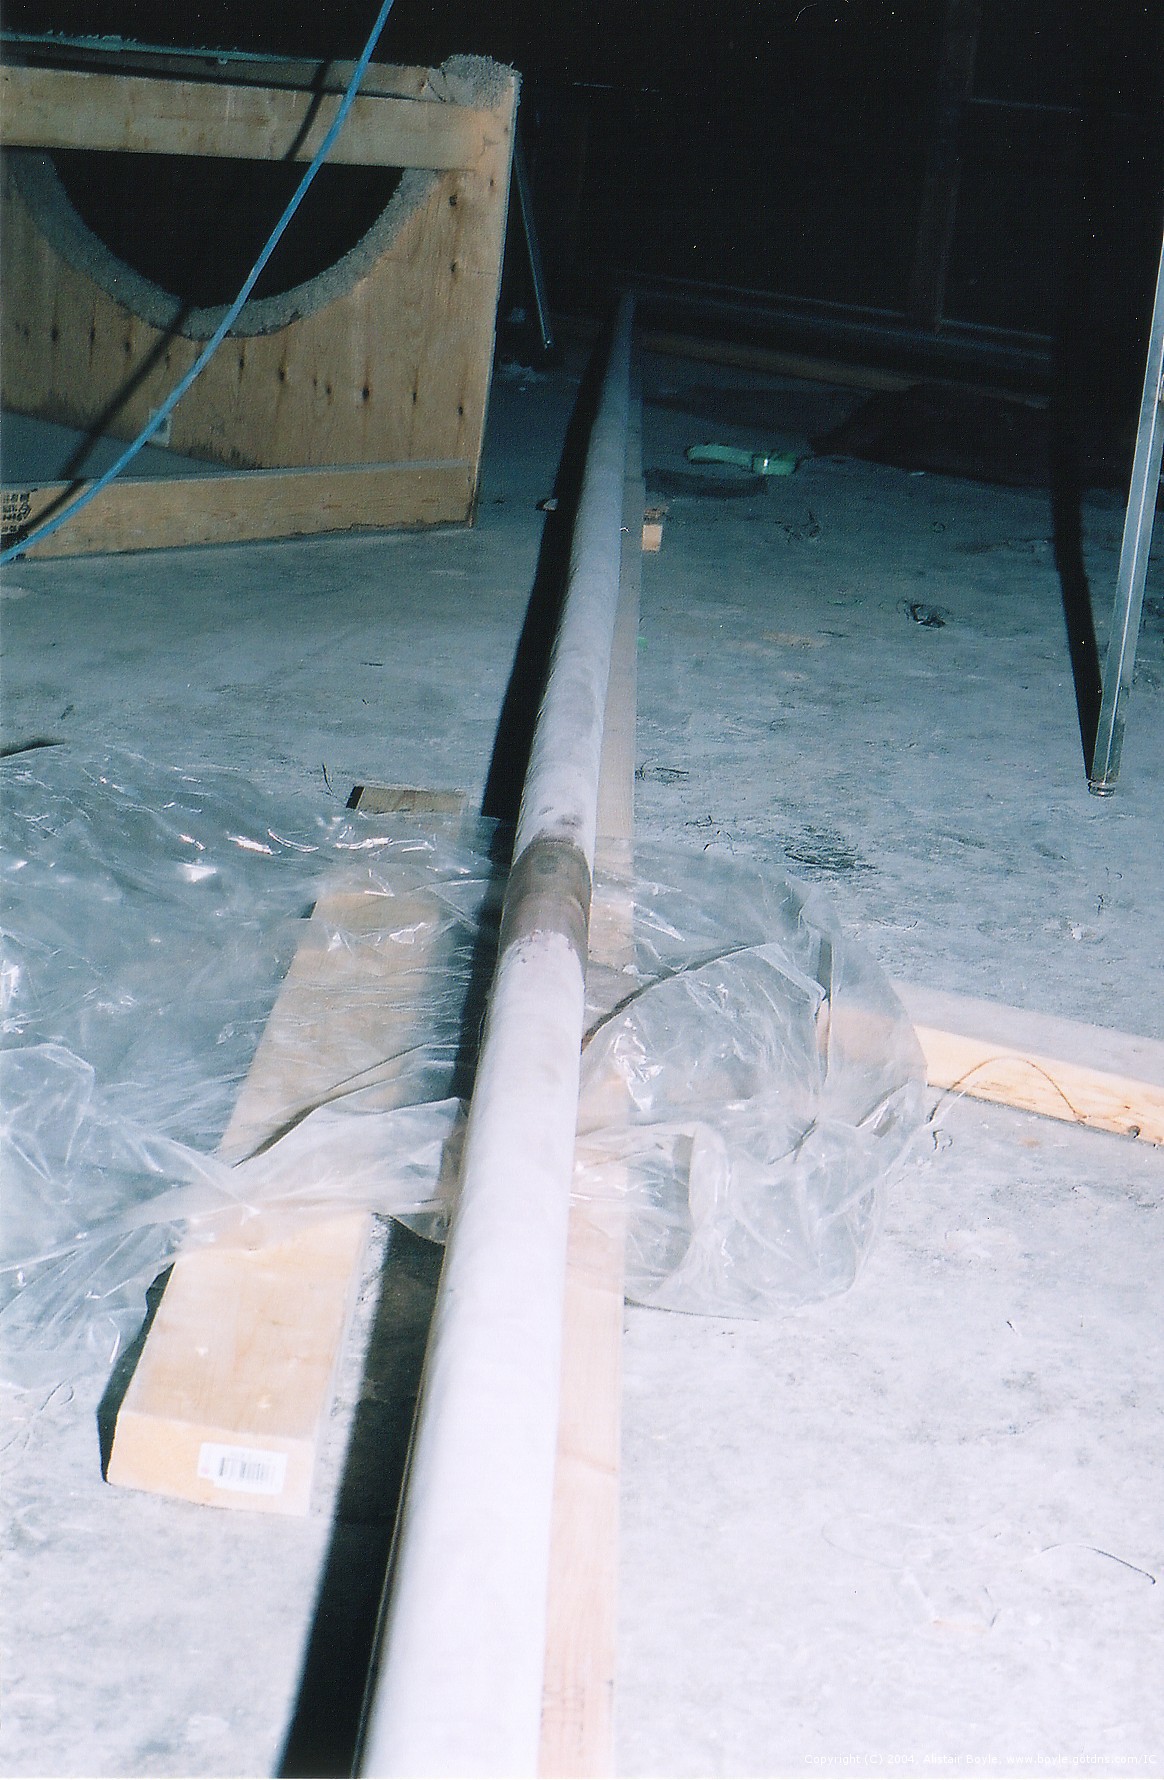
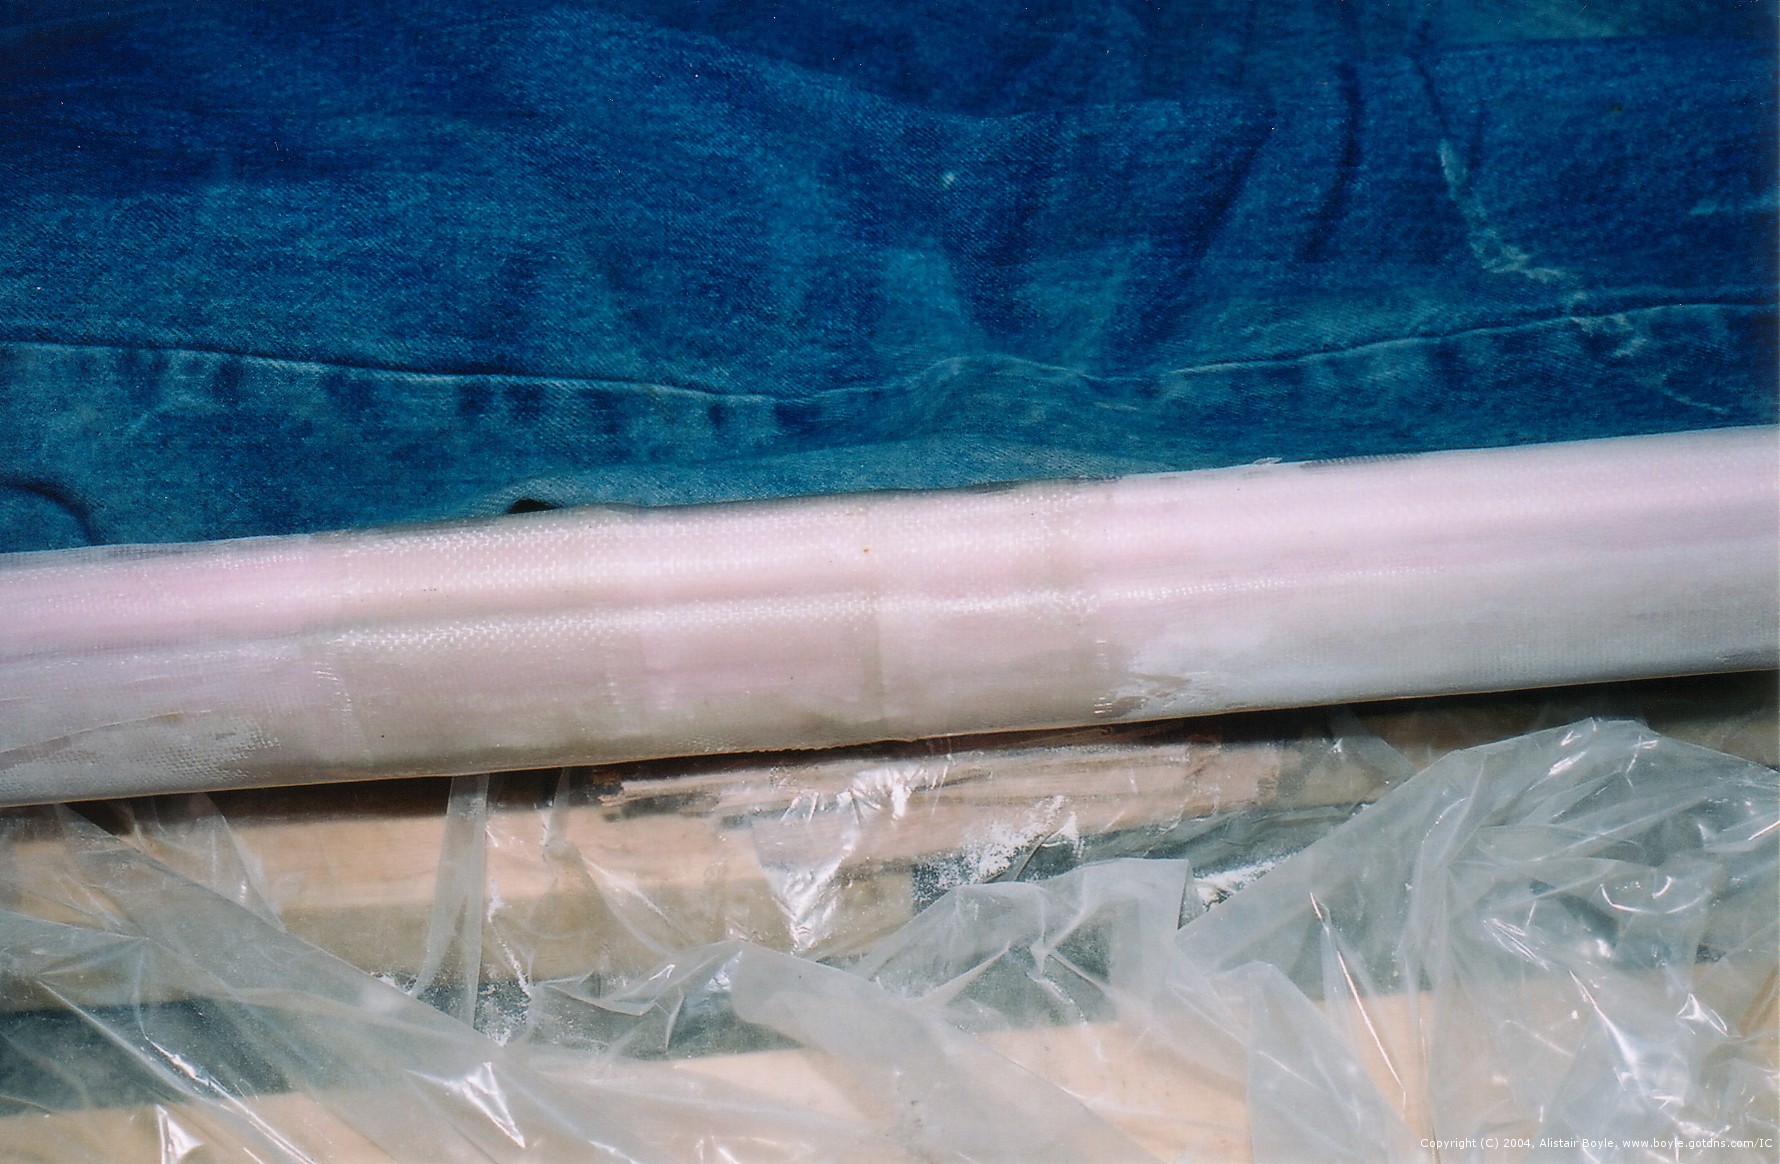
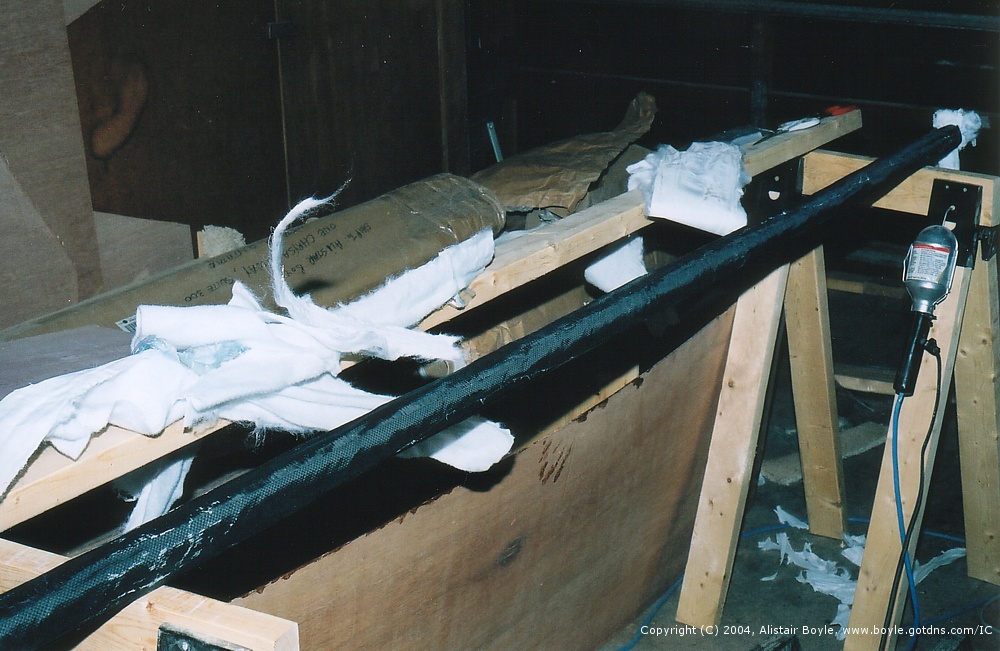
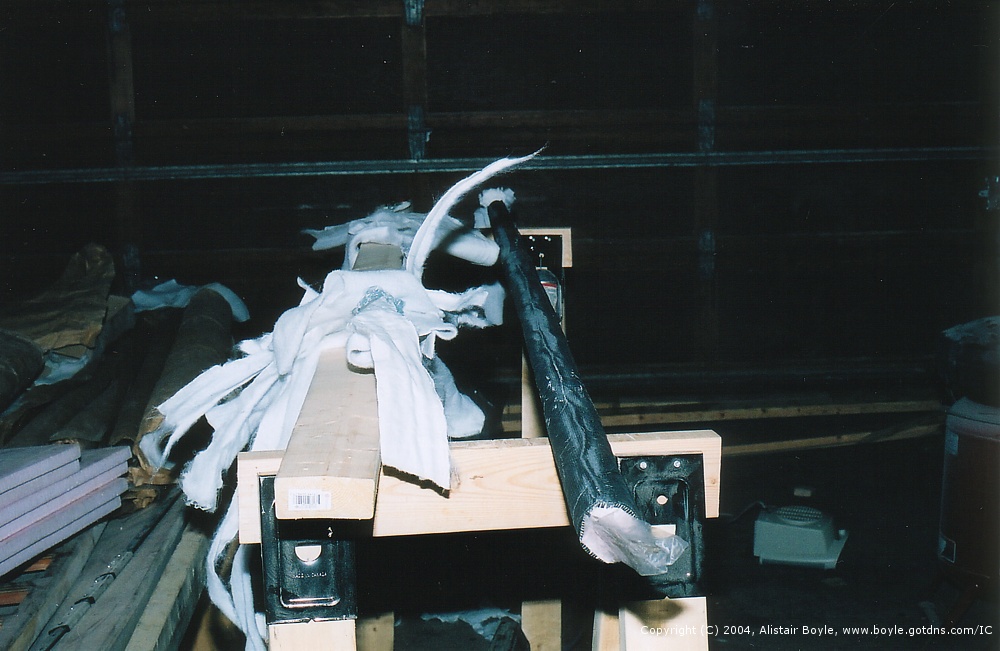
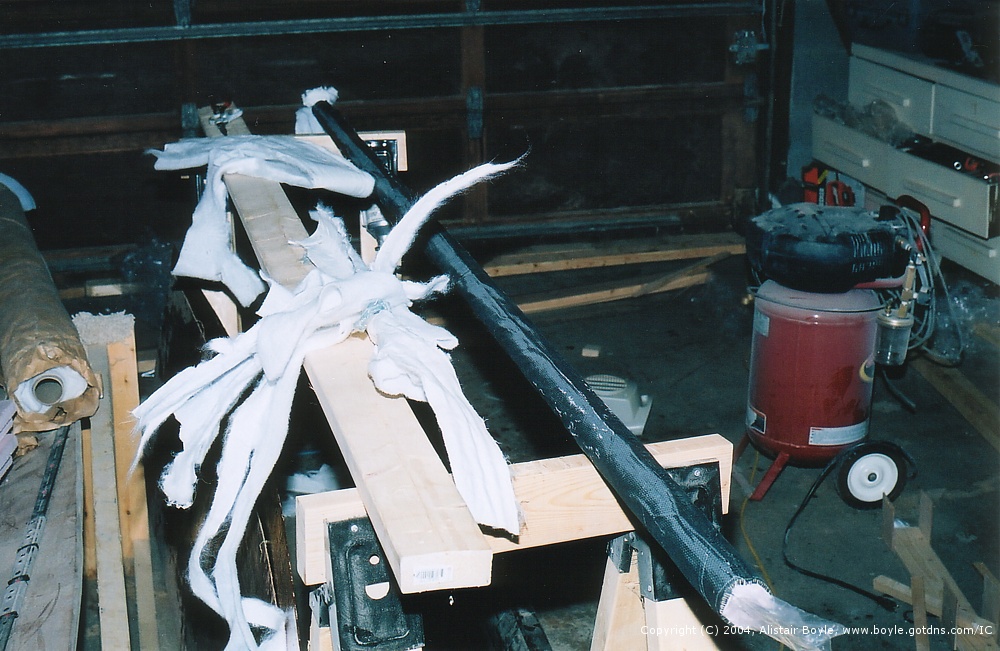
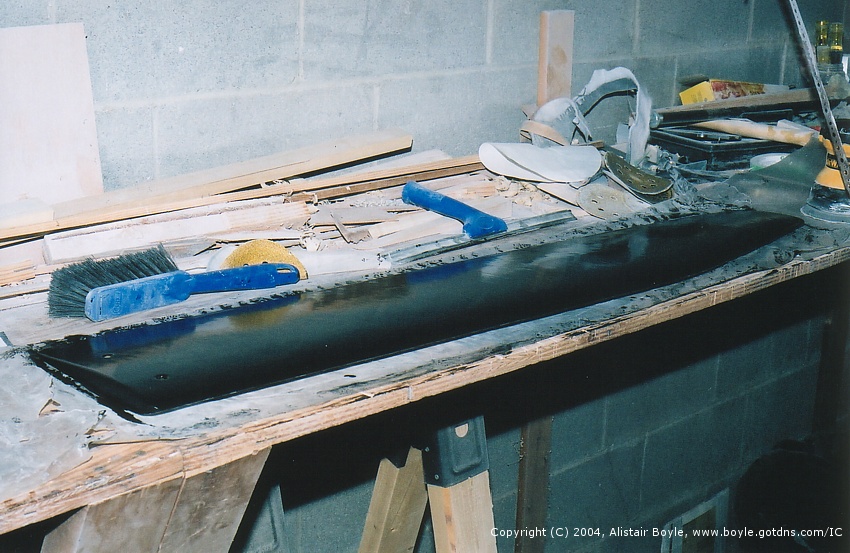
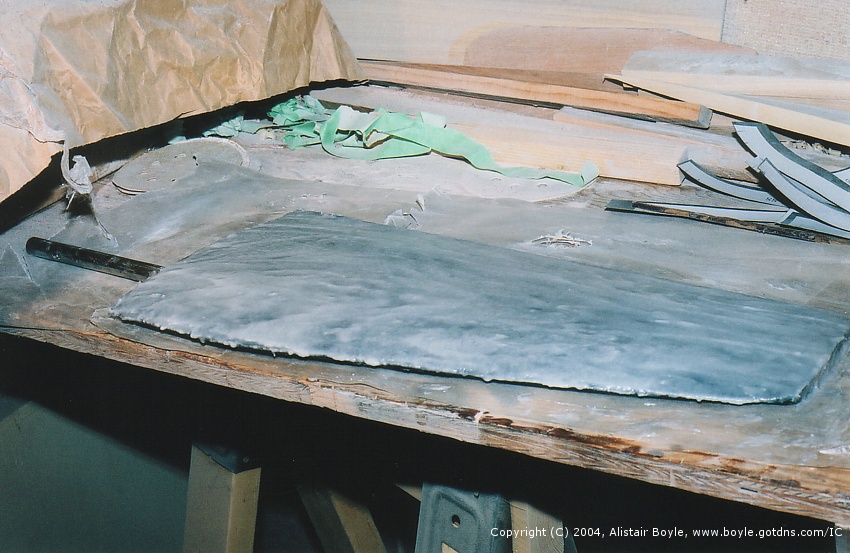
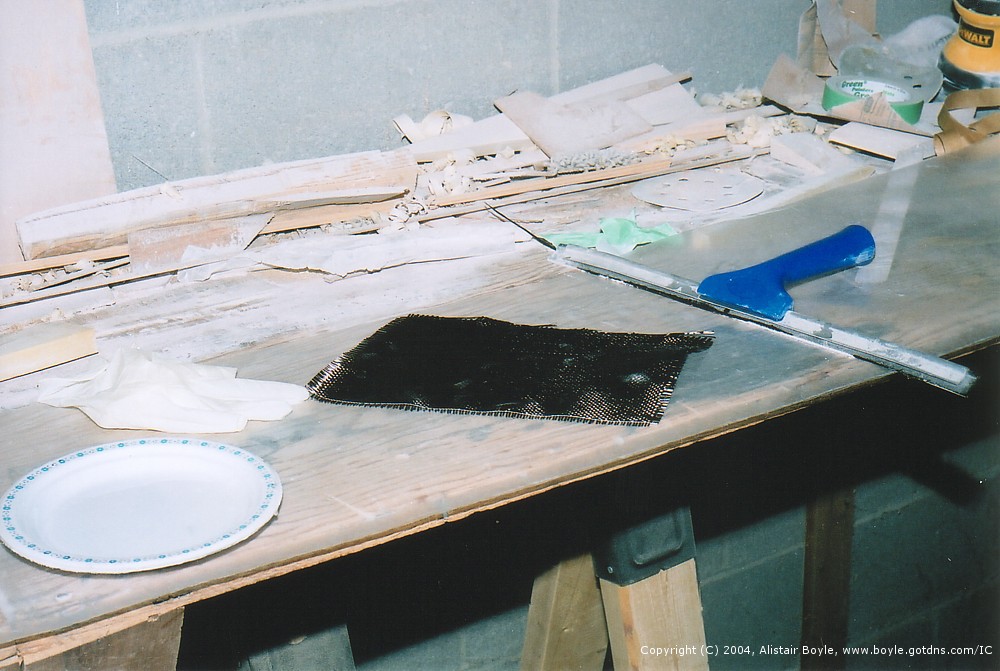
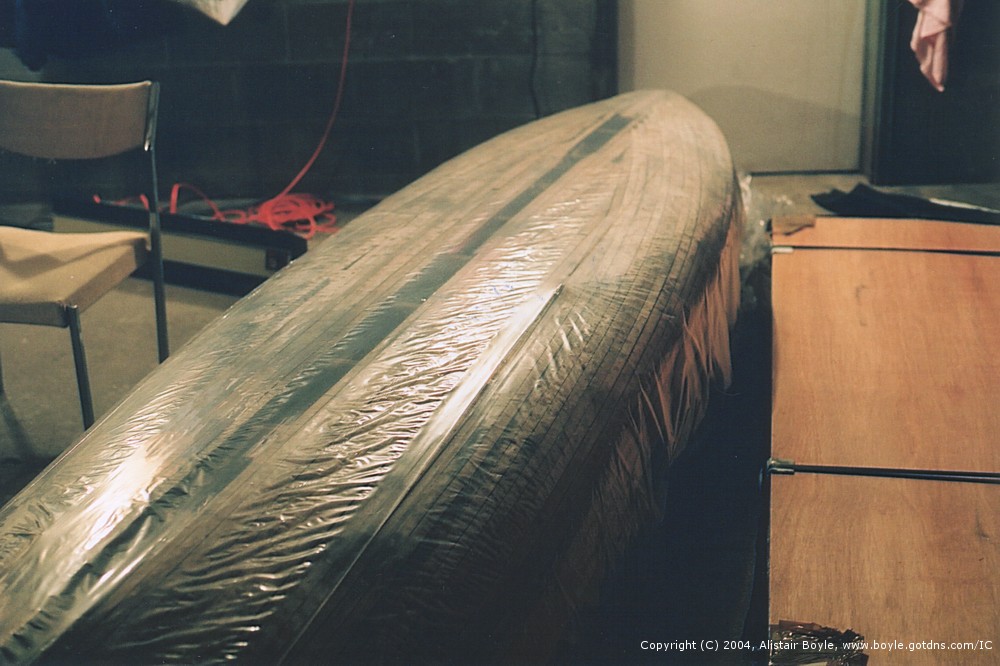
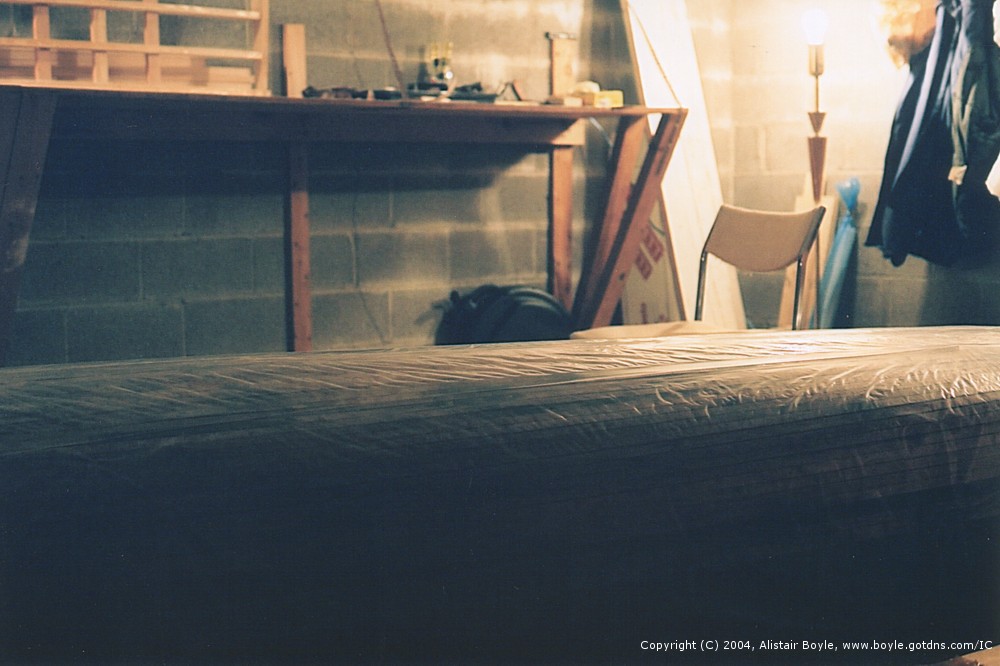
These pictures are a mix of odds and ends. You can see the hull being faired as well as the mast core being fibreglassed.


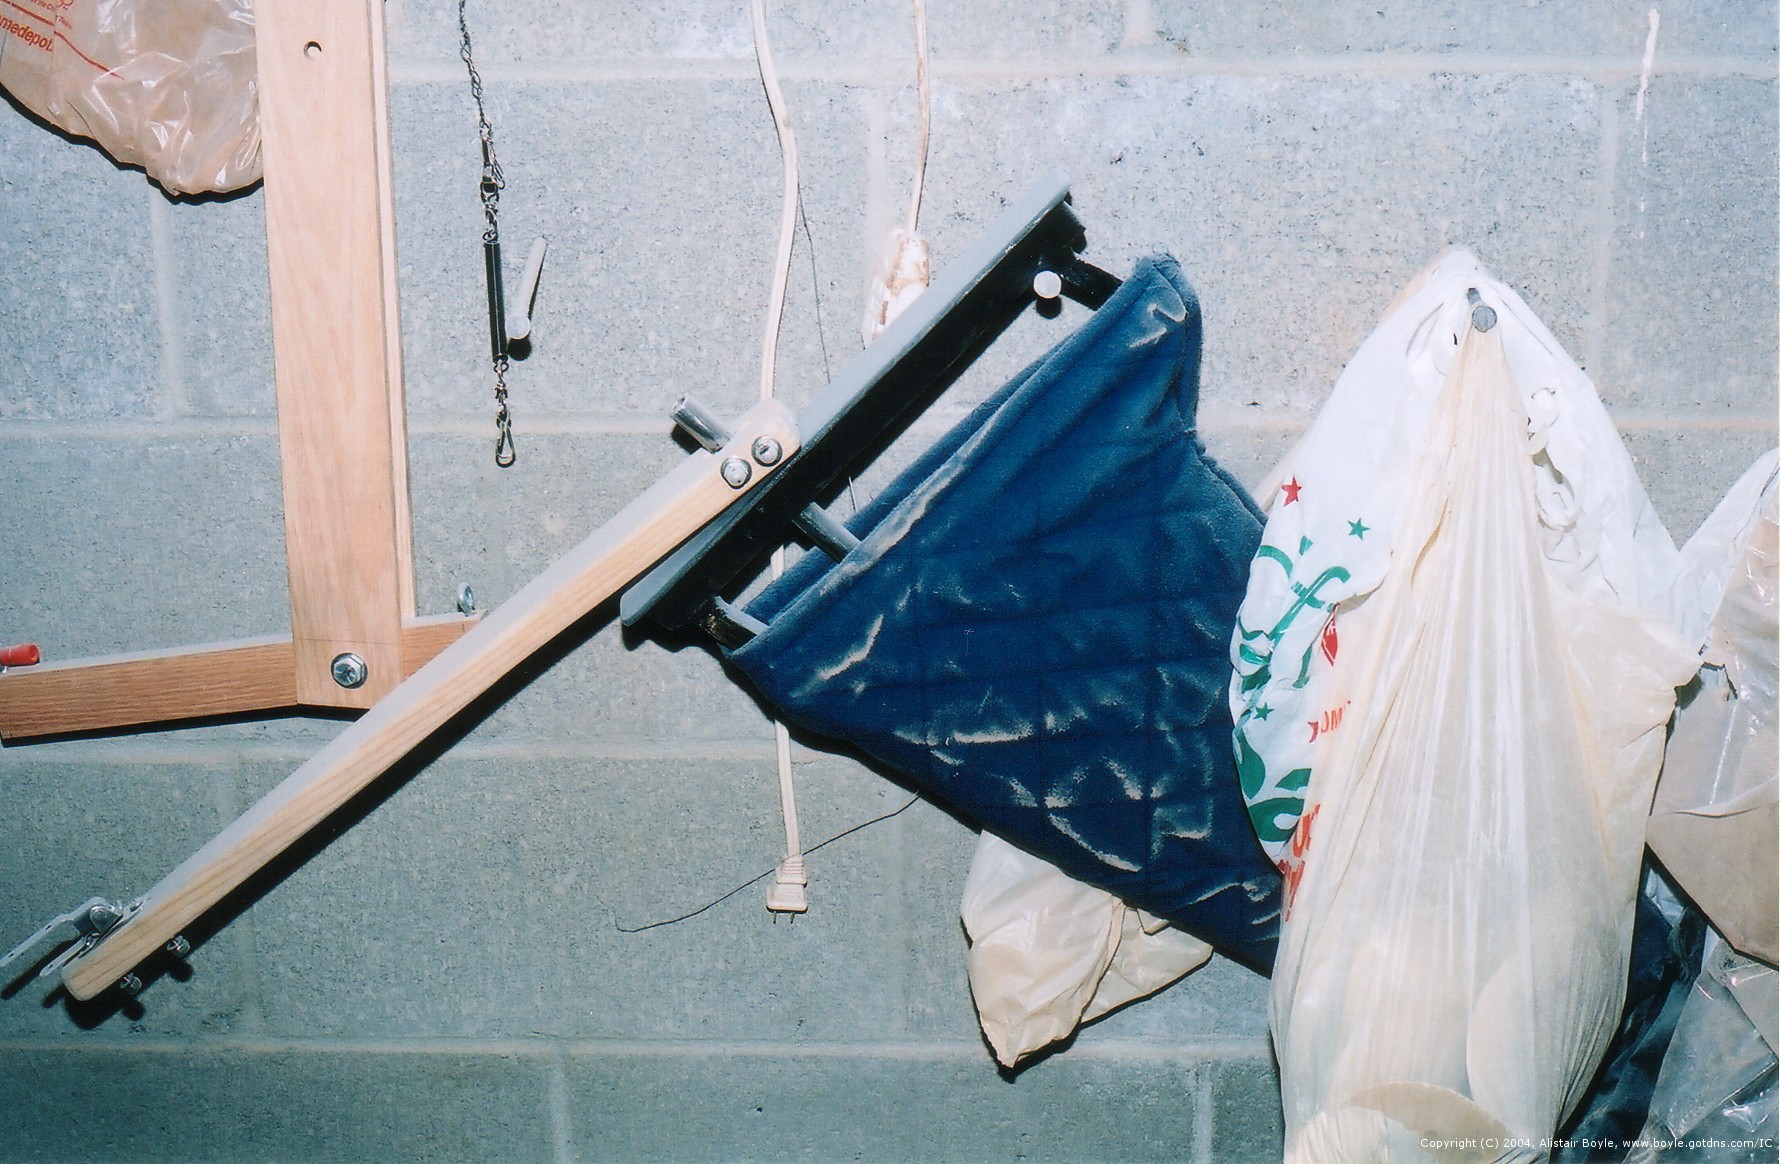


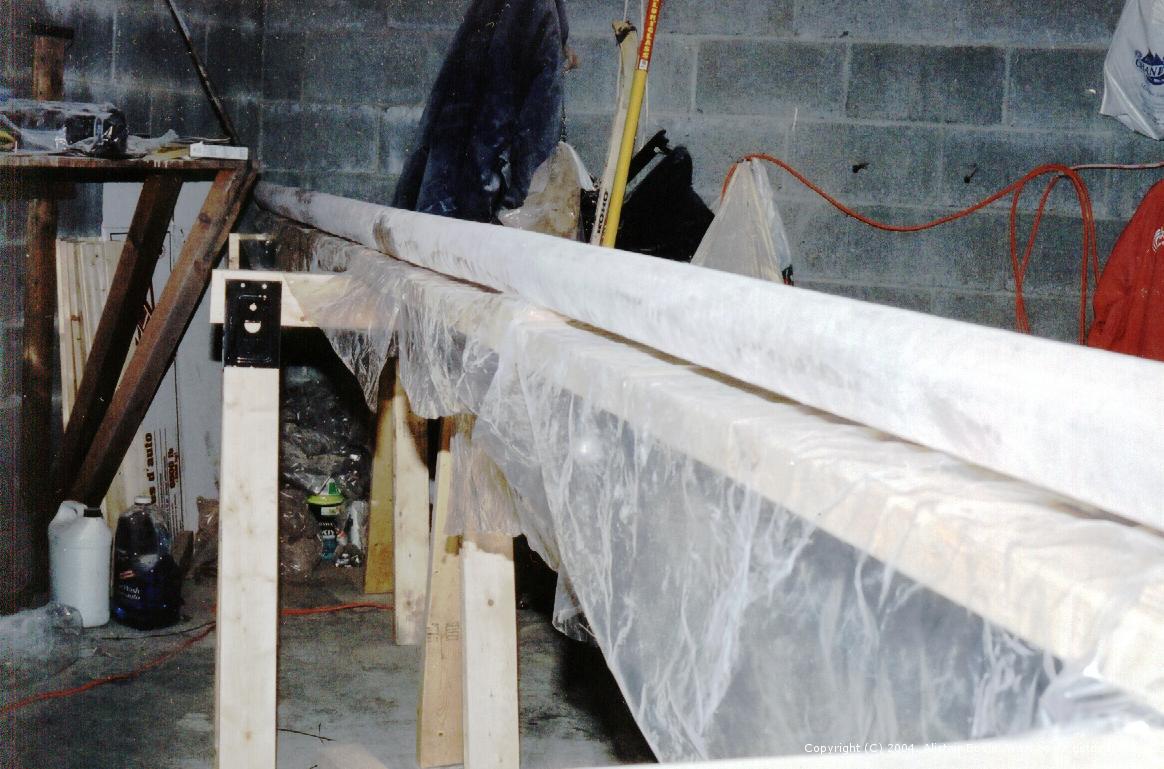
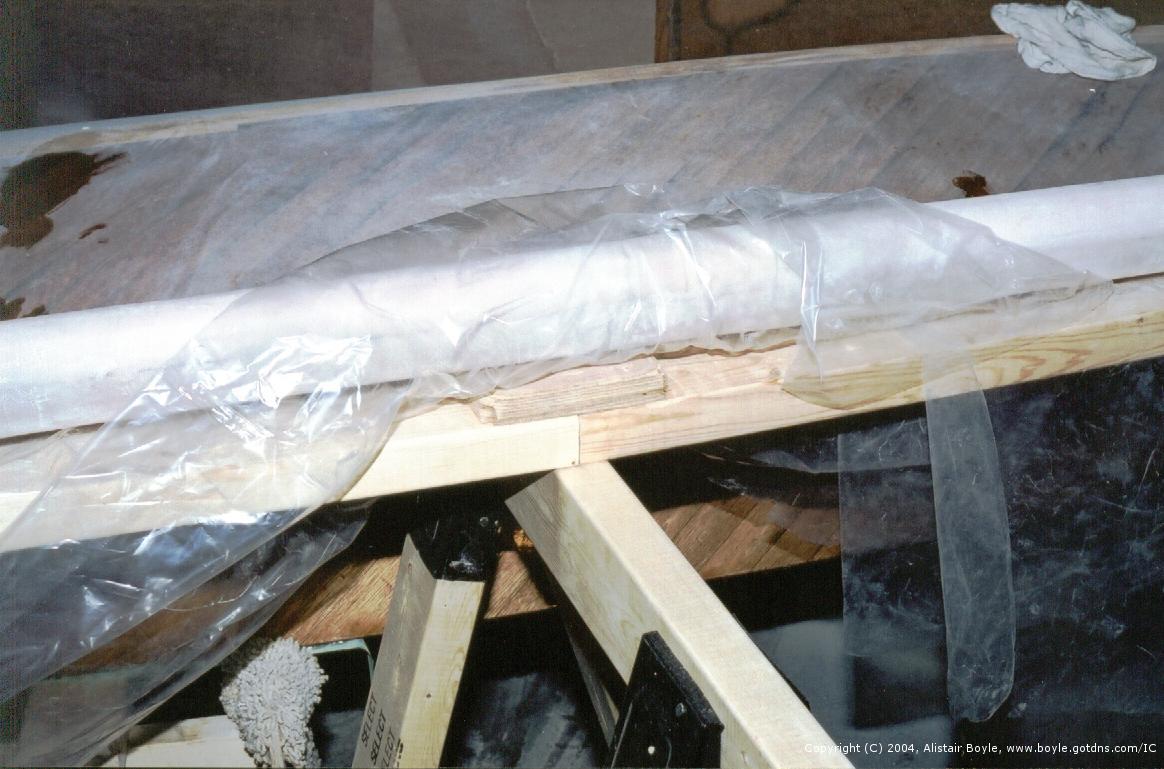
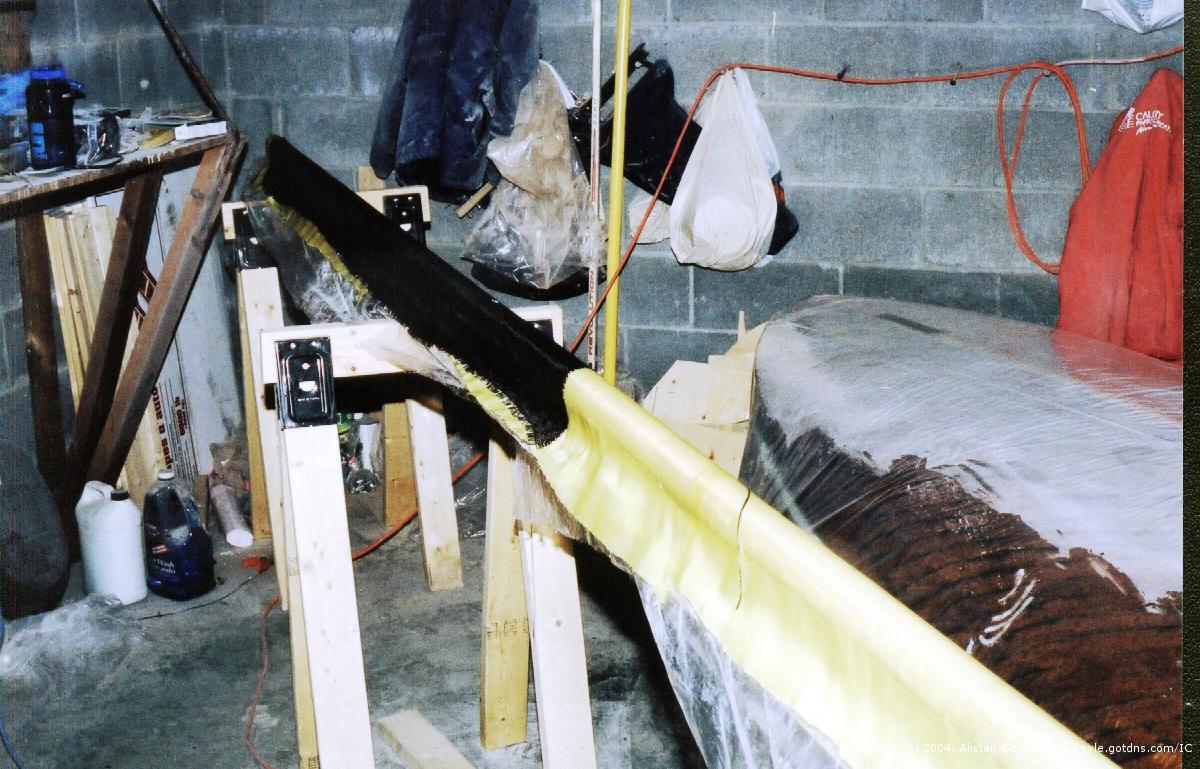
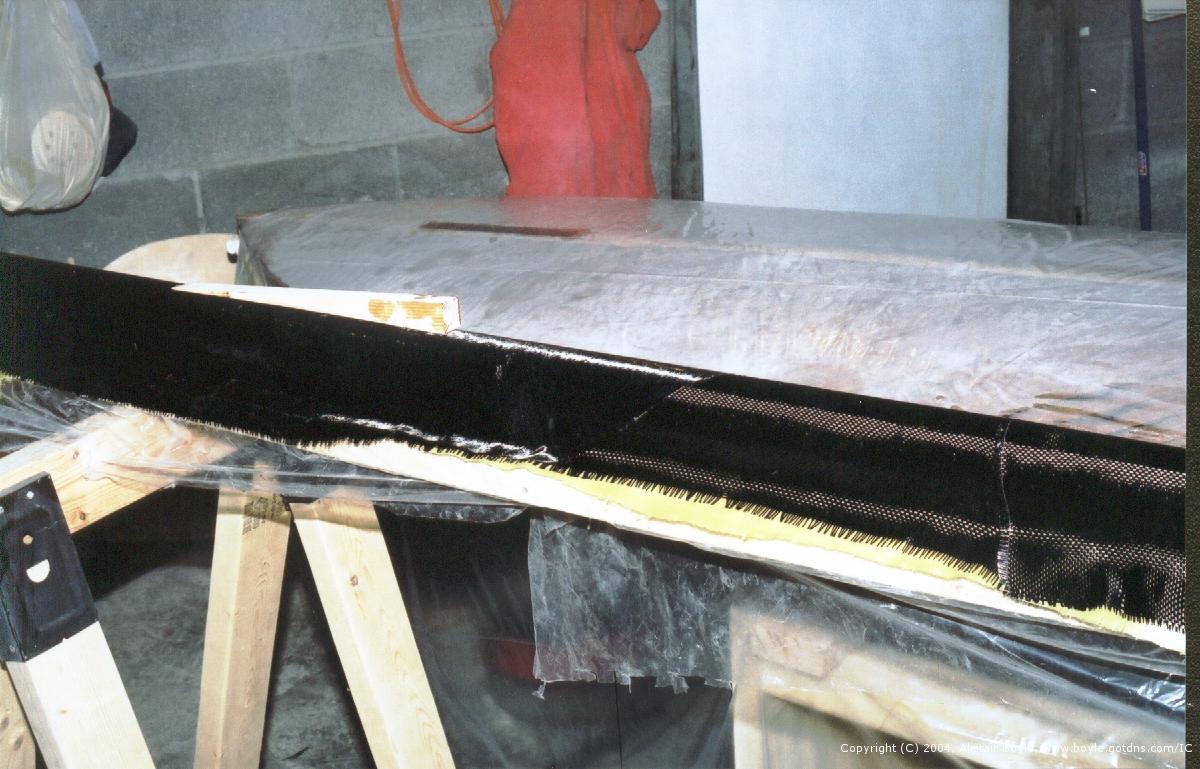
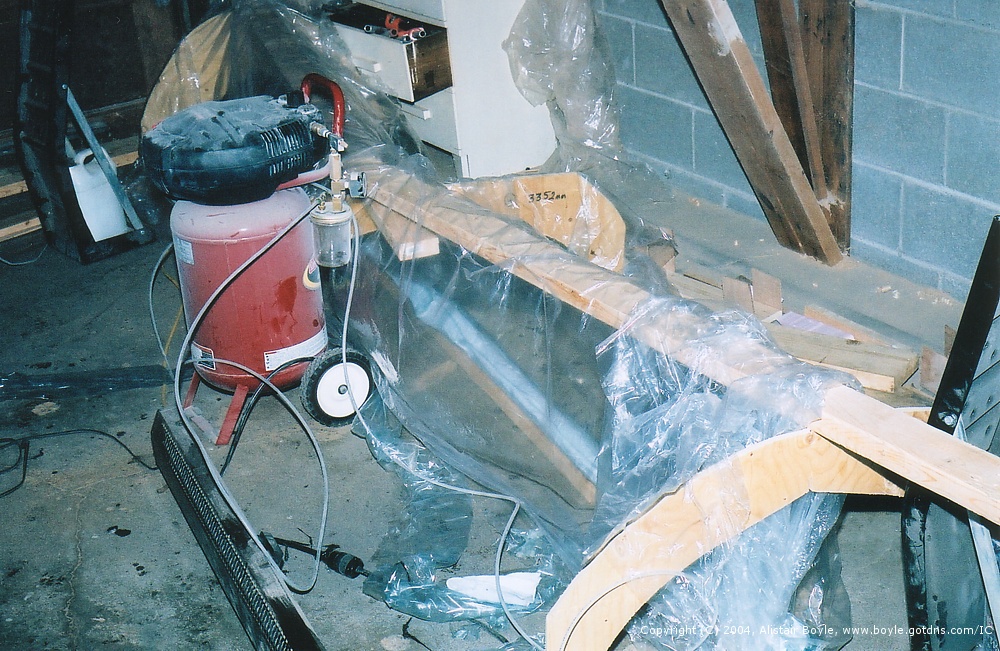
April 16th, 2004: On Monday I did the first and most challenging part of the mast. I did the layup of most of the carbon fibre onto the mast. Before I could do this I had to build a stand for the mast so I could work on it. The mast barely fits in the garage diagonally so its a tight fit. Once I had a stand that was levelled and straight so I could get a straight mast out of the deal, I was ready to go.
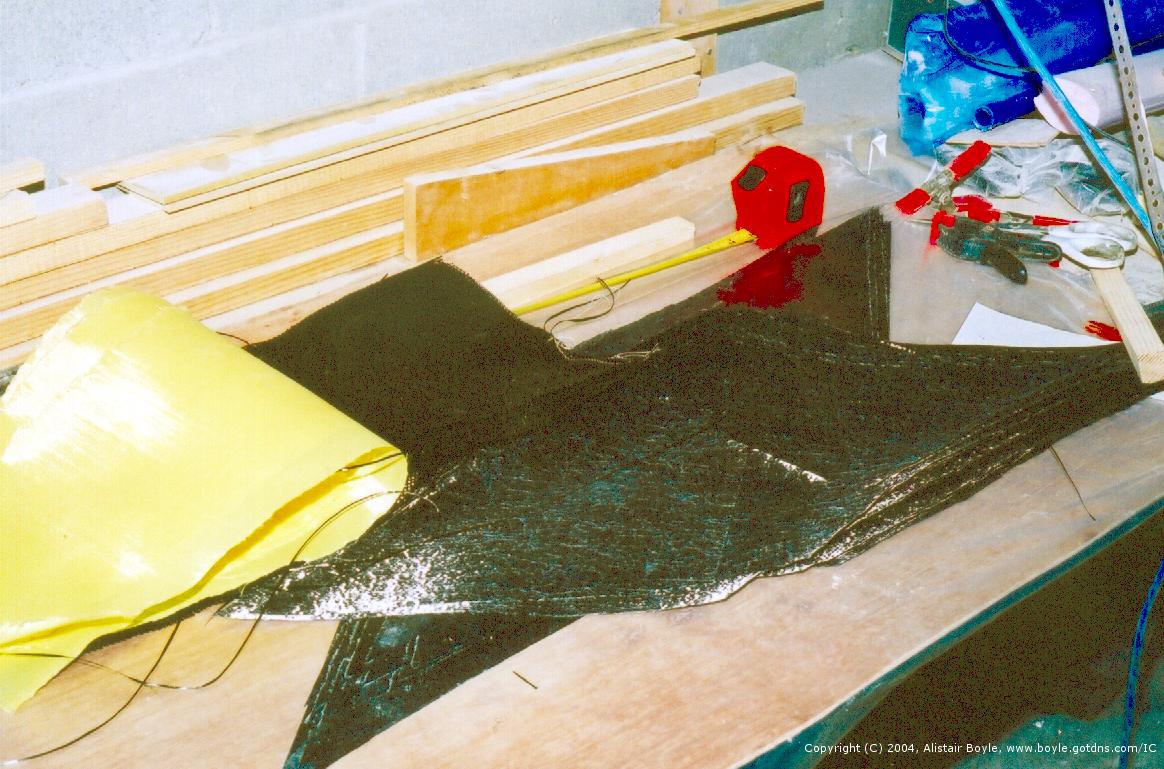
I spent Friday of the Easter long weekend cutting carbon and Kevlar so I could be ready. Saturday and Sunday were spent recovering. My hand was very sore after slicing up that much material. Monday I went and got yet another 4L container of epoxy, another squeegee, and some food. I got started in the garage at 11am. By 2pm I had the Kevlar and the carbon cloth on the mast.
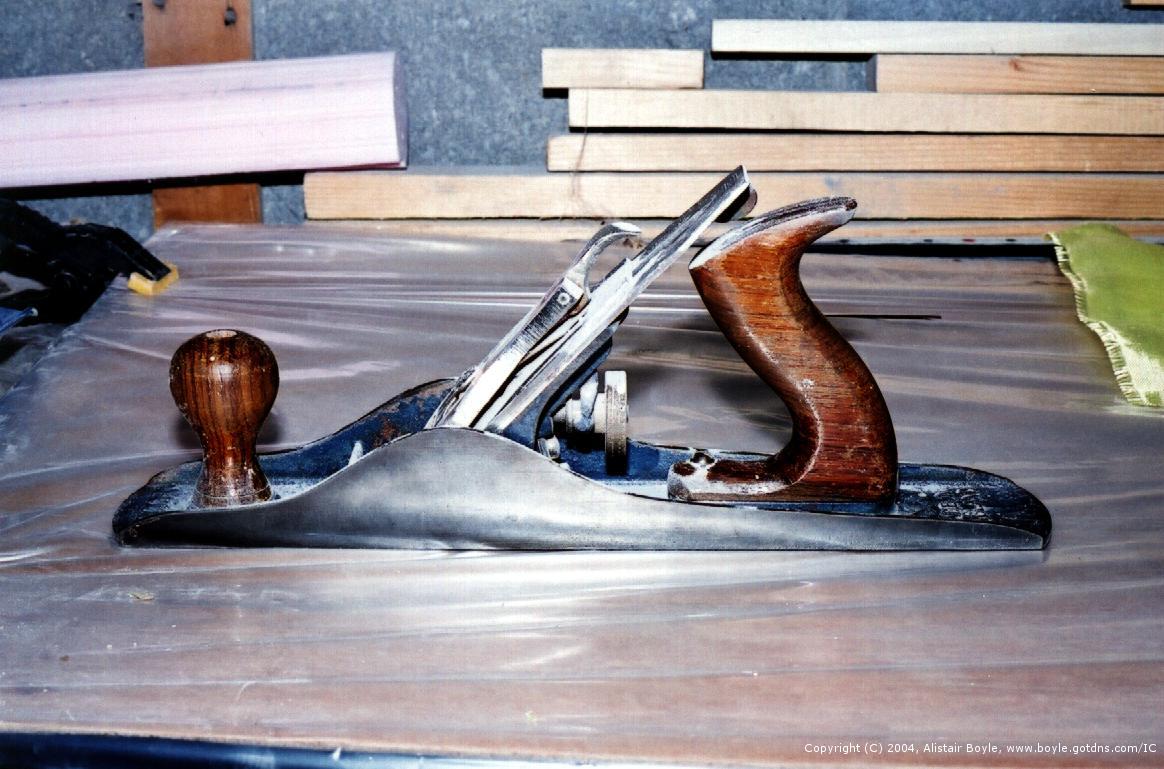
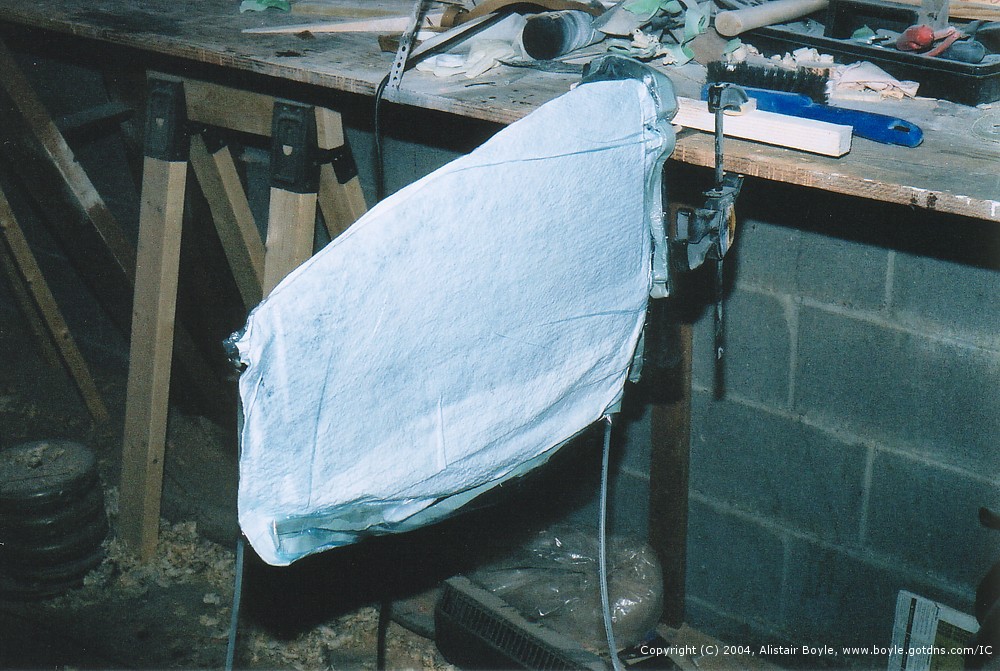
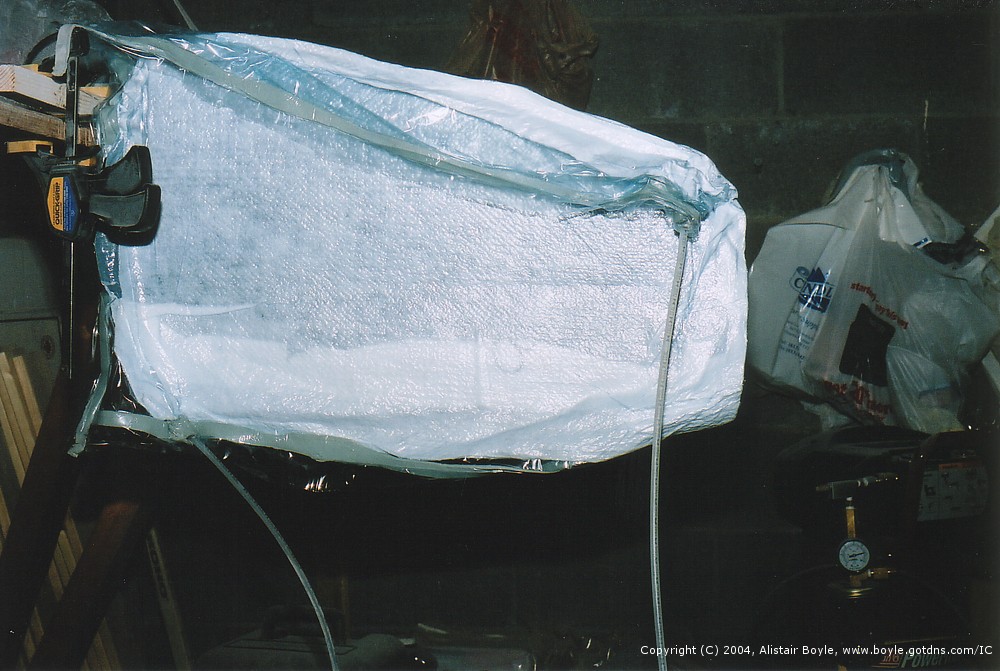
I put it on by laying the sections of cloth out on a piece of wood on my workbench, covered in plastic. The epoxy is spread around on the cloth, then squeegeed off. Then the cloth was laid out on the mast. I was careful this time to work out all the wrinkles and air pockets as I did the layup, rather than waiting till the end as before. I put the material on the leading edge of the mast and left the trailing edge for later.
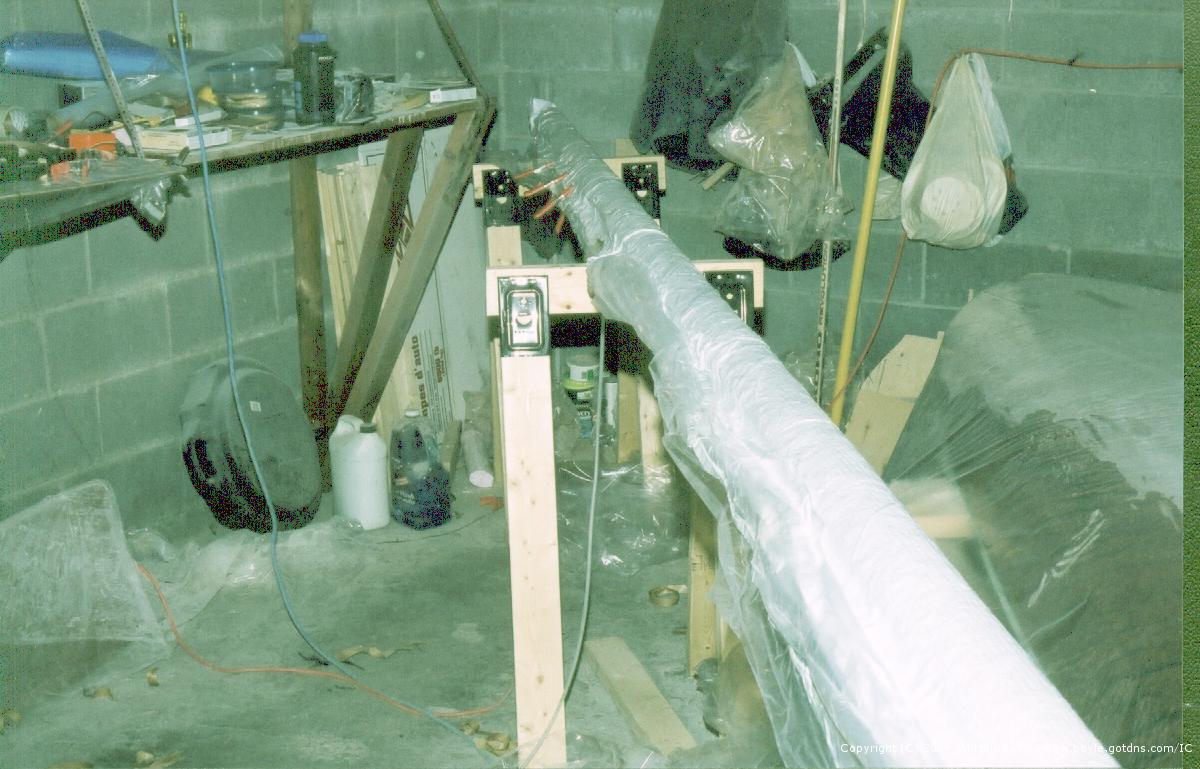
By 5pm I had all the material on the mast but the epoxy was starting to harden fast. I squeezed the trailing edge closed as much as possible and started bagging the whole thing. That took about an hour to do. The bagging tape, stuff the consistency of bubble gum, is awesome stuff. I'll have to find a substitute that's not as expensive. The bag was finished by 6pm and the vacuum got turned on. It took a bit of work to get all the leaks squeezed off, but finally things were ready to roll.
Then disaster struck. The plastic got sucked into the gap on the trailing edge of the mast, pulling in the peel ply and breather cloth as well. I was about ready to chuck the whole thing in the garbage at this point and go buy an aluminium mast.
Off with the vacuum, I poked a couple of finger holes in the plastic and worked the peel ply and breather cloth out of the crack. The holes were plugged with the gummy tape stuff and clamps were applied all along the length of the mast to try and squeeze the gap shut. Then the vacuum was slowly turned on and as the air got sucked out I went up and down the mast making sure the plastic stayed out of the gap. Eventually the vacuum got to around 5psi, and the vacuum was enough to hold the mast gap closed. The clamps were removed, a couple small tears in the plastic plugged and I could leave it be.
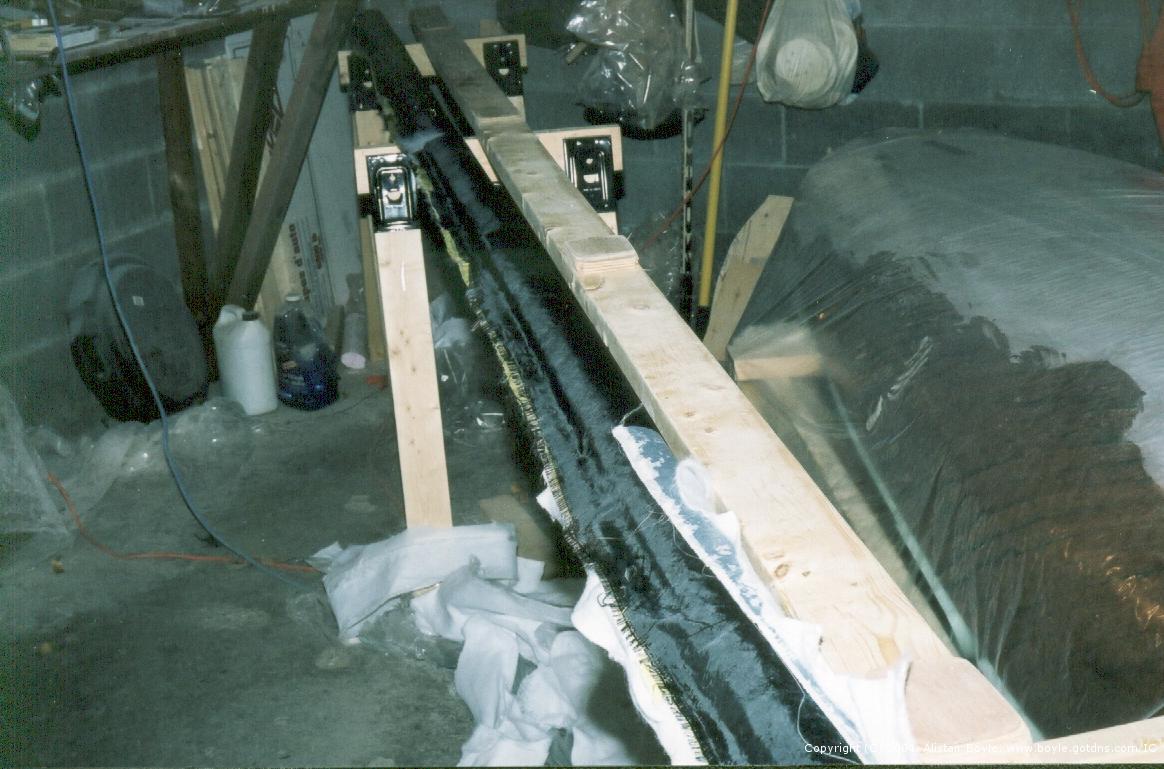
It was 10pm when I finally hit the switch to turn off the air compressor and release the vacuum. I cut free the plastic and pulled off the peel ply. (I've learnt the hard way from the boom and the bow sprit that its worth the effort to pull the peel ply and breather cloth off at the end of the vacuum bagging, rather than a day or two later when the epoxy has fully cured. Its much harder then.)
The mast has been sitting in the garage this week curing. Tonight I'll go and see how stiff it turned out. There's still the mast track and outside layer of carbon to apply, which means an easy opportunity to add more material if its needed to stiffen the mast.
The main lesson I've learnt from this is that to get a good spar you need a solid (ie: at least two layers of fibreglass over foam) core, and two layers of material are about the max that can be done for each session. I should have done half as much as I did on Monday.
For future reference the mast is now; foam core (to be removed), 2 layers of fibreglass, 1 layer of Kevlar, 1 layer carbon cloth, 2 layers unidirectional cloth, with 50% overlap, oriented 45 degrees from the mast and in opposite ways... a picture would clear that up nicely.
Pictures are on their way, they're being scanned in right now.
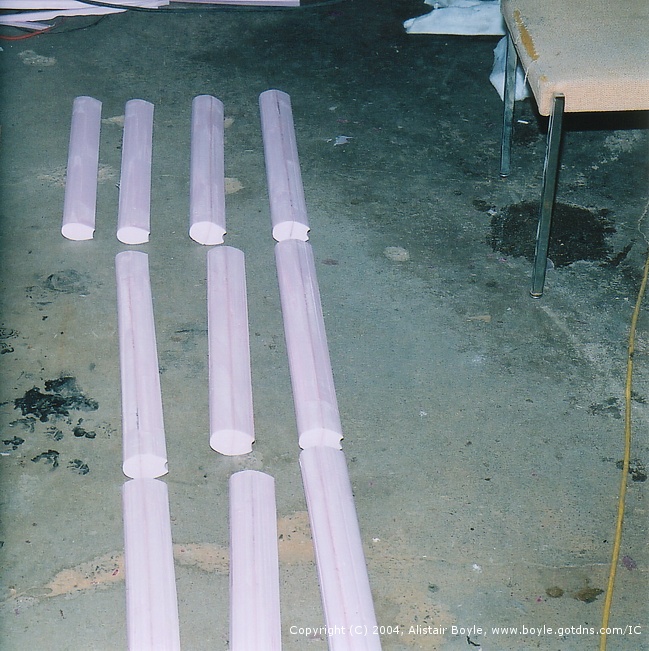
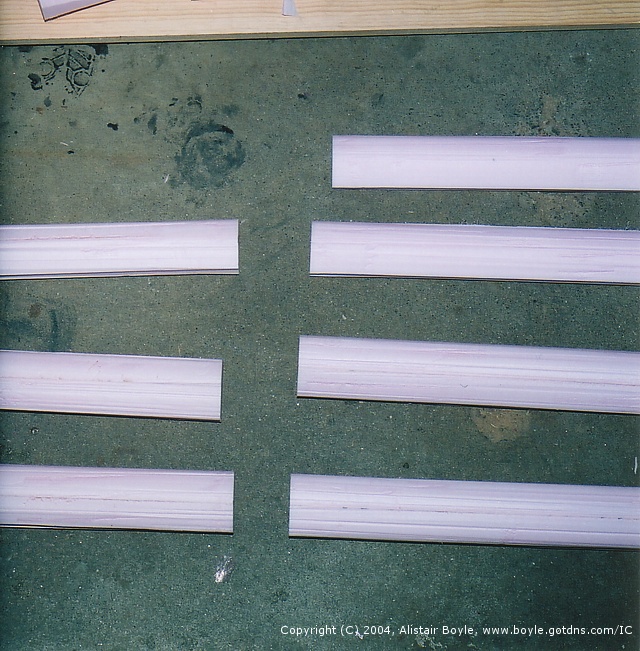
March 20th, 2004: Plenty of progress on two fronts over the last few weeks.The mast has been going well. All the sections for the mast were cut out by the beginning of March. These were glued end to end in 3 sections. Each section is 3 foam cores long. The sections are glued together with contact cement.
Each of these sections then has had two layers of fibreglass applied to it. Since its very difficult to get a tight wrap (as I've learnt) I did the front of each section first, then the back, then the front, and finally the back again. The back being the side that the mast track will glue to.
The reasoning for having two layers of fibreglass this time around is so that the vacuum won't compress the foam and fibreglass as much. Hopefully the result will be a cleaner and more wrinkle free layup at the end.
I've just completed connecting each of these three sections together to form the mast. Each joint was contact cemented, then fibreglassed.
The whole mast looks to have turned out reasonably straight. It is now ready to have the carbon fibre applied. The mast is now difficult to manage though, as its 20-odd feet long and barely fits diagonally in the garage.
I can't remember if I mentioned: check the contact cement. Some contact cement will melt the foam. I avoided this, but more by accident than anything else, while I was bored one afternoon and reading the label's fine print.
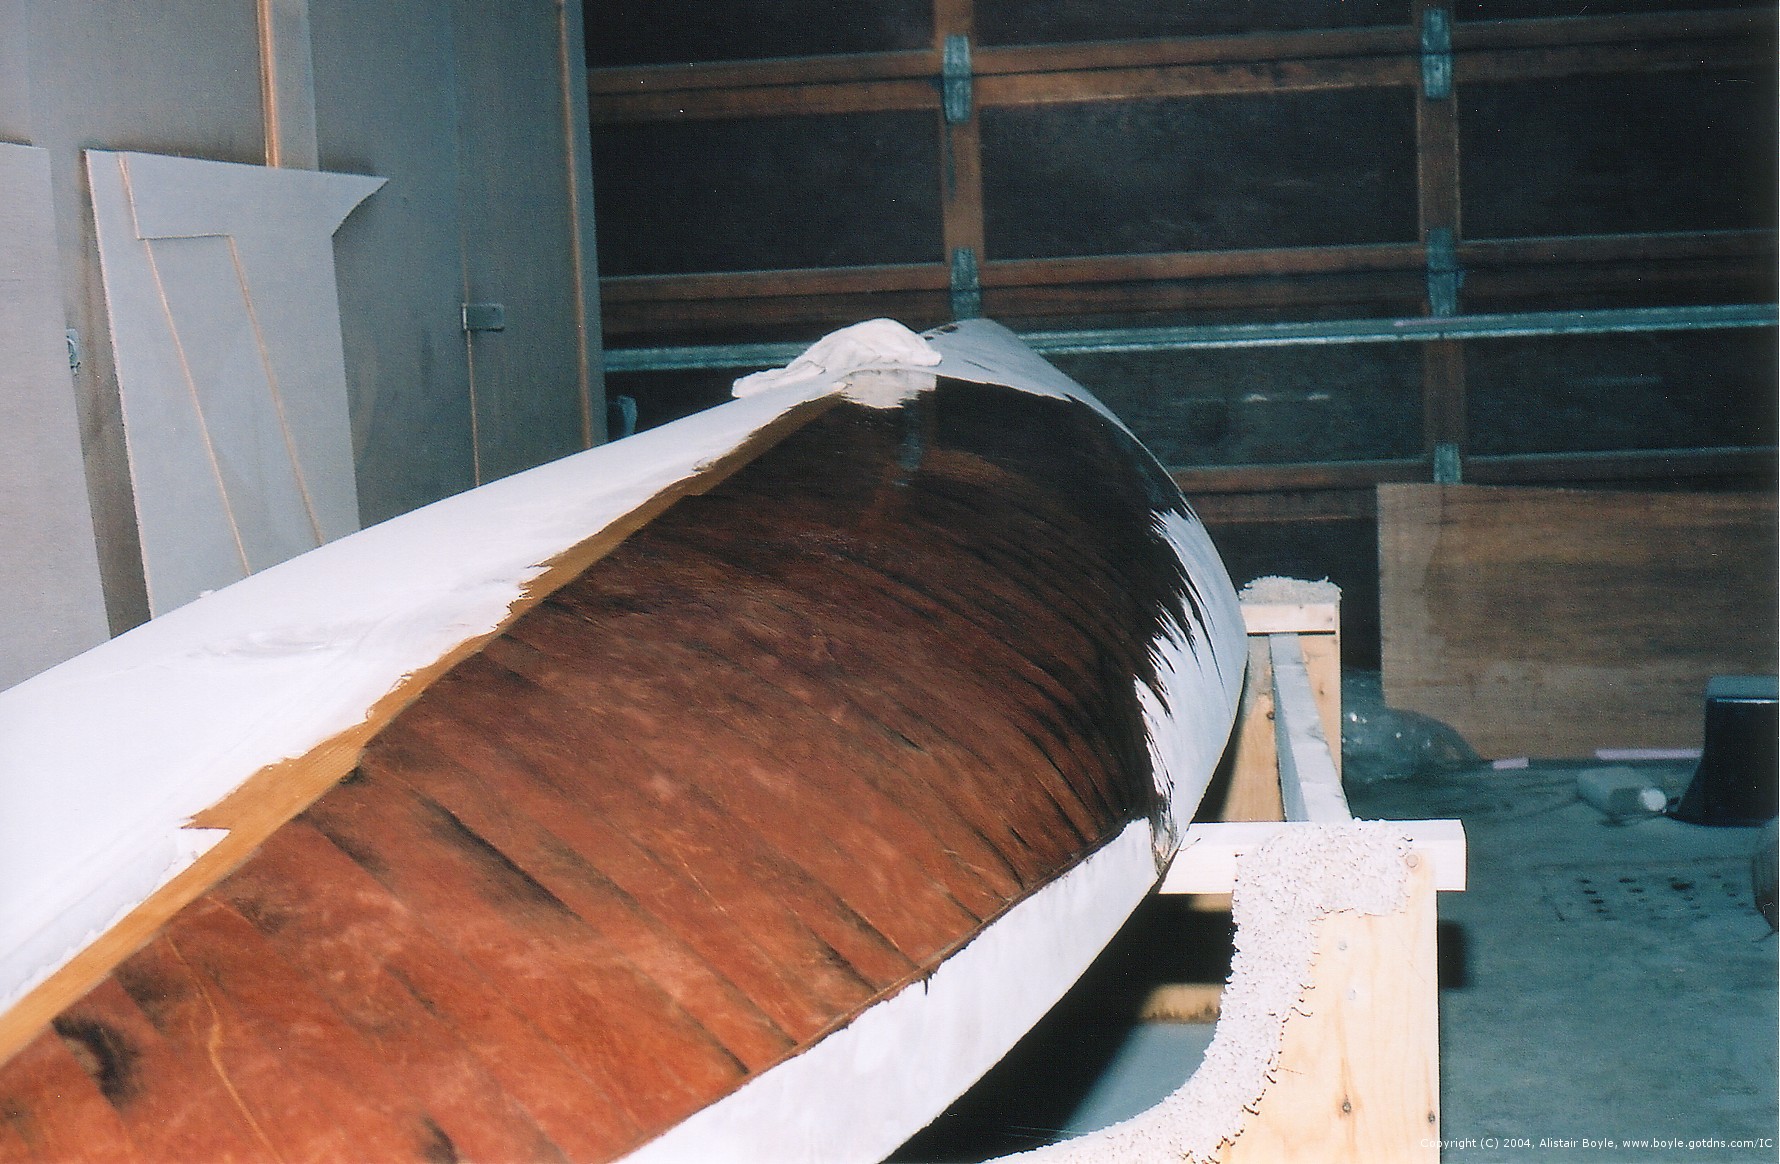
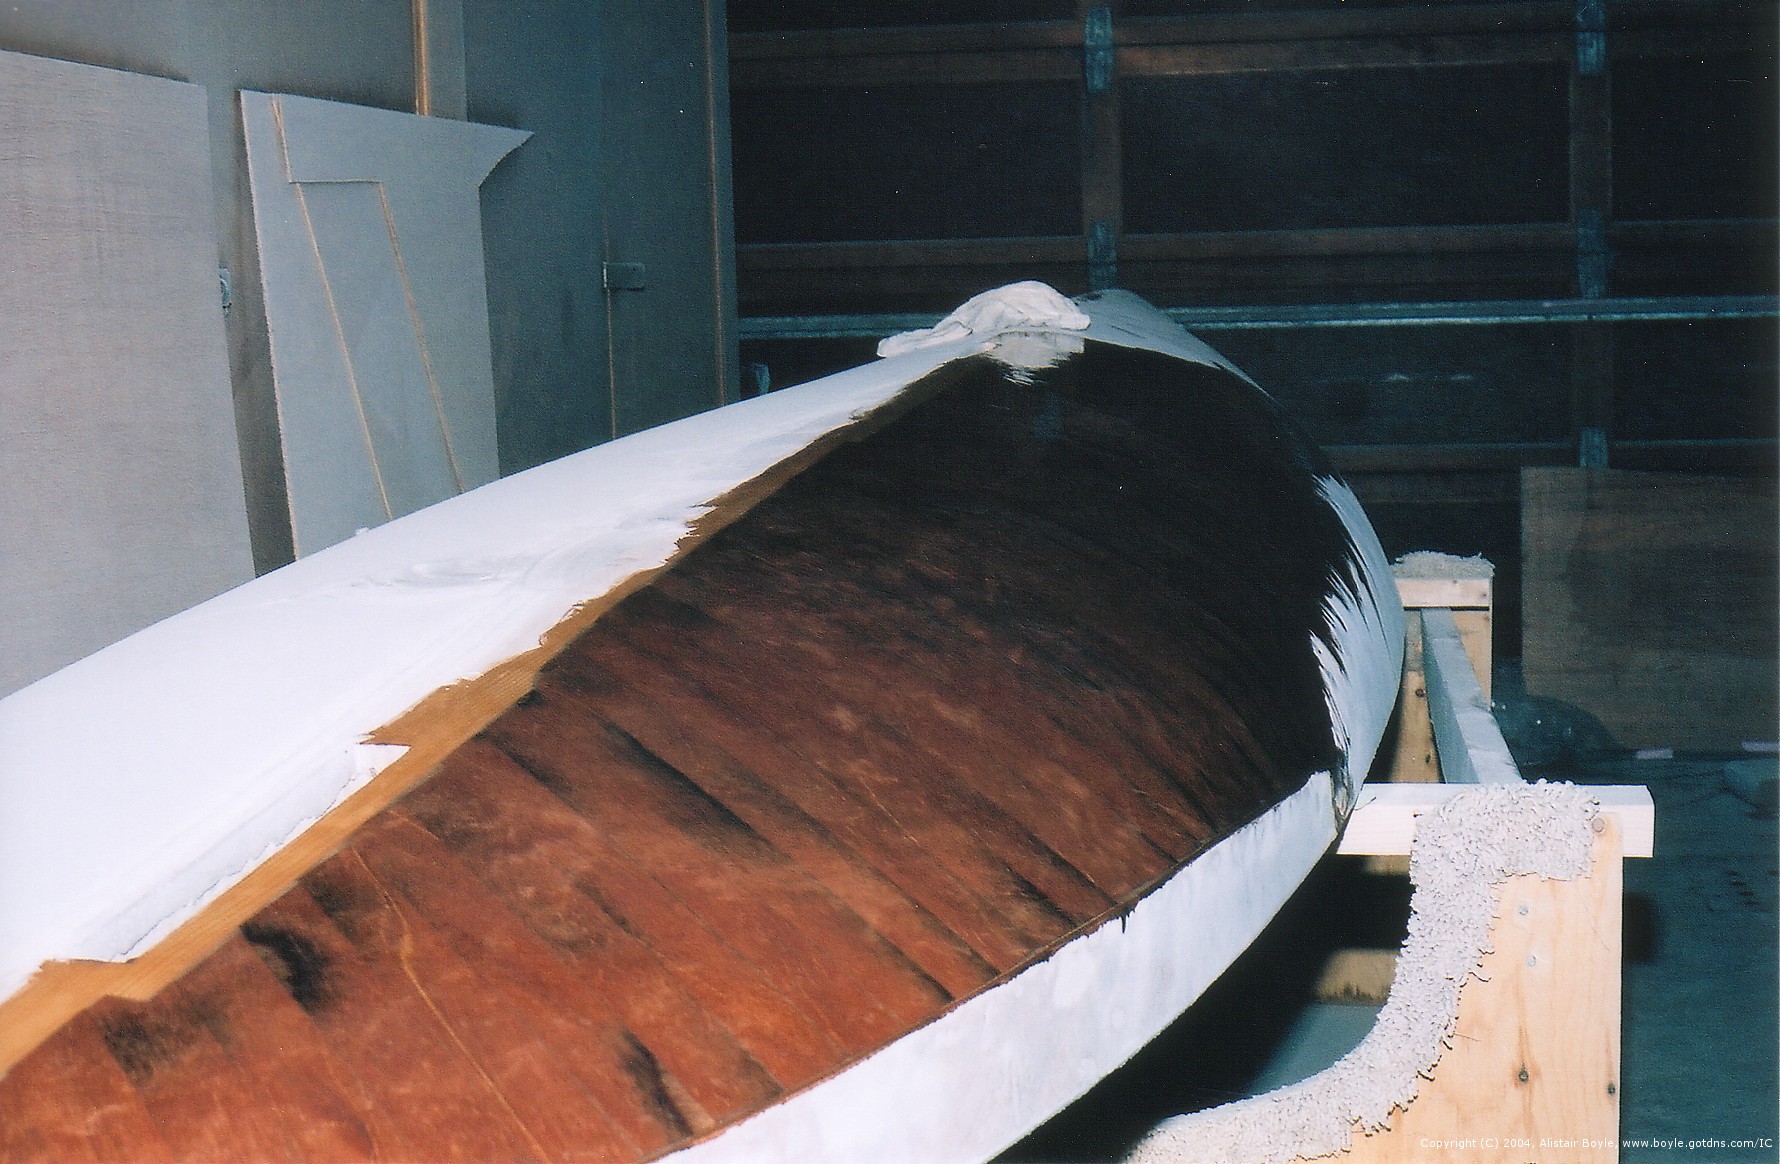
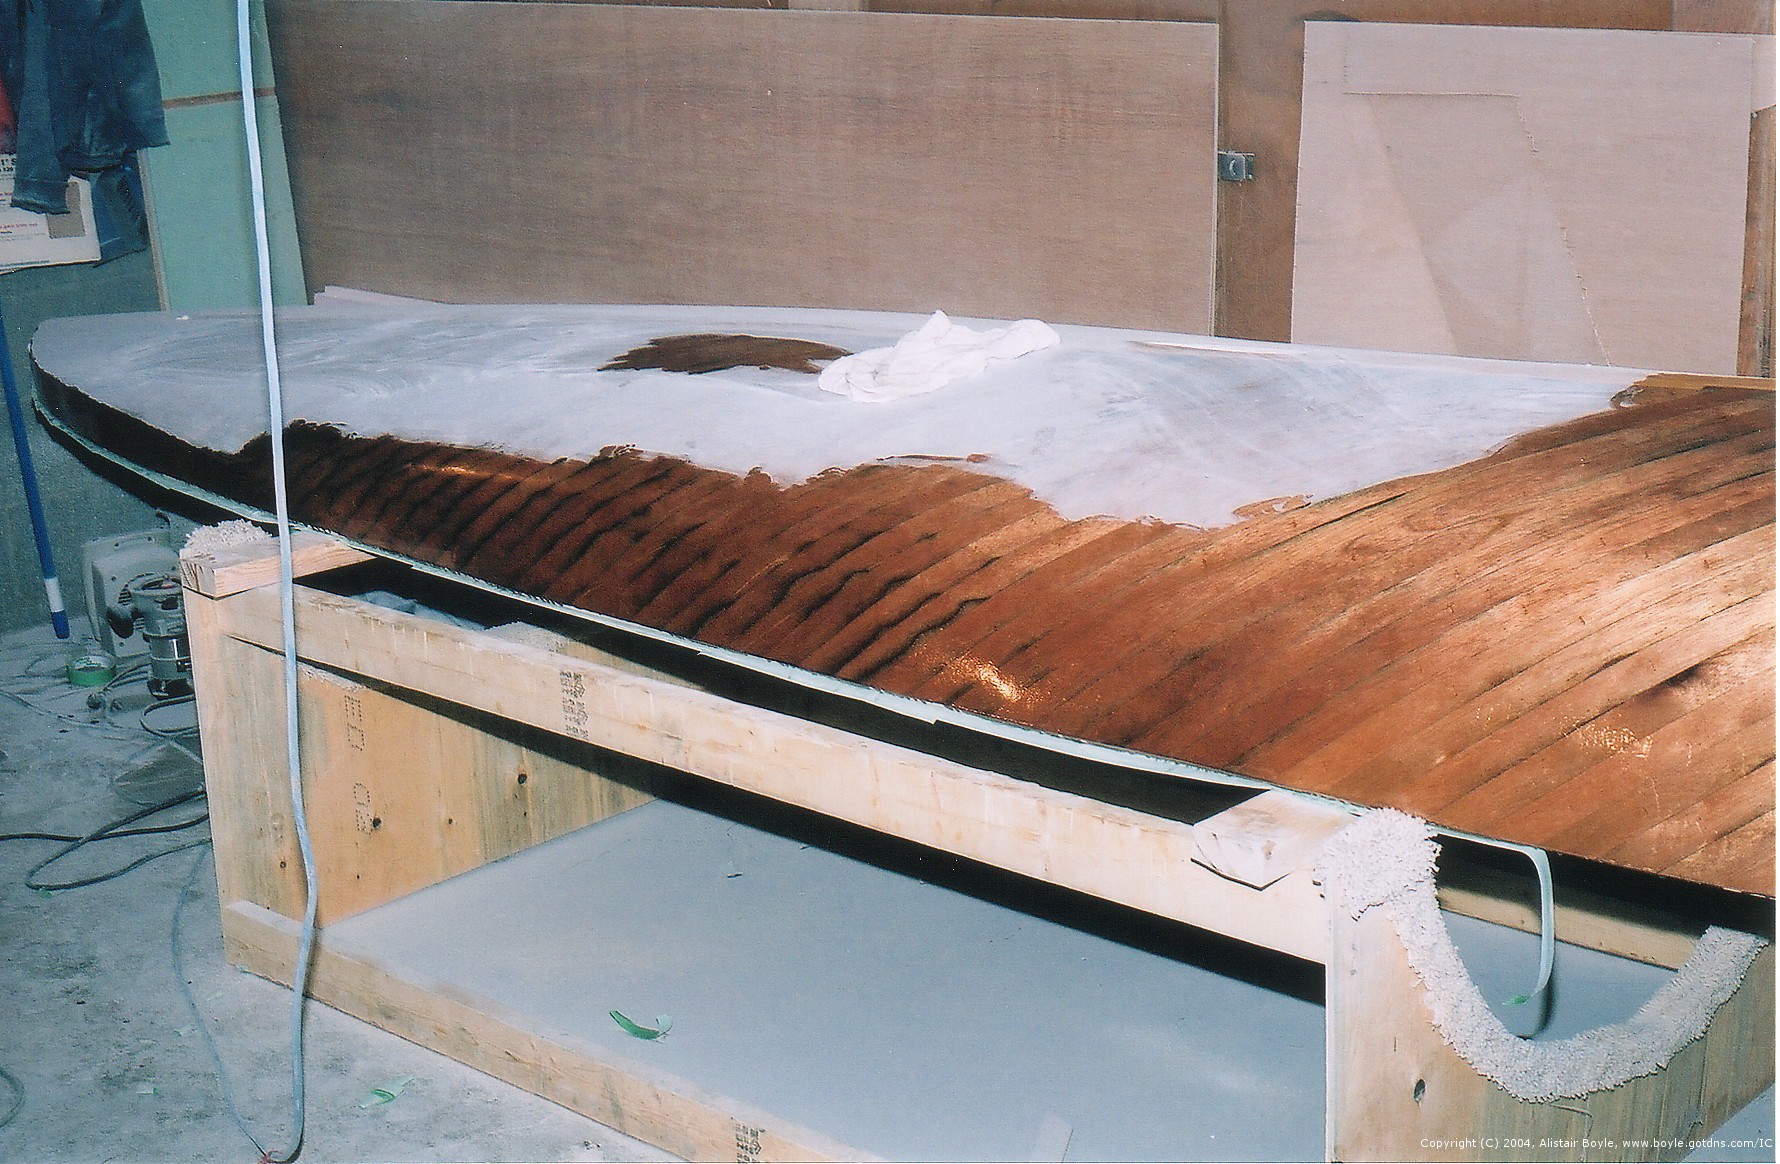
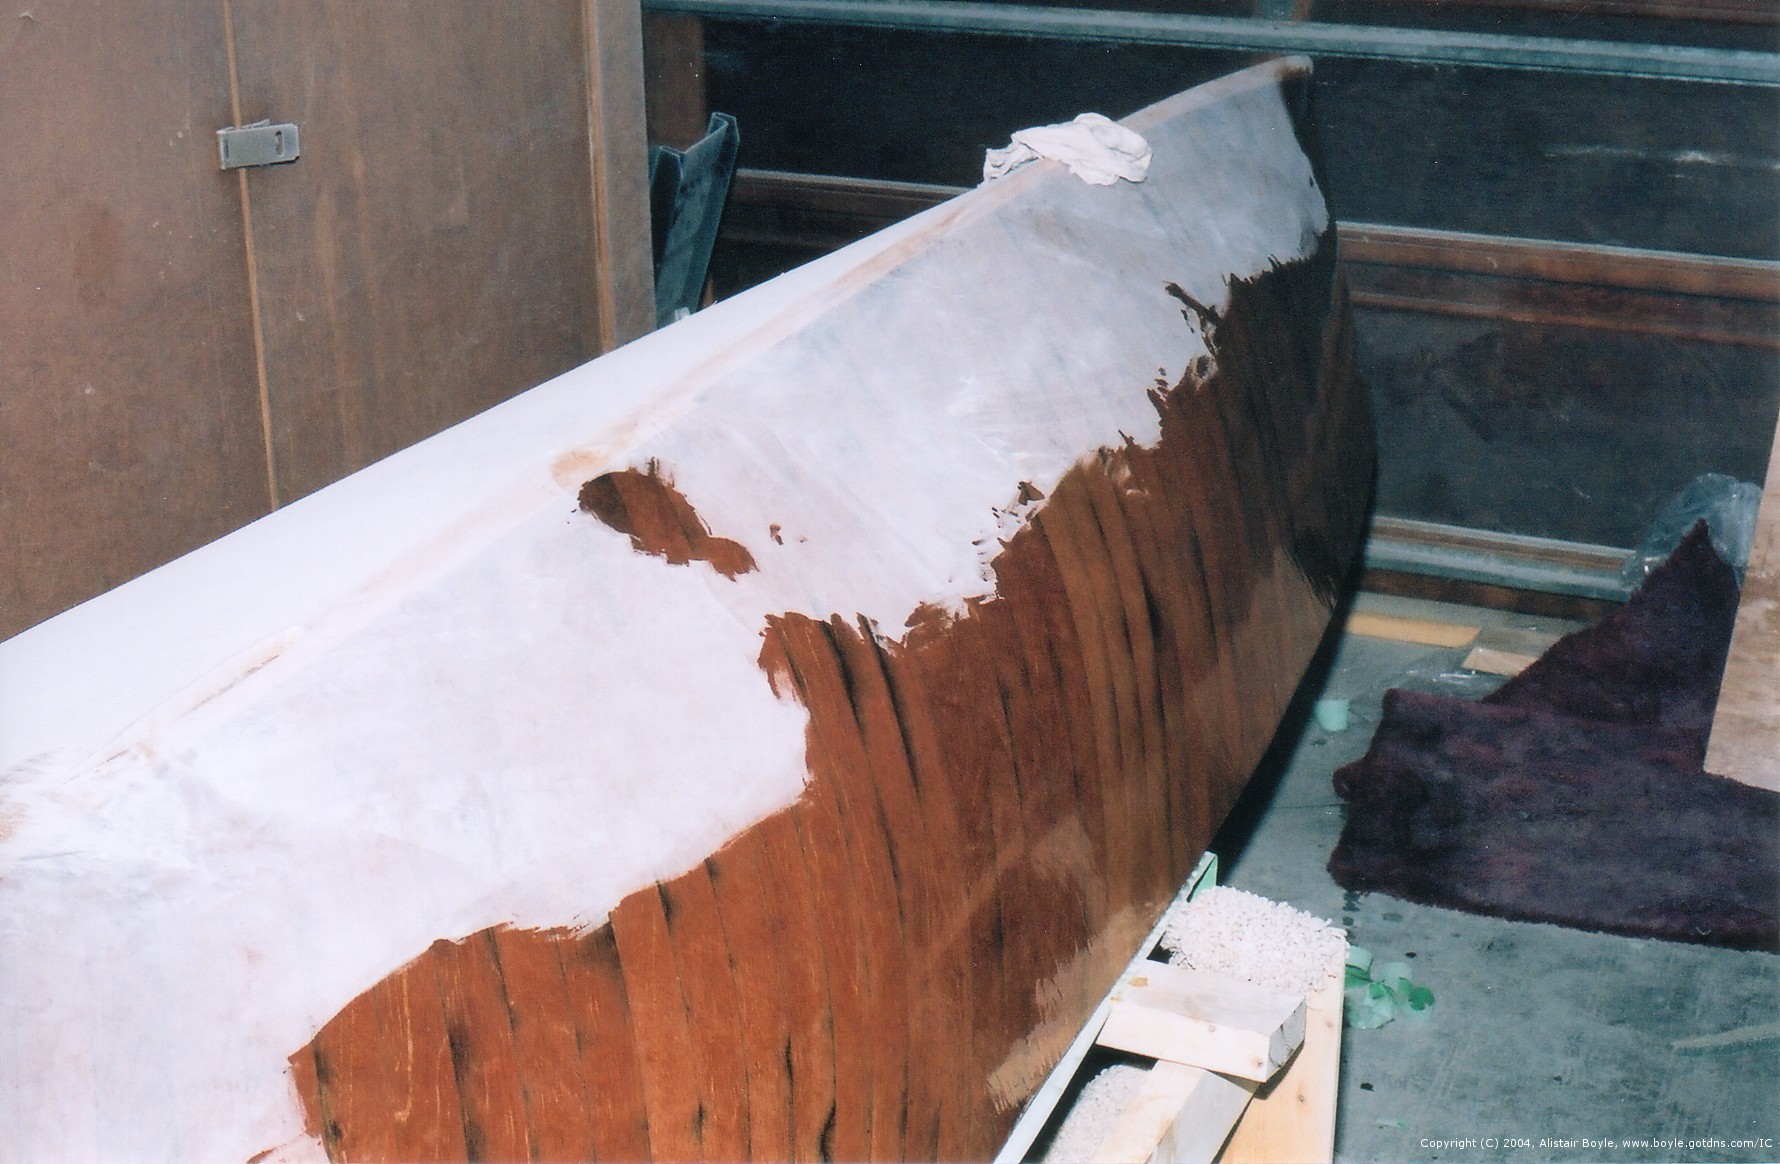
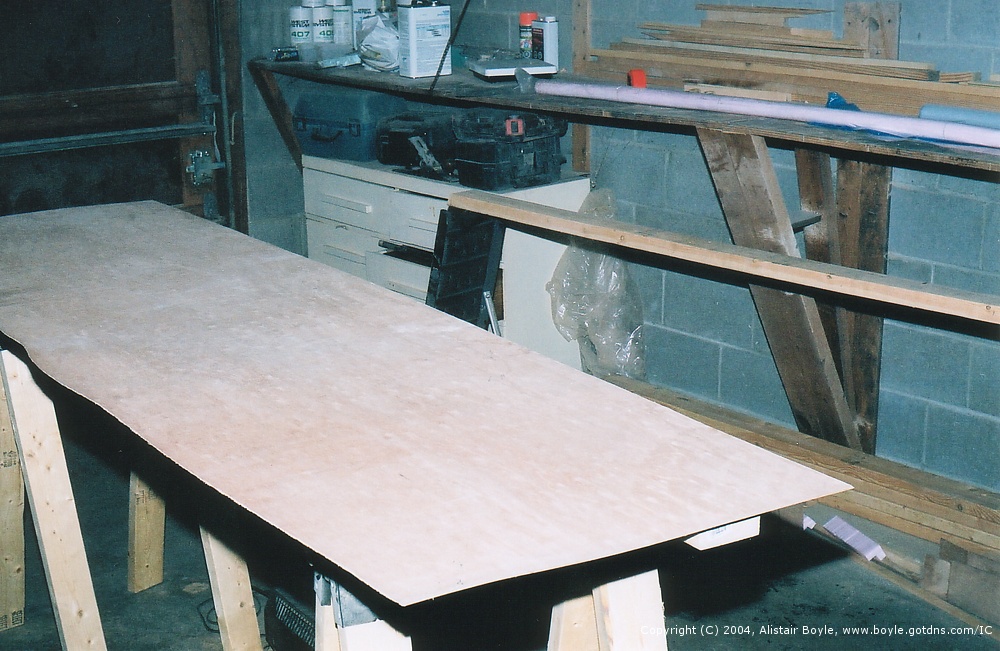
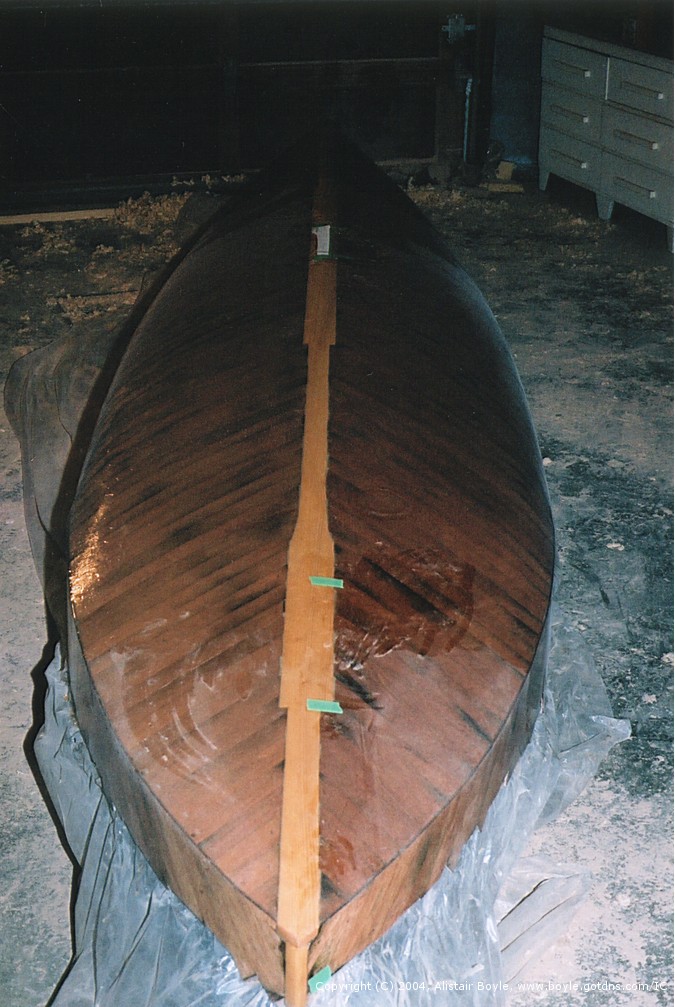
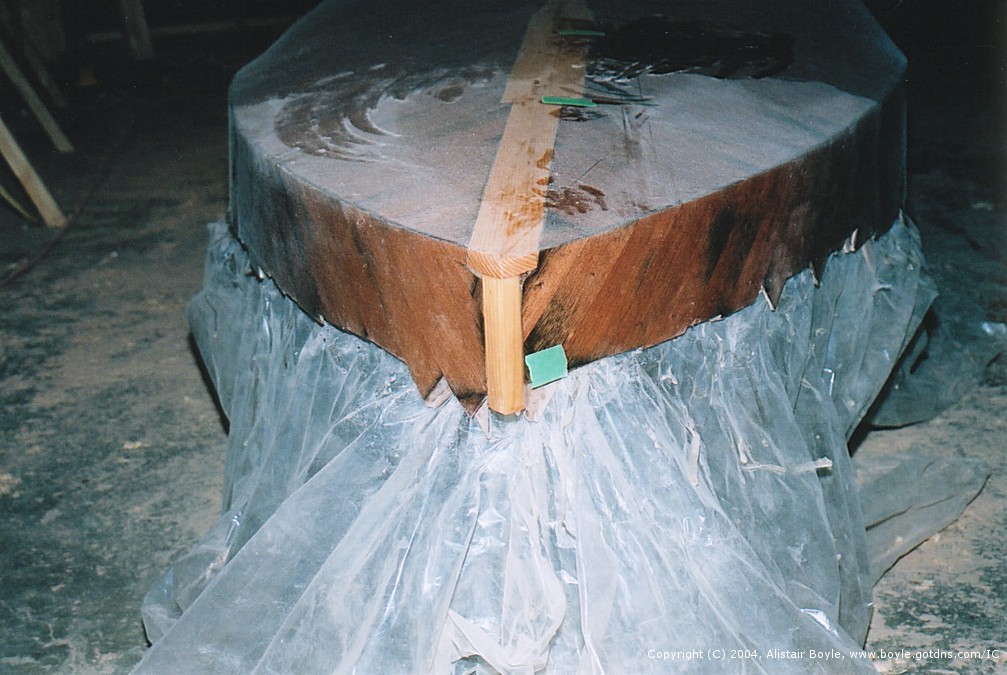
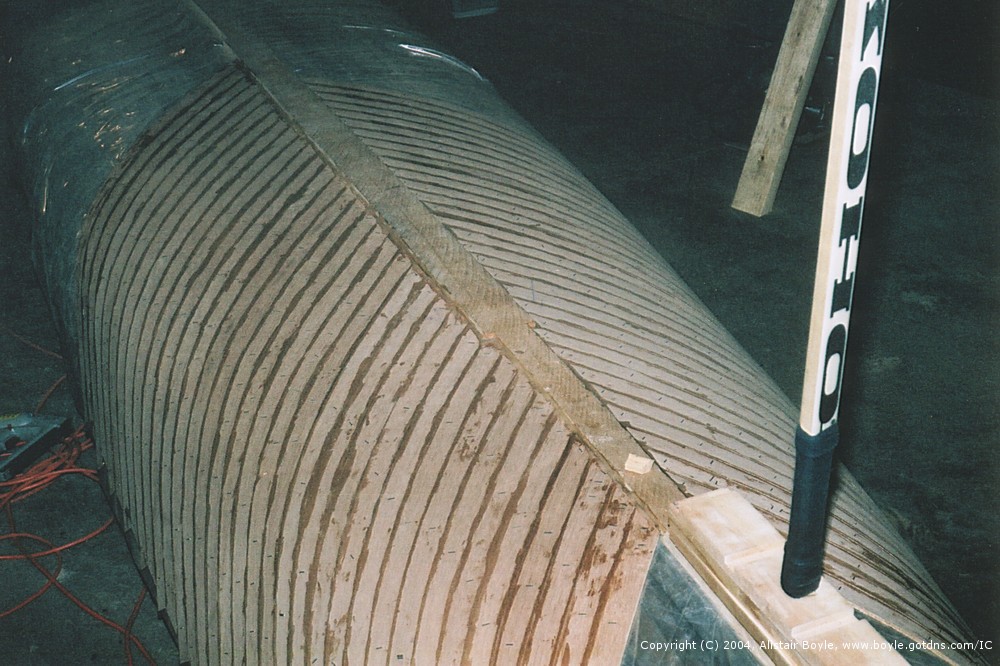
On a completely separate front, I've also started the final fairing and finishing of the hull. This involves applying a couple of layers of neat epoxy, then sanding smooth. This seals the hull from the water. Then the boat needs to be varnished to protect the wood from the sun. (Varnish is sunblock for wood, needed because epoxy doesn't provide any protection from the sun.)
I've currently finished epoxying the bottom, port side of the boat. The bottom is by far the trickier bit since it needs to be very smooth (to go fast). In addition there are thousands of staple holes that need to be filled so the boat will not get waterlogged.
Its interesting to note how my entries in this log have grown longer as time goes on. I must be getting more comfortable writing. I'm spending a lot of time doing that right now since, as I'm sure you've noticed, I'm busy giving my site a face lift and putting in some serious how-to content.
March 8th, 2004: Lots of work getting done these days, largely on the mast. Some pictures to look at till I have time to put in an update:
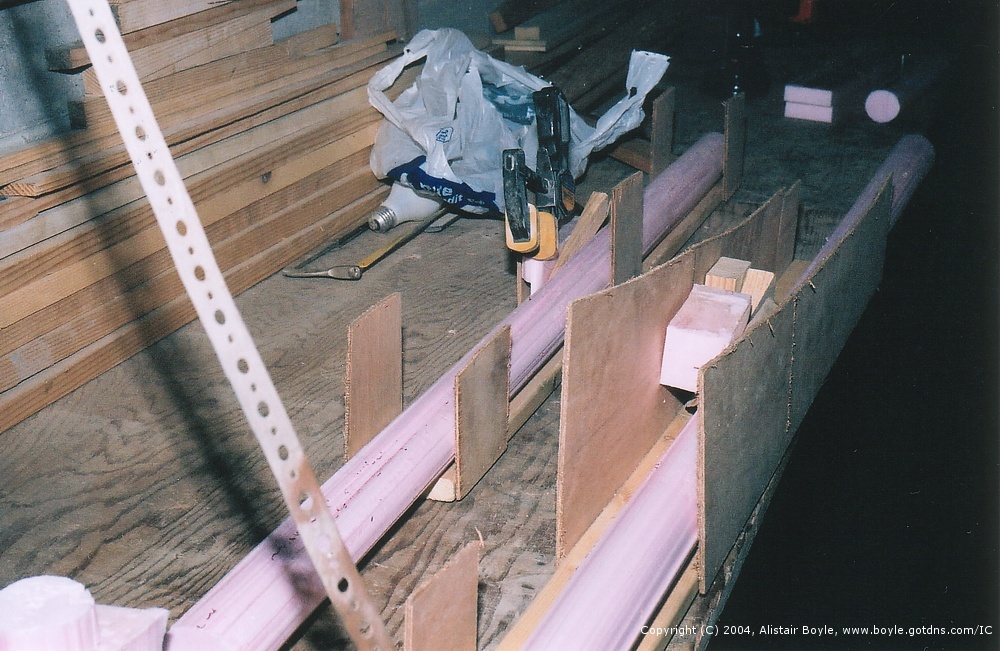

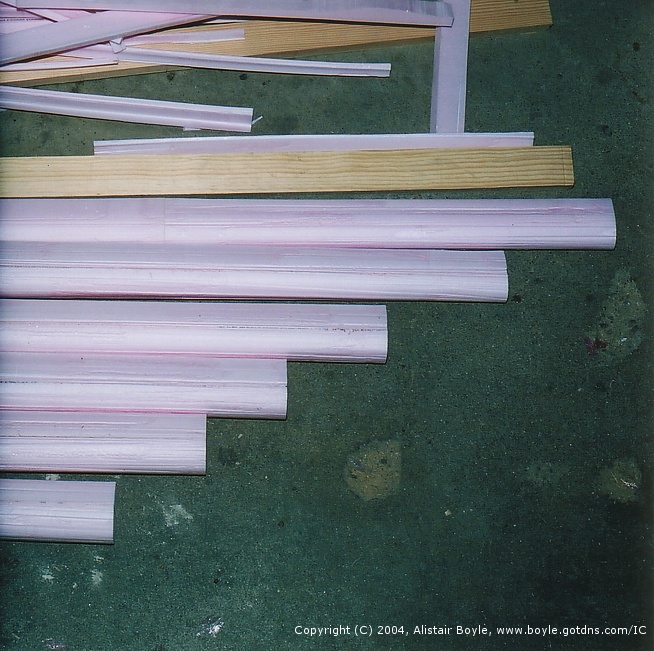
February 4th, 2004: I've been working on cutting the foam core for the mast over the last couple of weeks. At this point I'm approximately half way done. Nothing particularly new or exciting about the way I'm doing this except to say that with the practise I've had now, the cores I am cutting are much better than the ones I did initially for the boom. One thing I've found is that the spring tensioner on the hot wire cutter bow is a bad thing since when the wire catches on the template it vibrates and makes even more of a mess of the core than would be the case otherwise. Instead I have the bow clamped to a table with the bolts in the end tightened down. Then the wire is pulled taught before each cut. Cuts are about one inch squared in cross section since after about this much cutting the wire starts to sag as it stretches. Unexpectedly the spring tensioner had a lot of trouble keeping the wire tight enough even though cranking it up even slightly more was enough to break the wire. Going with out the tensioner, just using the bolts, screwed tight seems to work the best.
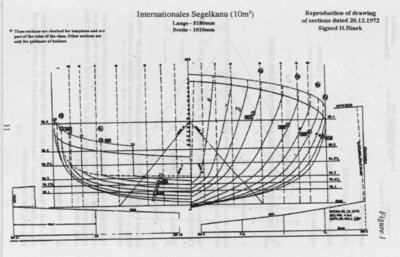
For all those people who have sent questions about where they can get plans for the boat, good news. I was flipping through the forums at www.intcanoe.org and came across a post from Ben Fuller. This led me to Mystic Seaport where plans can be ordered. I followed up and got this response from Mystic Seaport museum:
Thank you for your enquiry regarding plans for the Ten Square Meter International Canoe. We have three plans for this design, which is our catalogue # 29.157:
- profile and deck plan
- construction plan
- partial lines plan with hull sections and bow and stern shapes
We also have the measurement rules, which are used with the lines plan to give you the full hull shape.
The full set of plans and rules is roughly $50US. You can contact them for current prices and ordering information:
Ships Plans Library
MYSTIC SEAPORT
The Museum of America and the Sea
75 Greenmanville Avenue
PO Box 6000
Mystic, CT 06355-0990 USA
tel: 860.572.5360
fax: 860.572.5371
shipsplans@mysticseaport.org
www.mysticseaport.org
http://www.mysticseaport.org/library/collections/ships.cfm
This is the sort of thing you'll get. This image looks very similar to the lines drawings I have for the IC but I found it with Google so...
Its worth noting that making a mold (which you'll need to do from these plans) is very time consuming, taking about twice as long as the actual hull. If you can lay your hands on one you'll save yourself a lot of time. I have one for making wood hulls siting beside my parents house in Calgary which I'd be happy to turn over to someone. There are a number of fibreglass/carbon molds floating around North America as well. In addition Steve Clark and a few others are rumoured to have a number of partially completed hulls lying about which would definitely give you a jump start on construction. Rob Micheal, in the U.K., is in the IC/AC construction business and is currently constructing a pair of ACs with one destined for the US. Anyways, most of this is just to open your eyes to the fact that you don't necessarily have to do everything from scratch and it could save you a lot of time and effort.
January 26th, 2004: I did the bow sprit over the last few weeks. It didn't turn out as well as I had hoped but its salvageable. The sprit needs to be about twice as strong as it is currently which means that it is fairly easy to clear up the mess I made with the first round of carbon and epoxying. I tried to have an inner bag this time around so that there would not be so many wrinkles, but in the process of getting the carbon on the spar too many holes and nicks were made in the plastic and I couldn't get any vacuum when it came time. In the end I performed the same operation as I did for the boom with a single outer bag being used. When I was done I tried the bow sprit in the hole I'd made in the bow, only to discover that the hole, while being the right size, does not allow the pole to move enough to the side to get around the mast. Oops. This is a relatively easy thing to fix though so I'm not loosing too much sleep over it. In the mean time I'll get on with getting the mast started and once thats done I'll come back to the bow sprit issues. If it comes down to the line I can leave the bow sprit for later. I can still sail with out it. The mast is another matter all together.
January 6th, 2004: Received a note from Karl Wittnebel:
There's a note from Ben Fuller indicating that Phil Kinder made the sails that took 1-3 at Worlds. This is not correct. Steve Clark won the regatta with a suit of sails made by Phil. Those sails, though constructed by Phil, were designed by Ted Van Dusen, who also makes the carbon masts used by most of the US fleet. Ted doesn't make sails for other people, so Steve took the pattern to Phil, who will indeed make you a suit for about 1300 USD. As you are aware, there are several manufacturers in the UK, including Hyde, Orange (quite popular at the moment), etc. and they are listed on the UK website.
As for places 2 and 3 at Worlds, Anders Petersson and Erich Chase made their own sails, and those sails were designed by Anders. John Kells used Van Dusen/Kinder sails, placing in the top 15, and I did also, but was only 27th or so. I guess I can't blame the sails, unfortunately!
All this is very minor, but I thought you'd be interested to know about the sails used by the top people at Worlds.
Just to keep everything straight, the Van Dusen designed sails cost 1400 USD now. Those are the sails I ordered. I've tried to contact Ted previously but I haven't managed to reach him through email. Unfortunately I've had to proceed on my carbon spar adventure without any valuable and much needed input from him.
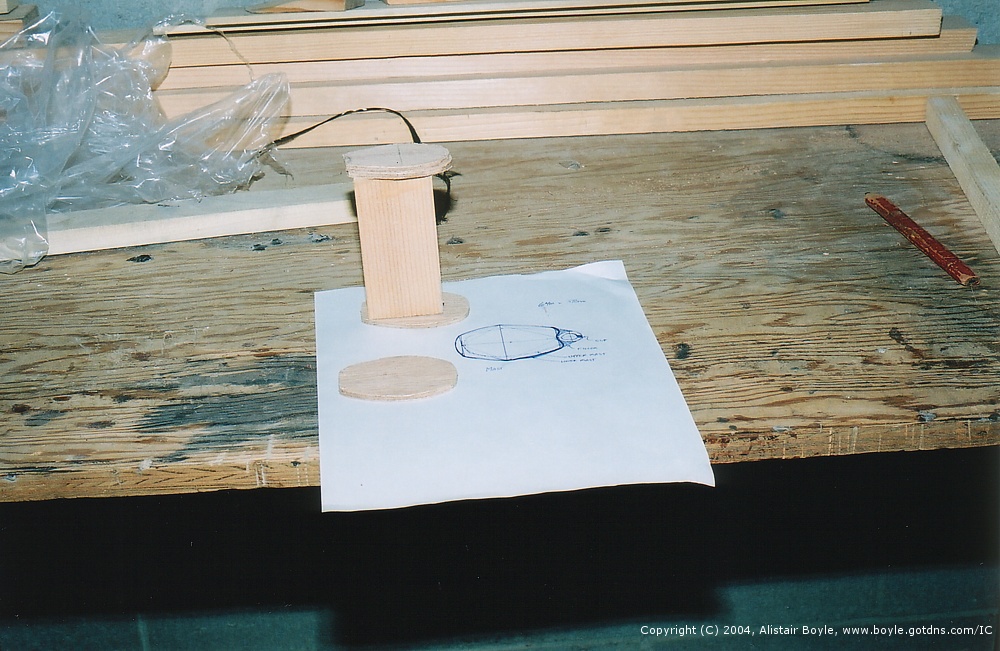
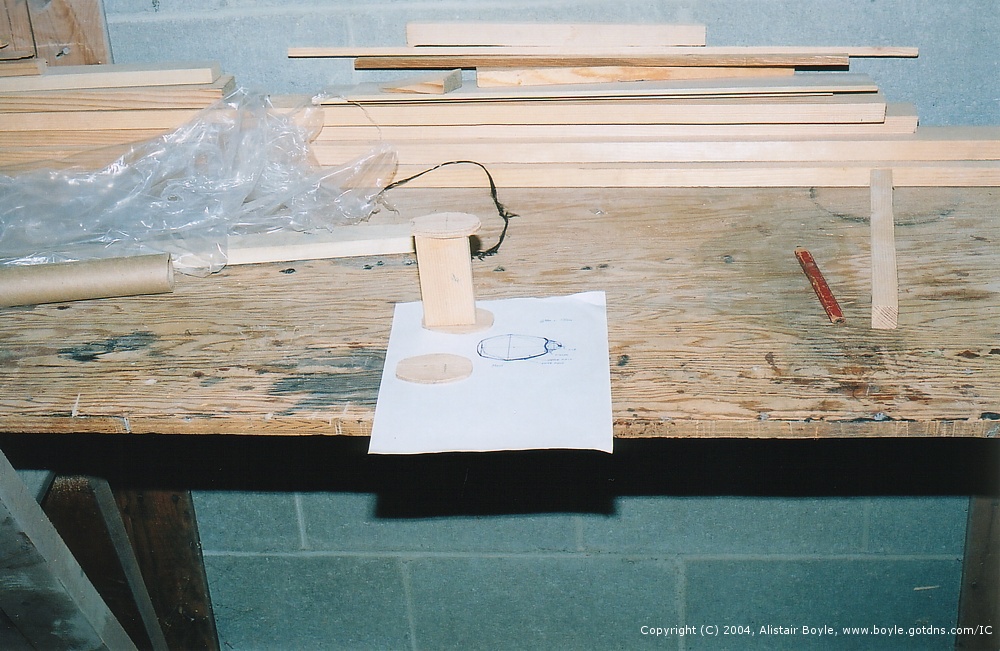
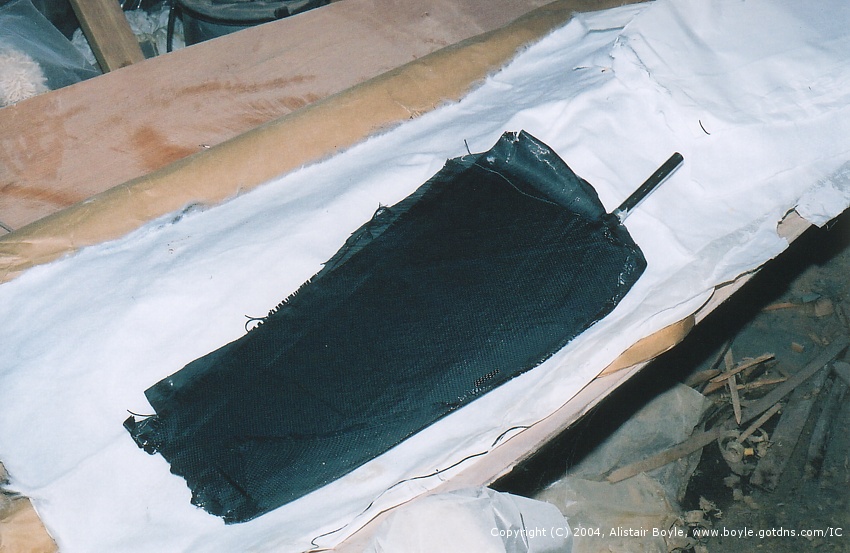
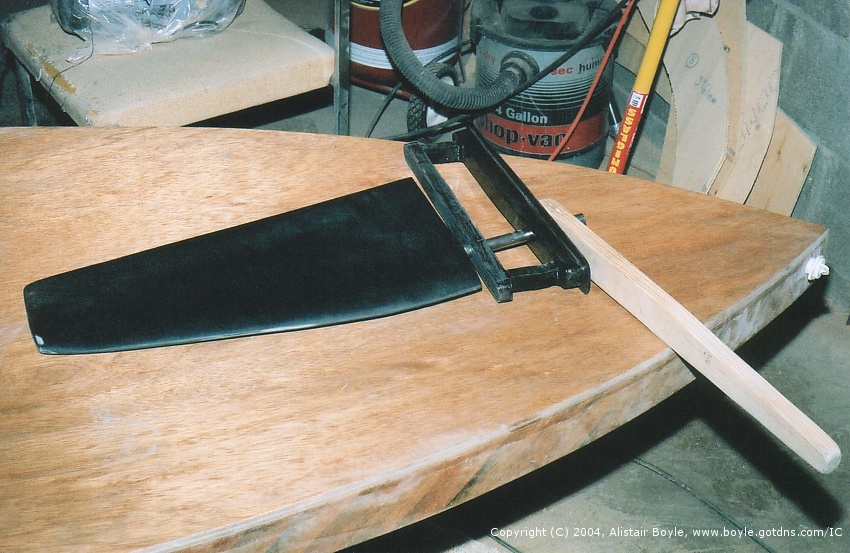
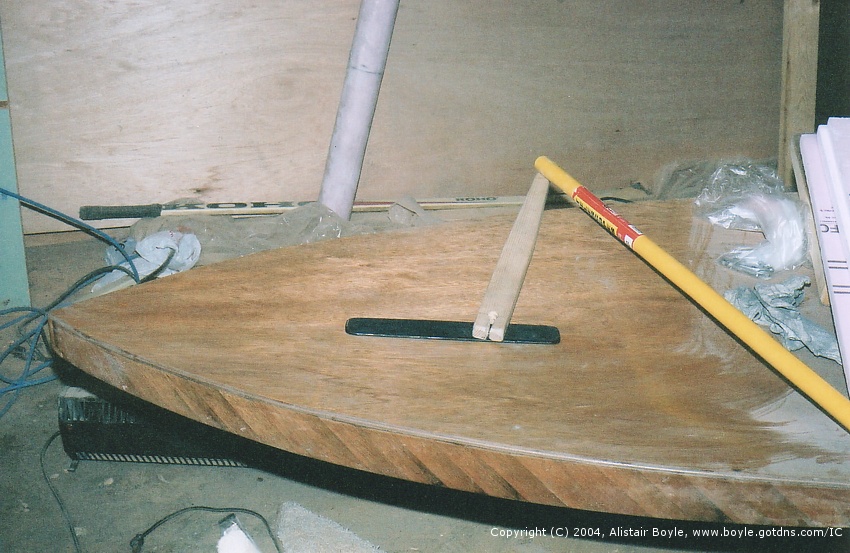
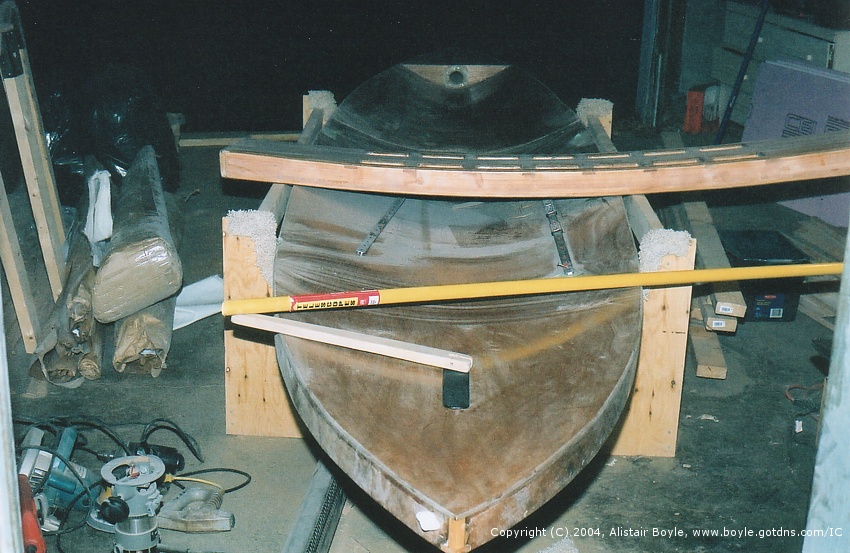
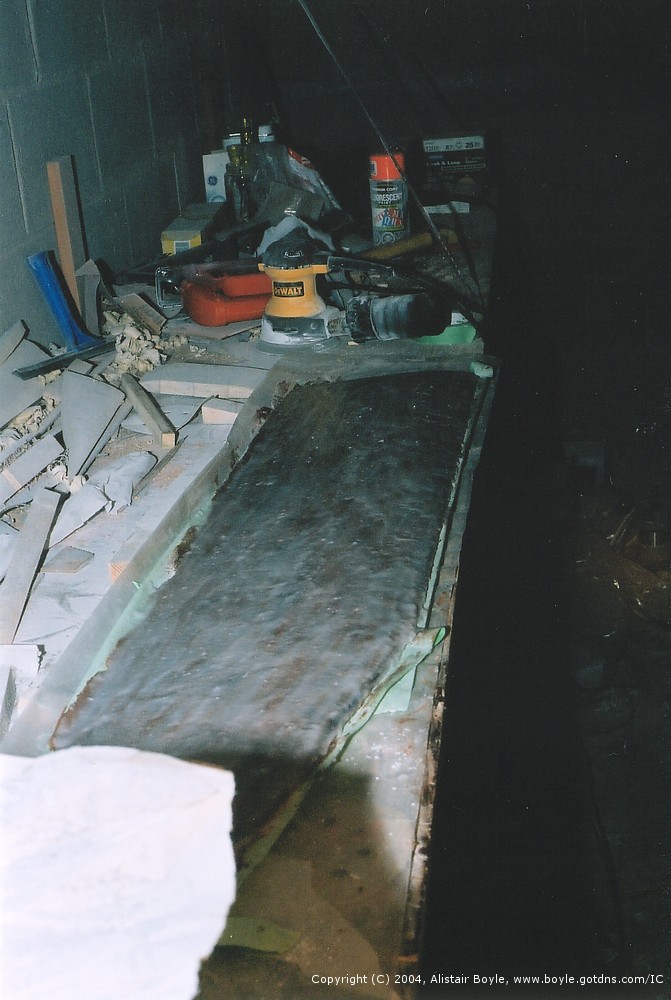
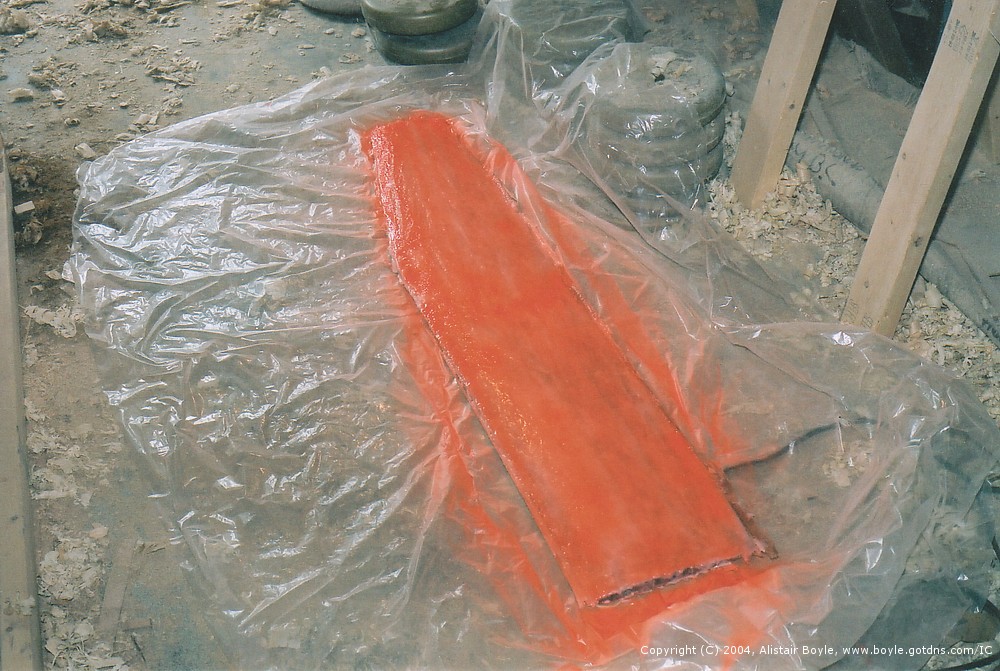
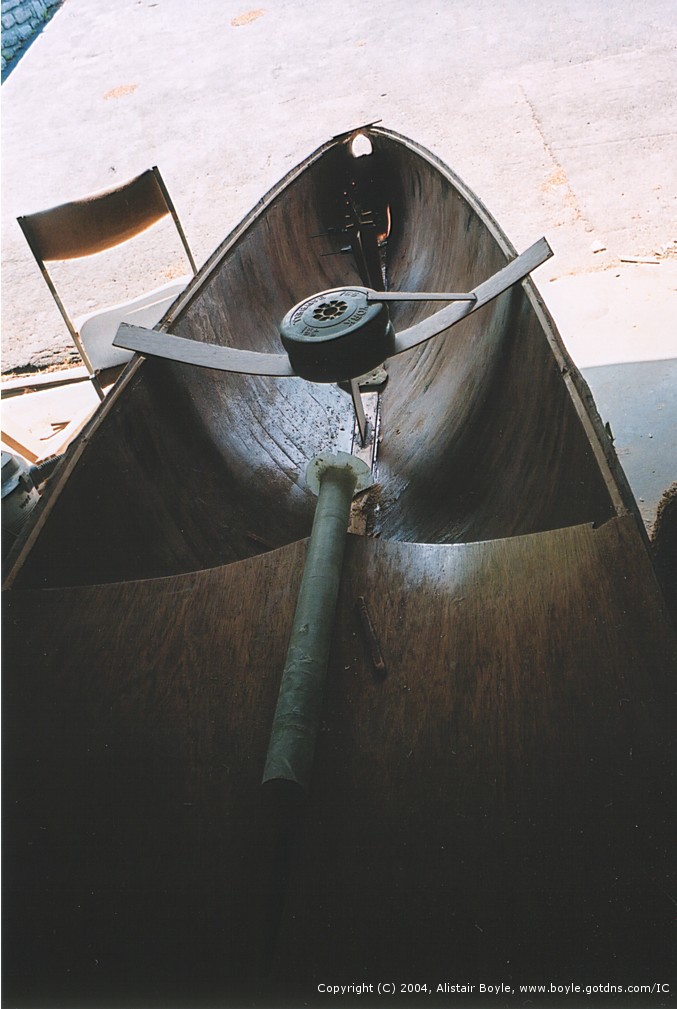
November 24th, 2003: The latest batch of pictures. These show the completion of the dagger and rudder. The last one shows the fibreglassed foam that was used as the form for the boom. The boom didn't turn out as well as it could have. It looks like it will certainly be strong enough but it has a lot of wrinkles so I am going to try a slight variation on the process for the bowsprit. This will hopefully result in considerably fewer of the cosmetically ugly wrinkles ending up in the mast.

November 17th, 2003: Did the lay up for the boom over the course of 3 hours on Saturday. Then another 4 hours of vacuum bagging. It looks like it turned out properly, though I am still working on peeling the breather fabric and peel ply off.
The layup goes:
- Kevlar at 0/90�
- carbon fibre cloth at 0/90�
- unidirectional carbon fibre at 30� to longitudinal, ~50% overlap
- unidirectional carbon fibre at 30� to longitudinal, ~50% overlap
- carbon fibre cloth at 0/90�
- Kevlar at 0/90�
The second layer of unidirectional carbon fibre is wrapped in the opposite direction so that the two layers of unidirectional carbon fibre have their fibres at 60� to each other.
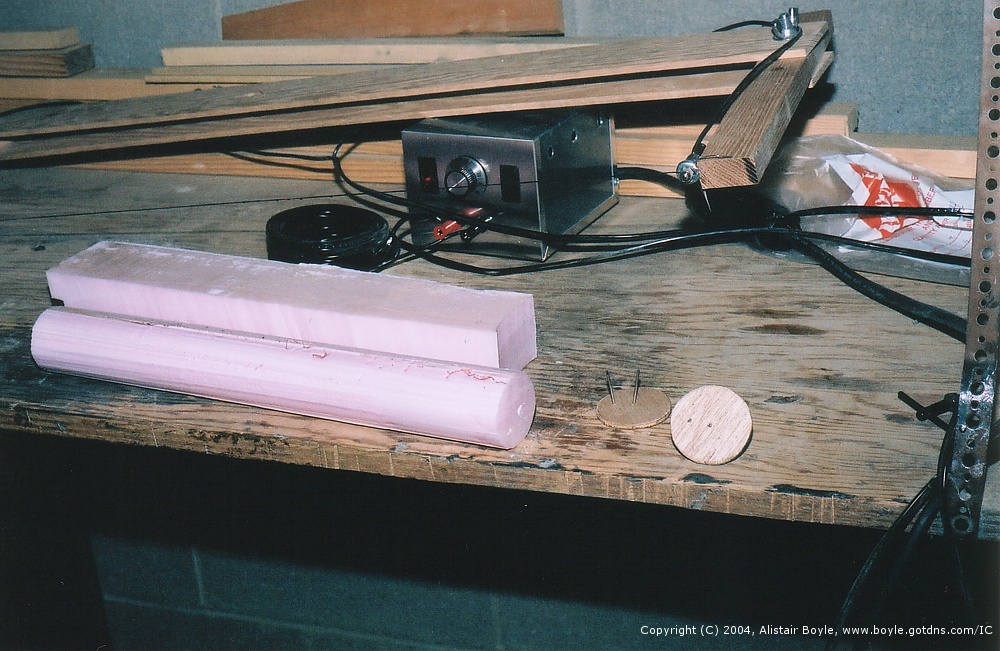
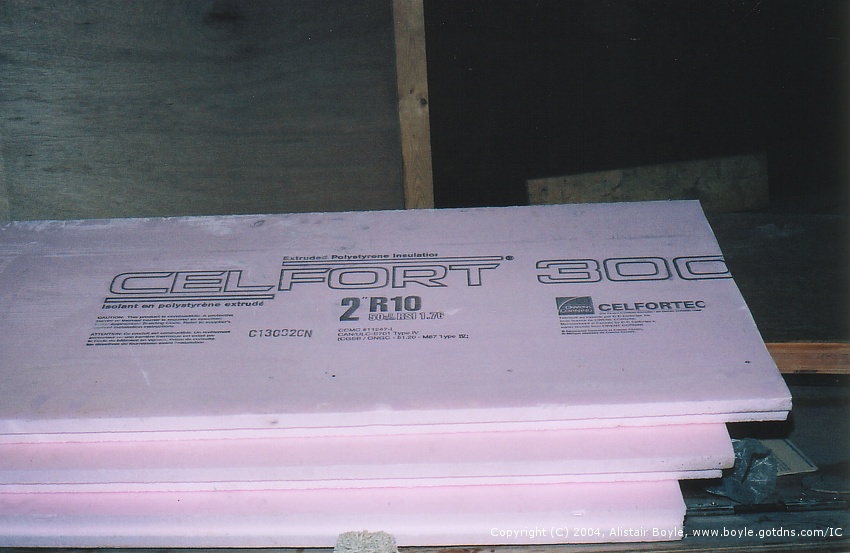
November 12th, 2003: Things have been busy. I've got the foam cut for the boom. This involved cutting blocks of foam up into manageable pieces and gluing them together to make the correct thickness (100mm max boom diameter) using the hot wire cutter. Then I created a pair of templates with the cross section that I want for the boom out of some left over 4mm ply. These I attached to the ends of the foam blocks with nails. Then the precision foam cutting began. The foam was clamped to a table and using the templates placed on the end of the block as guides the hot wire was dragged through the foam. Reasonably short sections were used because the Nichrome wire in the hot wire cutter stretches a lot and trails behind so it is hard to get a cut that conforms to the template accurately if the templates are too far apart. A jig was used to slice the ends of each section so that they match up and all the sections were glued together. Gluing the foam is done with contact cement. Foam means the cheap, pink styrene R10 you can get at Home-Depot. It has NO structural value what so ever so it will be melted out using acetone at the end of these operations. Finally the foam tube was given a single layer of fibreglass. Its now reasonably smooth and should be able to hold up to being vacuum bagged with out collapsing. (Fingers crossed there.)
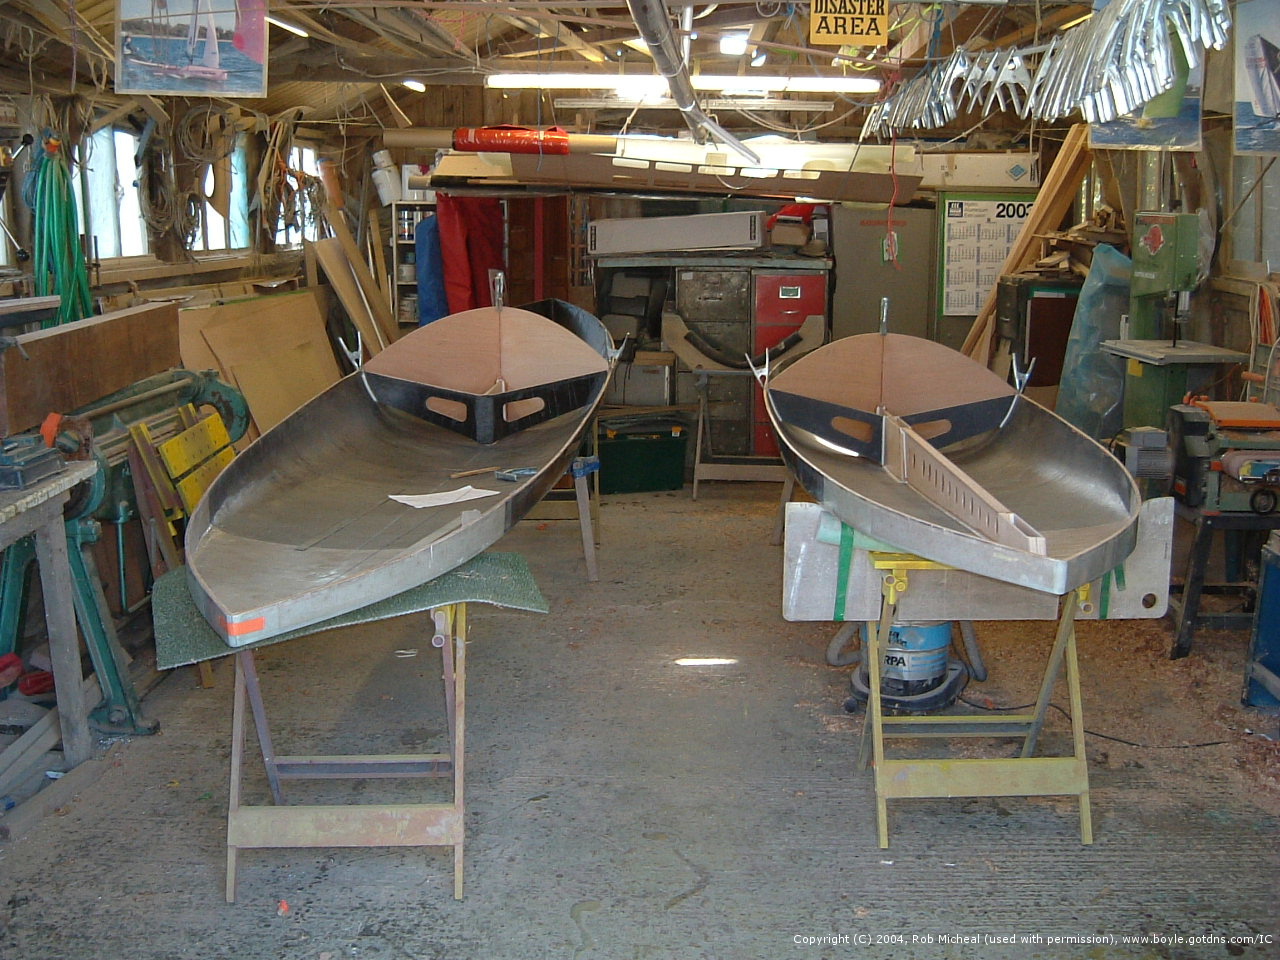
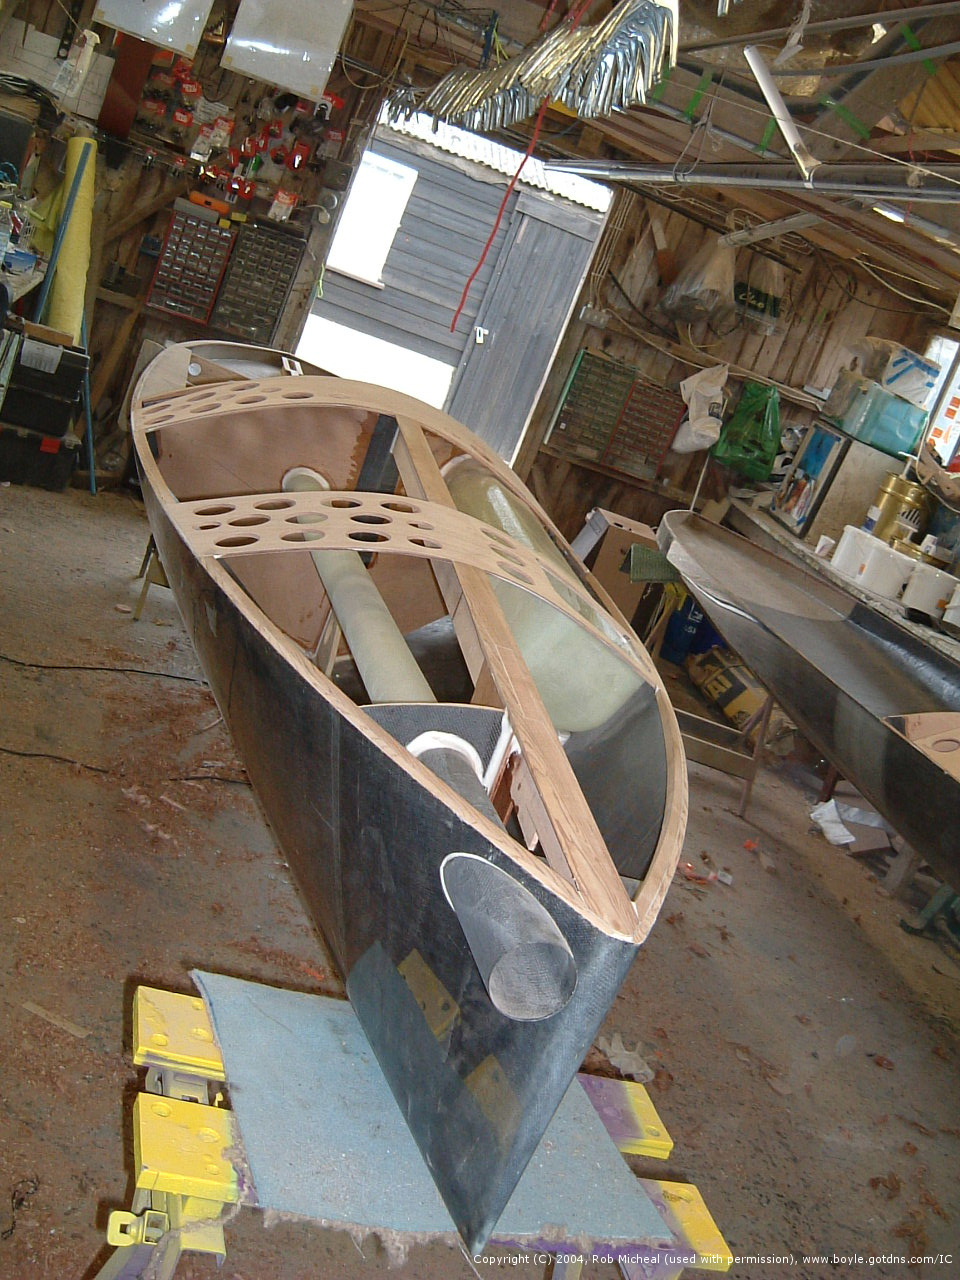
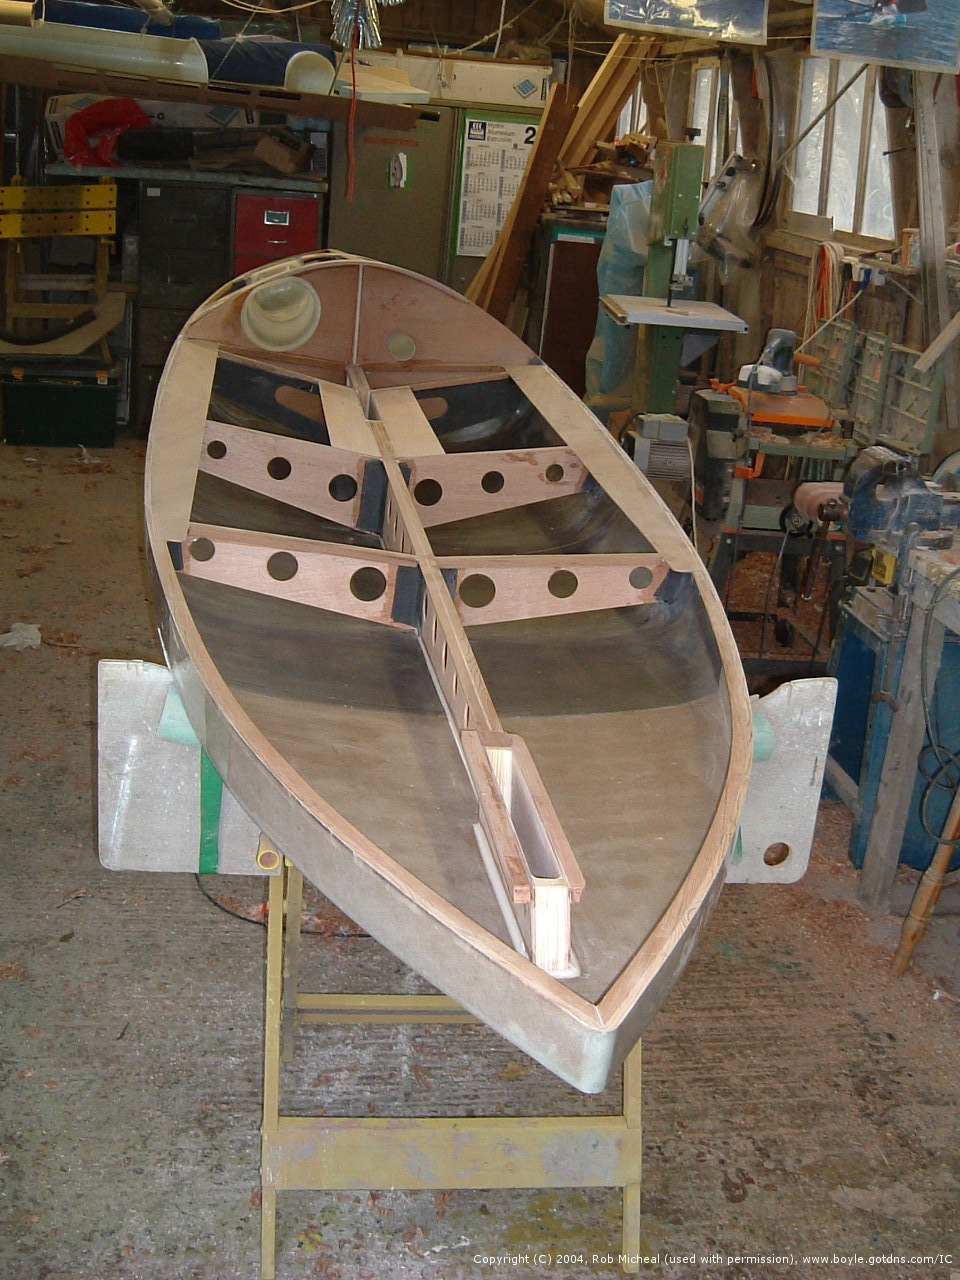
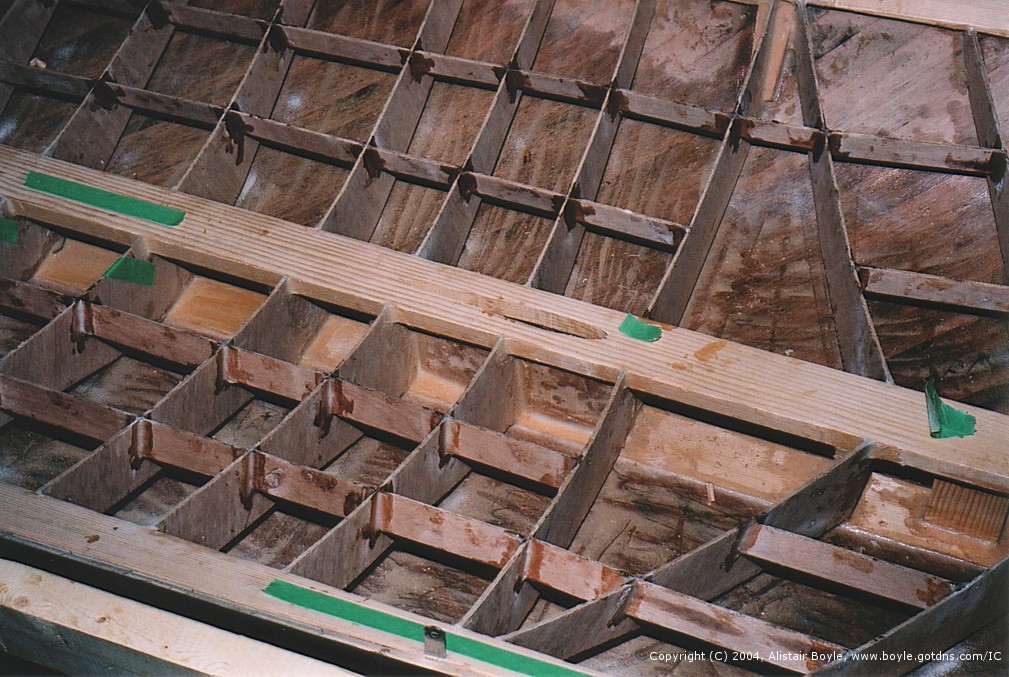
Here's a few pictures that Rob Michael sent me, his 43rd and 44th boats under construction. They are carbon hulled, ply decked asymmetric canoes. Compare and contrast the construction differences between my boat and these. These pictures make me think I may have over built the guts of my boat slightly...
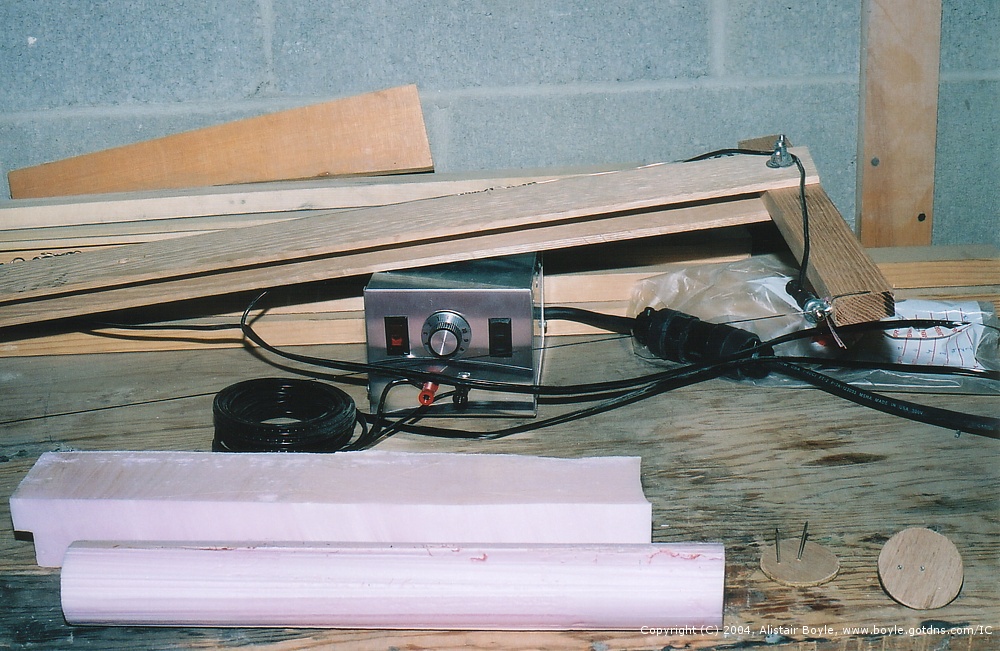
October 22nd, 2003: Tick, tock. Well looks like this thing ain't getting in the water this year. I've finally been able to put some proper hours in at the garage to get some work done. I'm at the polishing stage for the dagger board. The rudder is now at the graphite coating stage. The hot wire foam cutter is completed and working now. I ended up having to make a power supply to power the foam cutter as well since the one I was planning on stealing from work turned out to be dead.
The power supply is according to these plans: Foam Cutting Power Supply
The bow is according to this excellent site: David Woodward
The hardest part was finding a source of Nichrome wire to use for the hot-wire part of the hot wire foam cutter. In the end I bought an old toaster at Value Village and pulled it apart to extract the wire from the toaster. Problem solved. I initially tried using stainless-steel wire but this took too much current to heat, locking up the power supply. The switch to Nichrome (which has a higher resistance) solved this. The foam cutter system is now all working beautifully. Hopefully this weekend I'll get the time to start on making the boom.
September 18th, 2003: Yet more time is passing without getting enough boat work done. The vacation time out at my cabin was great. Unfortunately, I returned the mold to Calgary only to learn that Martin no longer has room for it at his place and doesn't want it back. He told me to take it to the dump. Given the time and money I spent getting the damn thing back to Calgary it'll sit beside my parents house for the next couple years first. If anyone is interested in a male mold for making wooden ICs...
I've been spending the last weeks buying a new car so the end of September is rapidly approaching with almost no boat progress at all. The goal is to be rolling with the mast and boom stuff before October. We'll see if that actually happens.
August 13th, 2003: More pictures here. The last batch of pictures I thought I was taking didn't turn out so these ones are the latest greatest. I haven't got much done this month due to spending most of my time trying to get organized to go back to Calgary and out to BC for some vacation time. At any rate you can see that the foils are all but done now. Its just that darn mast and boom that have to get done before the ice arrives...
The rudder vacuum bagging did go much better. I easily achieved the desired 7.5 psi after carefully sealing the bag this time. My vacuum bagging contraption described in the previous entry can be seen attached to the compressor. I put two layers of unidirectional carbon on at thirty degrees from the longitudinal direction. Then a layer of cloth in the 0/90 degrees direction. Then a layer of peel-ply, breather cloth and the bag to seal up the whole thing. Then I applied vacuum for about 4 hours. Finally, before the epoxy was fully cured I removed the rudder from the bag, peeled off all the junk and used a pair of scissors to trim the excess carbon off. I'm now using the slow hardener in preparation for doing the mast which takes about 4 hours to set. The fast hardener was taking about 2 hours before it got fairly solid.
When the vacuum bagging was completed, three layers of thickened epoxy were applied to each side of the foil. Then the foil was spray painted a nice contrasting colour (ie: florescent orange) and then it was sanded until all the paint was gone leaving a relatively smooth surface. Then I dug out the foil templates again (used earlier to plane out the blanks) and used these to sand down to the final shape. Finally I applied two layers of epoxy mixed with graphite to each side to finish the foil. This gives the foils a nice black Darth Vader sort of gleam. The graphite is also supposed to result in a low friction surface. Final sanding to a super shiny ridiculous gleam is the last step. I think I'd rather get sailing this year though so I'll probably leave the 1200 grit sanding for this winter.
The dagger board is at the final sanding stage now. The rudder has one more layer of filler to be applied before it can be sanded down.

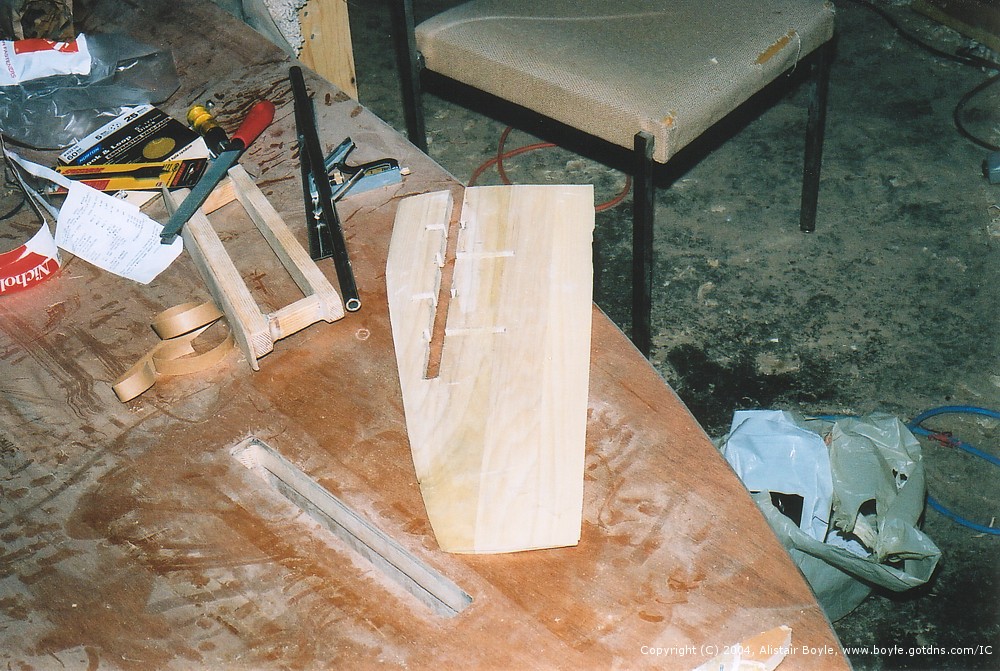
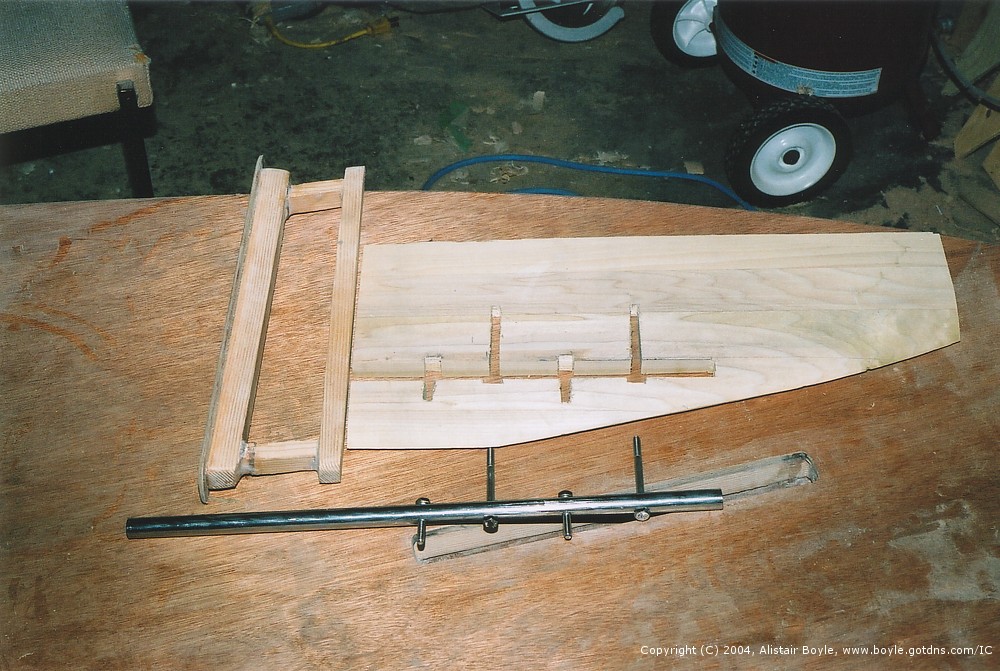


July 18th, 2003: Got the rudder post done last night. I went with a 1.5' length of 5/8" diameter, 1/8" wall stainless steel tube. I drilled four holes and plunked 1/4" bolts through. These fit into the outline I've traced, then cut in the rudder blank. Today I'll start gluing the whole thing back together. I'm sure this little description will make much more sense with a picture... its sitting there on the roll of film waiting to be developed. I should be set to vacuum bag the carbon onto the rudder blade in two days.
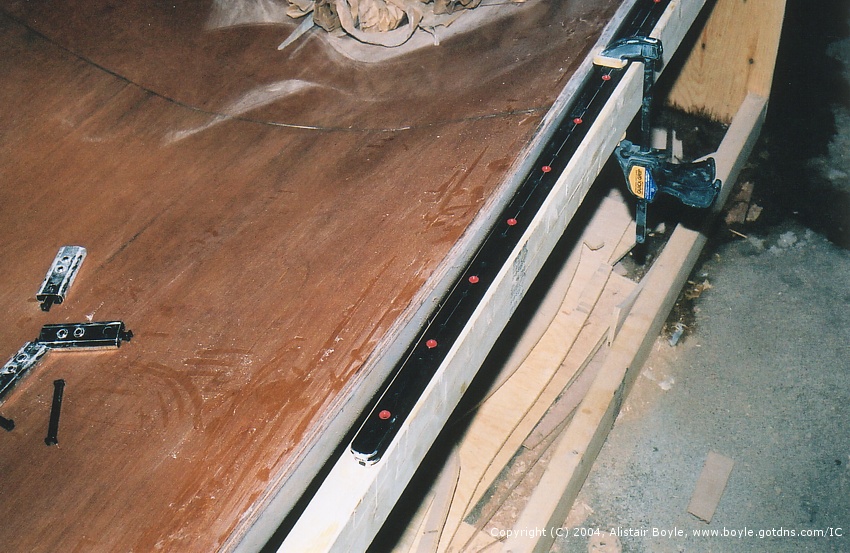
In other news I got the track and slides finally so I can get the seat carriage done now. I ended up getting Ronstan T-track and 4 sliders (two per side) with no hardware attached. These will be bolted to the underside of the carriage frame. I'm still waiting for the rest of the mast gear to come in.
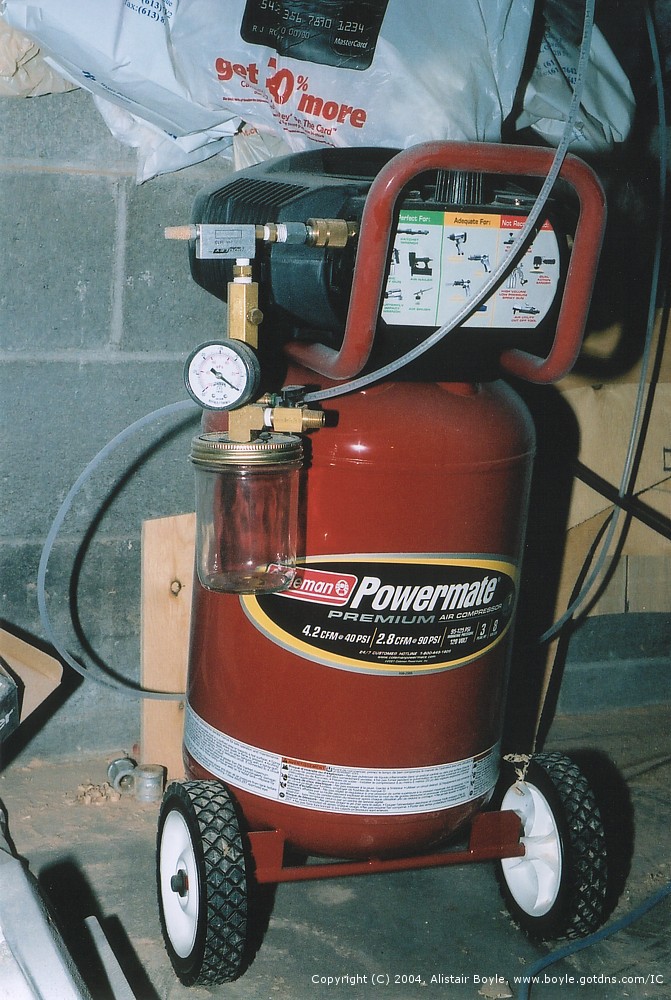
On the subject of vacuum bagging: here's my setup. I have a 8 gallon, 3hp air compressor capable of 2.8cfm @ 90psi. This is connected via quick connect and a few adaptors to a Venturi pump, purchased from Dooley for $30US. Much cheaper than a couple grand for a vacuum pump. The one I purchased is PD-093. This is connected to a check valve, vacuum gauge, release valve, resin trap, and finally out to two vinyl tubes that go to the bagging apparatus. With the ends of the tube plugged I can get 15 psi pretty easily. From what I've read 7 psi of vacuum is the correct amount. Set to achieve 7 psi vacuum the compressor is running about one min. on, one min. off. For bagging the dagger board I only managed 2.5 psi but I'm sure this is due to my rather hasty sealing of the bag around the dagger board. With the dagger board experience behind me I expect I will get much better numbers when I do my rudder.
July 15th, 2003: New pics. These are about a month old. The hull is now completed. I am officially CAN37, Touch-on-Wood. Remaining are the dagger board, rudder, mast, boom, and bowsprit. I managed to get the vacuum bagging setup working two weeks ago. A description of that gear is to follow.I did the carbon fibre on the dagger board last week. That was two layers of unidirectional carbon and a layer of carbon cloth. Now filling and fairing is the order of the day. As you can see by the date I am falling way behind my little plan but perhaps by the end of the summer I'll be able to go sailing. I can at least see the end of the tunnel now.


June 9th, 2003: No new pictures to put up yet, though I do have a roll of film waiting to be developed. The hull is now decked. Yeah. I've got the seat finished now and I've starting planing down the blank for the dagger board. Its been a busy weekend but hopefully this week I'll be able to put in enough time to track down a vacuum pump to rent for vacuum bagging the carbon bits I'll be making over the next month or so. I'm really looking forward to getting out sailing now...
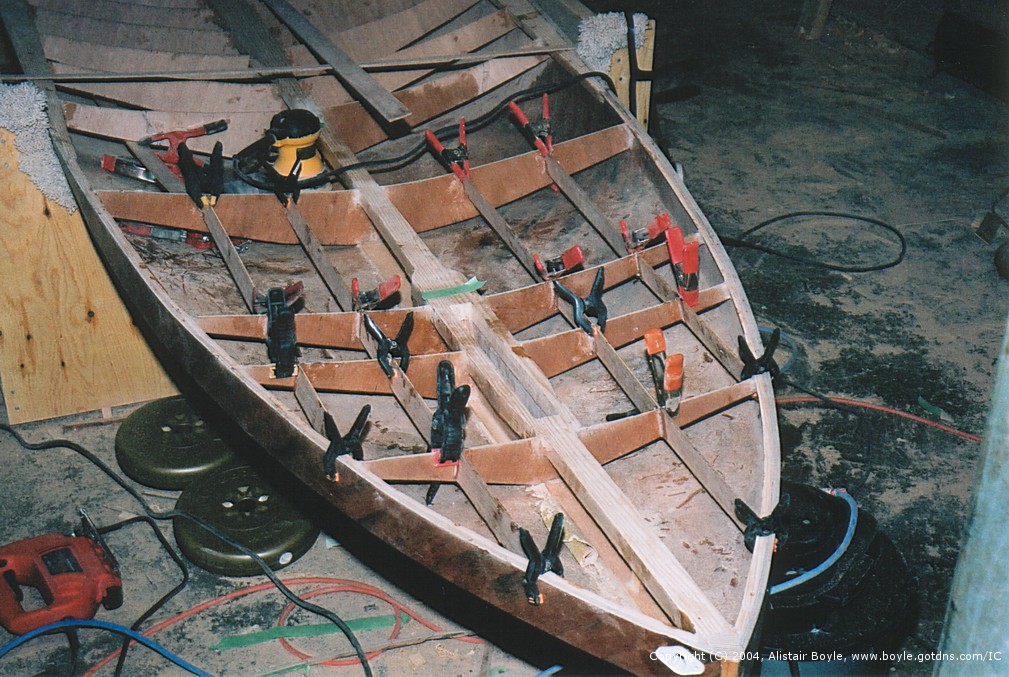
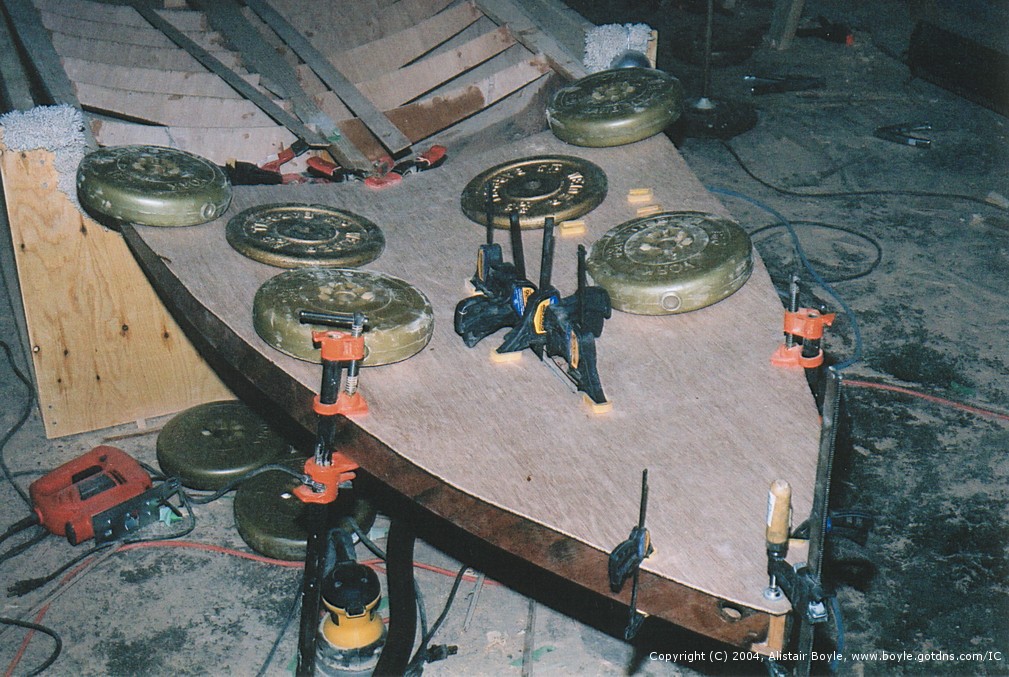
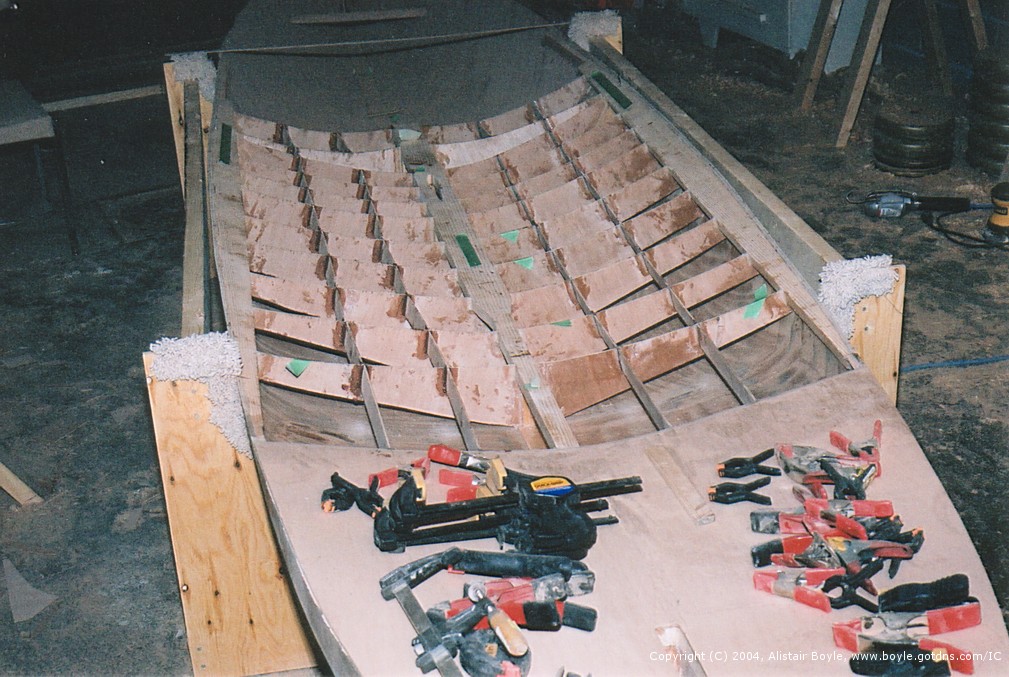
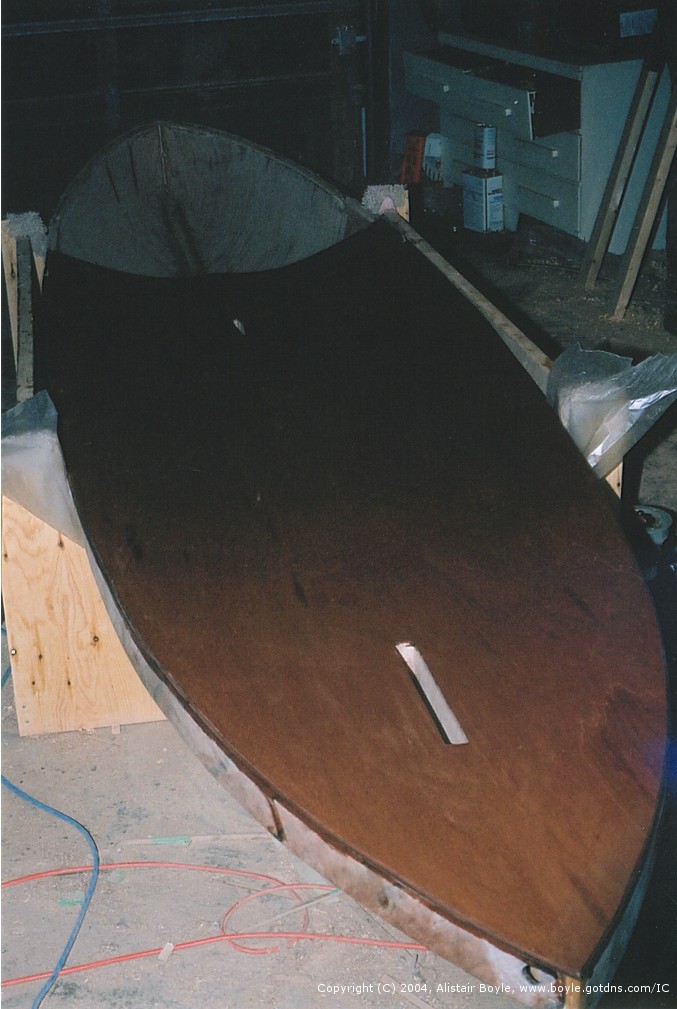
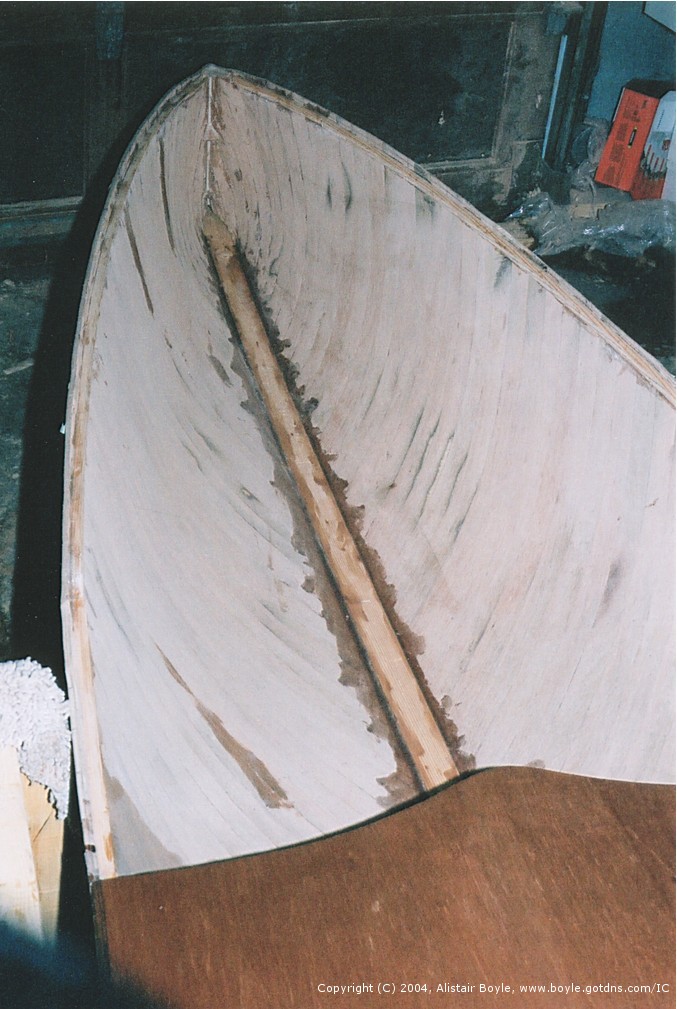
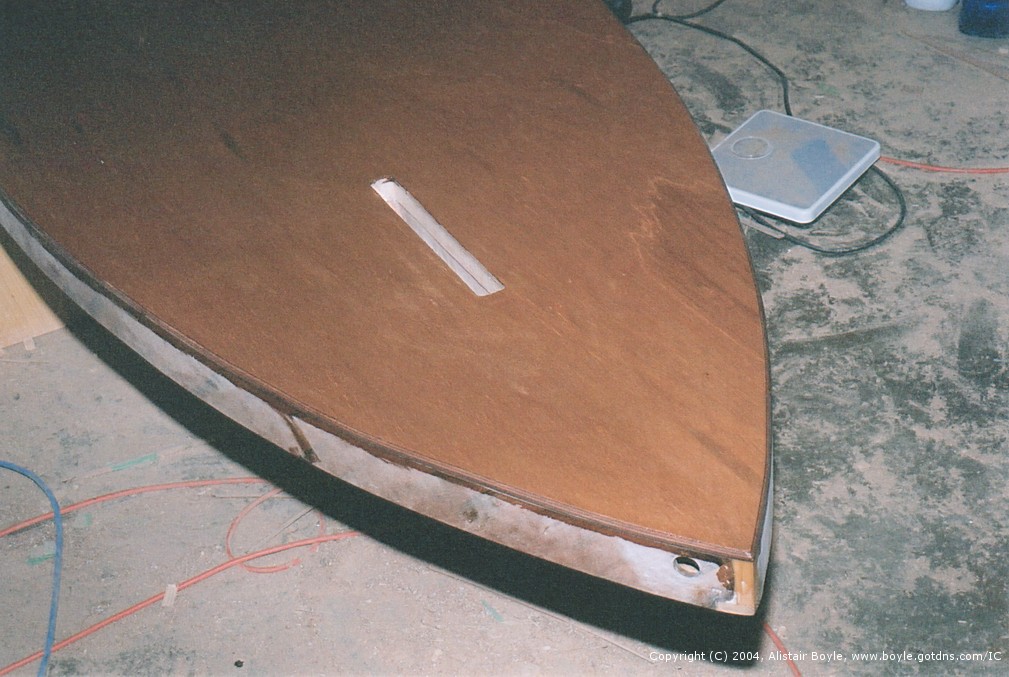
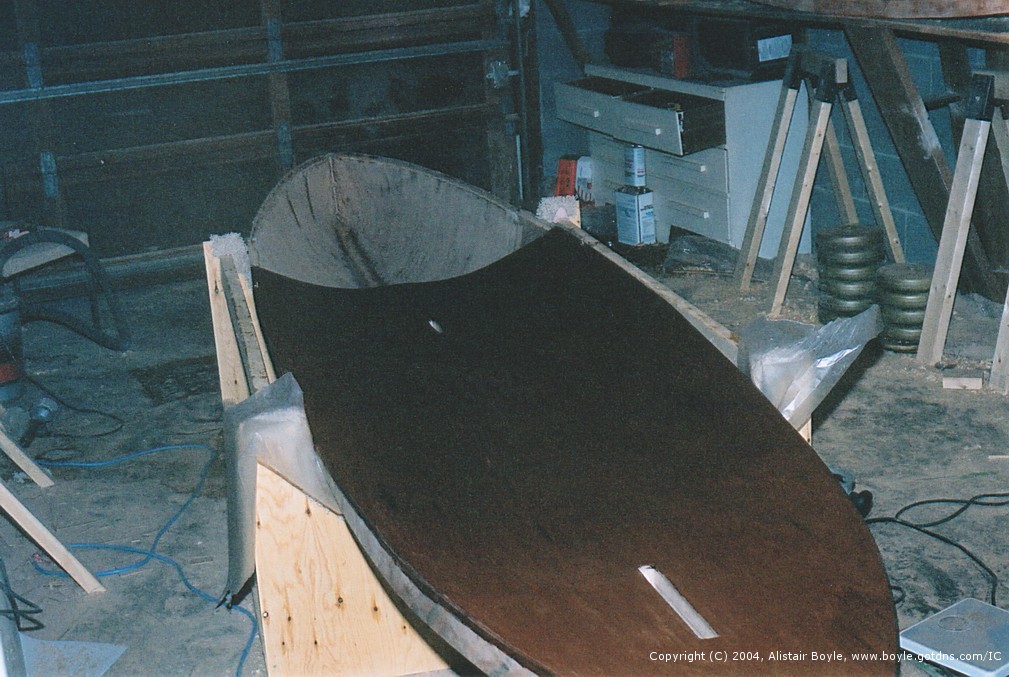
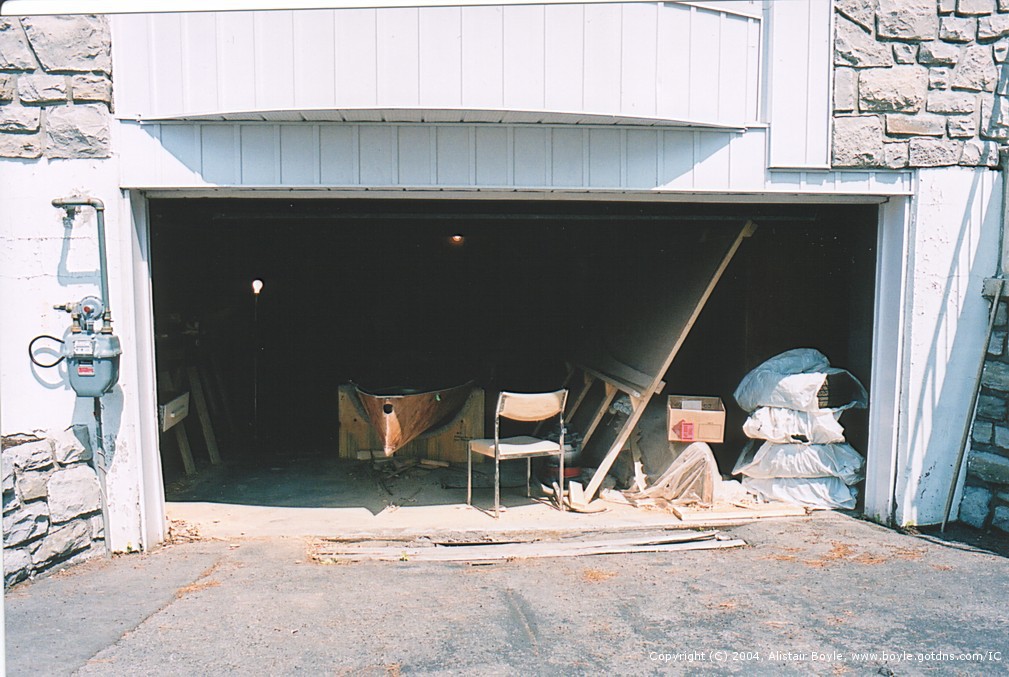
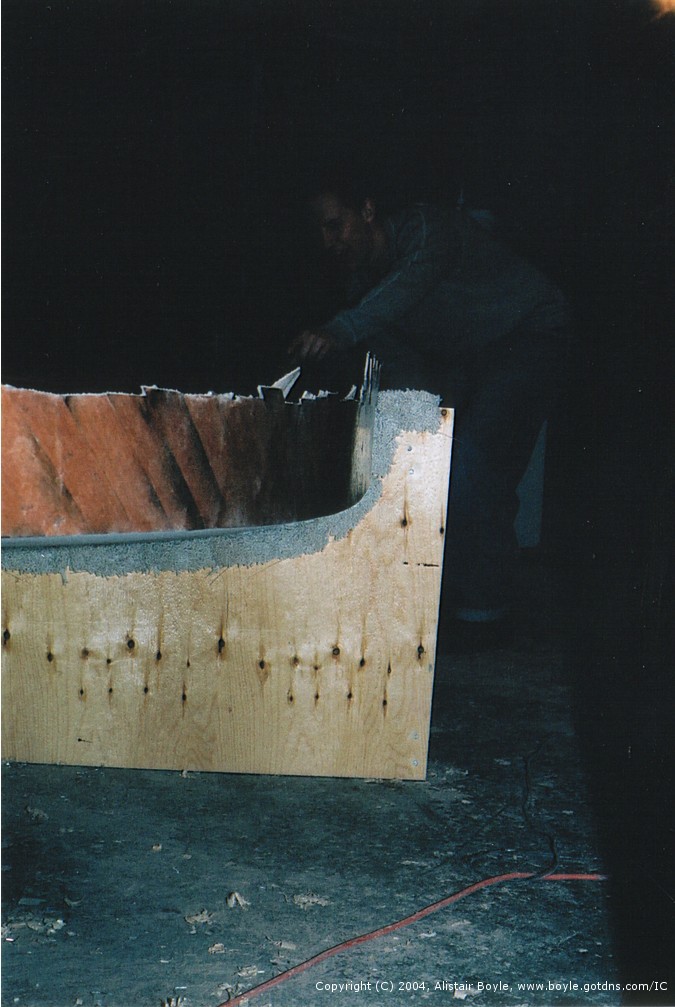
May 2nd, 2003: Well things aren't going quite as quickly as I'd like, mostly due to life interfering. I lost two weeks at the end of April due to moving to a new apartment. On top of this last night I hurt my shoulder playing hockey so I probably won't be able to do much on the boat for a bit. That being said, I've now got about 3/4 of the hull sealed after installing all of the internal structures. What remains is to finish up the bow and to put a second top layer over the back 3/4 of the boat. I've also got the top of the sliding seat done now (2 layers of ply). Here's some pictures (mostly approx. a month old) showing my handy work.
February 14th, 2003: The results of some recent enquiries on the icanoes mailing list (see the US IC site) turned up the following info...
From Ben Fuller (US 172):
I think Bob Lewis is still the Canadian keeper of things like sail numbers.
If you are in the market for new sails, Phil Kinder of Kinder Industries (the email on the web page doesn't seem, to work try this) would be the guy to contact in the states. His were the ones that took the top three places at the 2002 worlds.
From Wight, John F Jr
I've also put together a shopping list of blocks and cleats and so on that I'll be getting from Harken. (The cost is in US$.) I like the Harken gear better than the Ronstan stuff by and large. I was also pointed toward Frederiksen stuff, which it turns out, is now owned by Ronstan. They have a lot of stuff that looks like the new carbon Harken gear that I like.
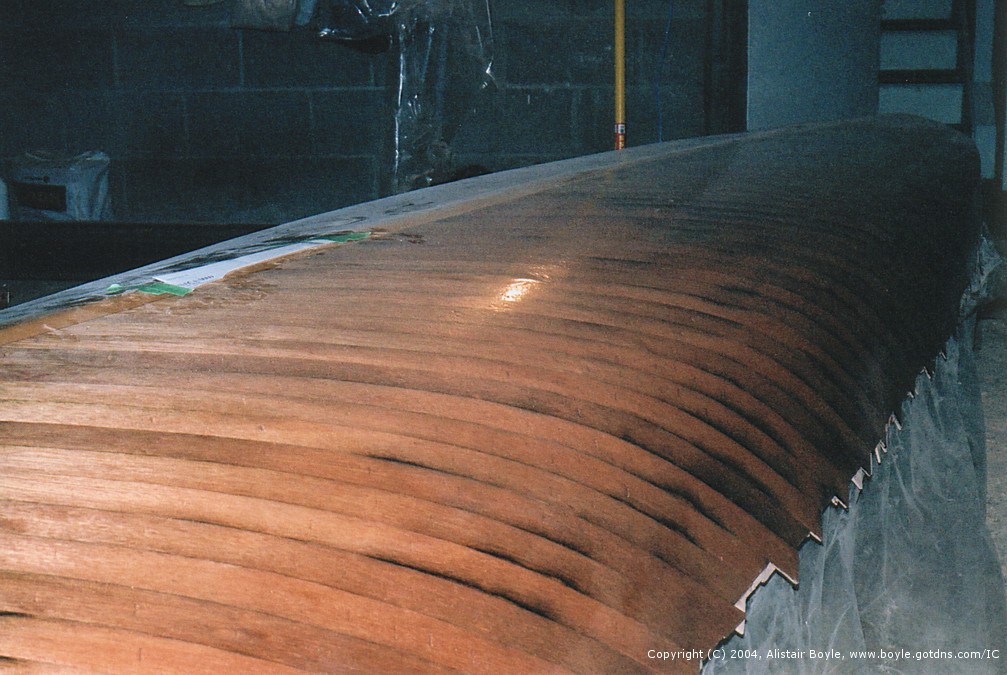
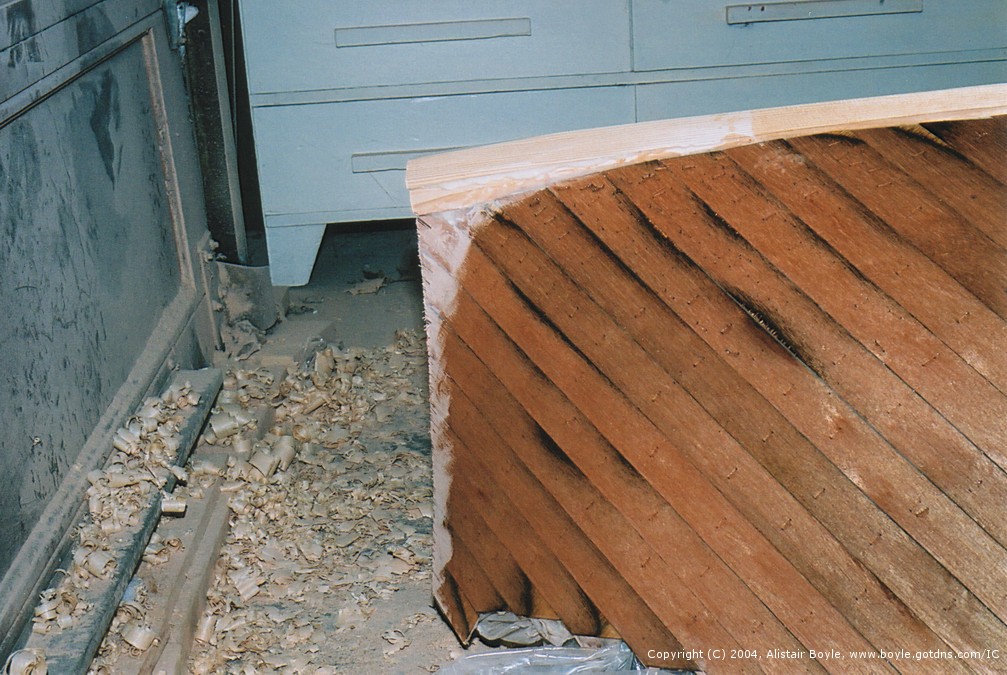
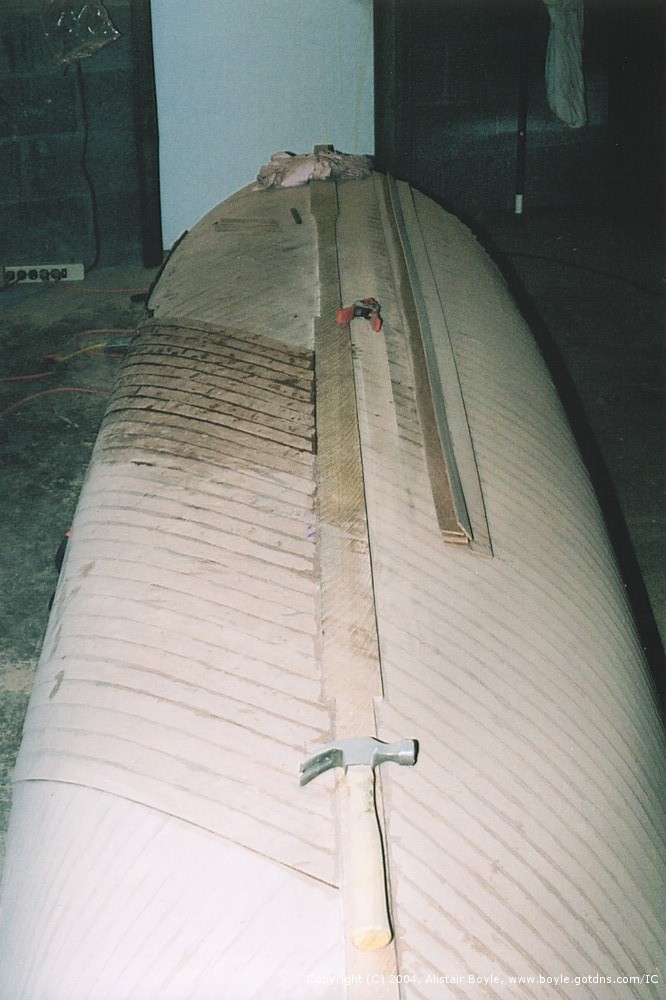
February 9th, 2003: Big day today. The last strips went onto the shell. Now its on with sanding and fairing the bottom of the hull. Lots of hand planing and sanding with the orbital sander. Then filling and fairing with the epoxy/filler mixture. Finally a couple coats of varnish to protect the wood from the sun. That's the work for the next two weeks or so. I've used up a full 4L container of West Systems at this point, and ordered another one from Lee Valley. That should be enough epoxy to finish up the rest of the boat and spars.
February 6th, 2003: This week is the last week of applying the plywood strips to the shell. Next comes a lot of sanding and then giving a couple final coats of epoxy followed by varnish to protect the wood from the sun. Yesterday I actually popped the shell off the mold. That is good because it means I didn't manage to glue to shell to the mold.
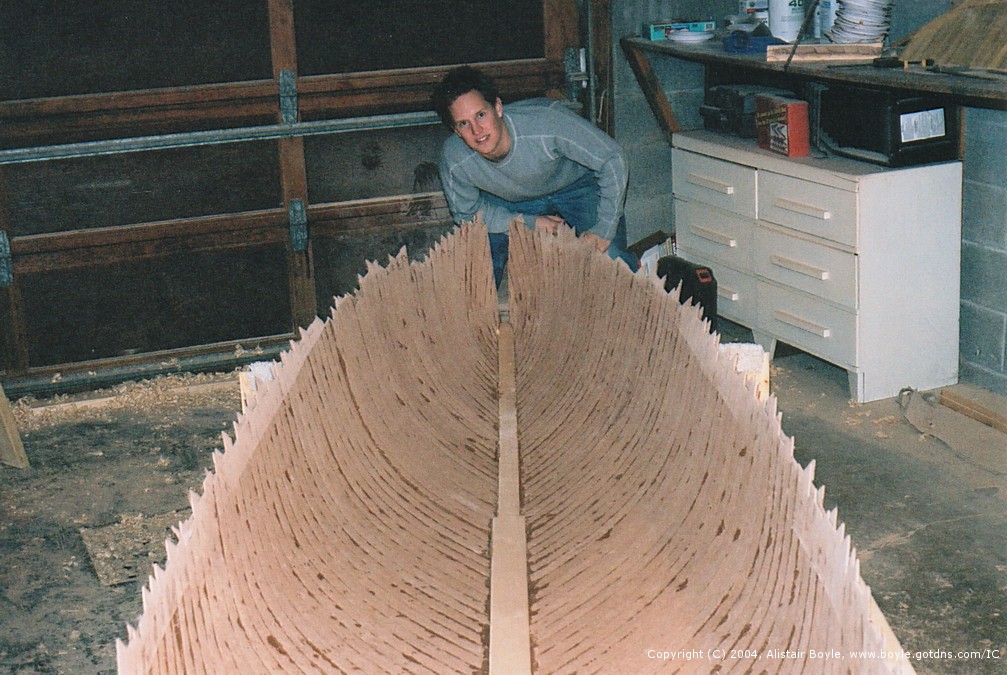
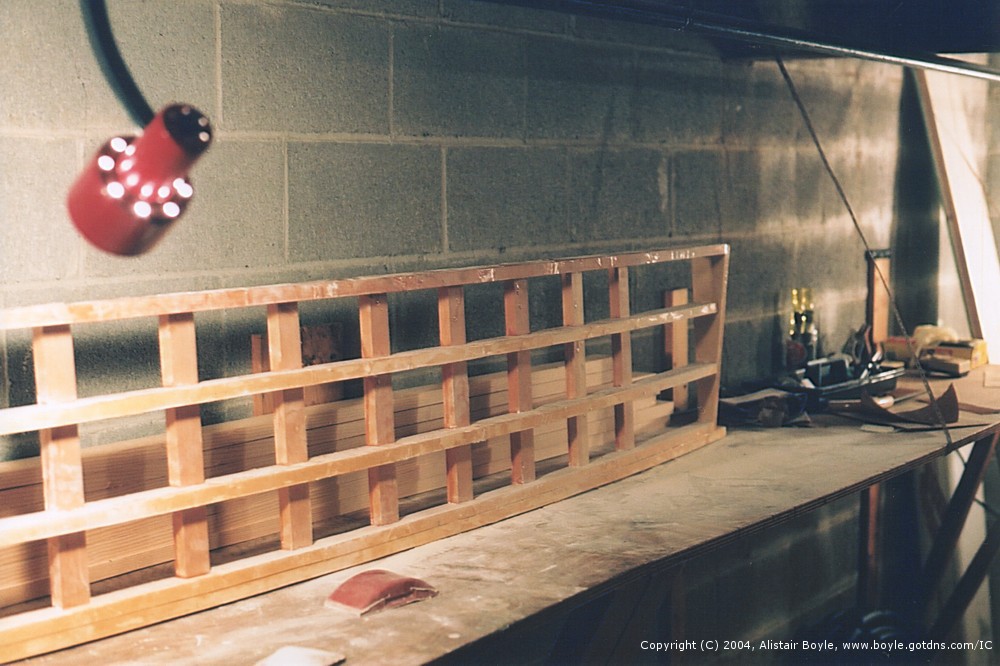
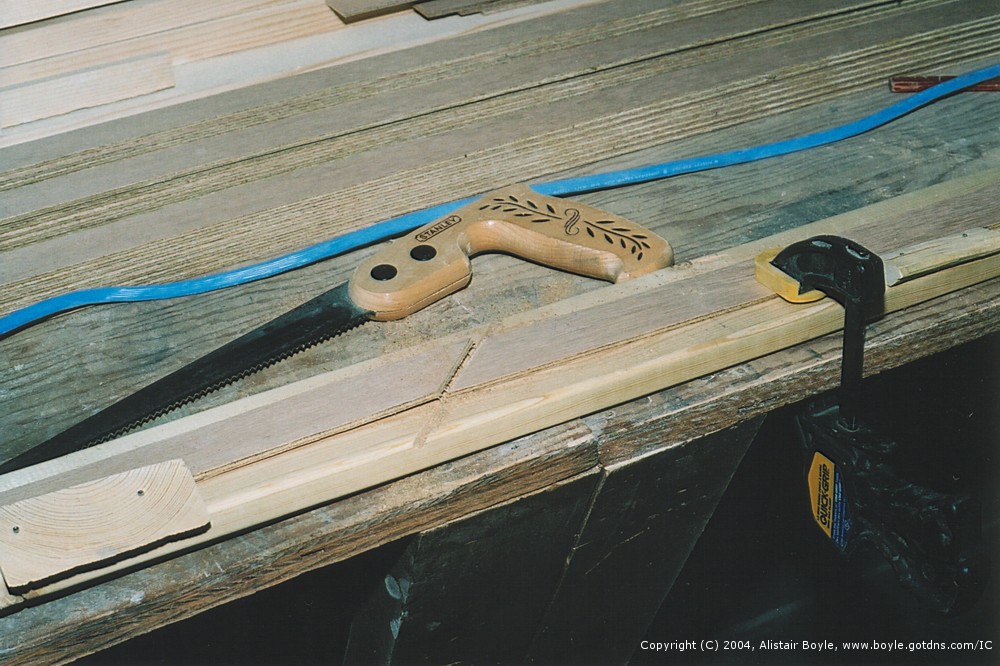
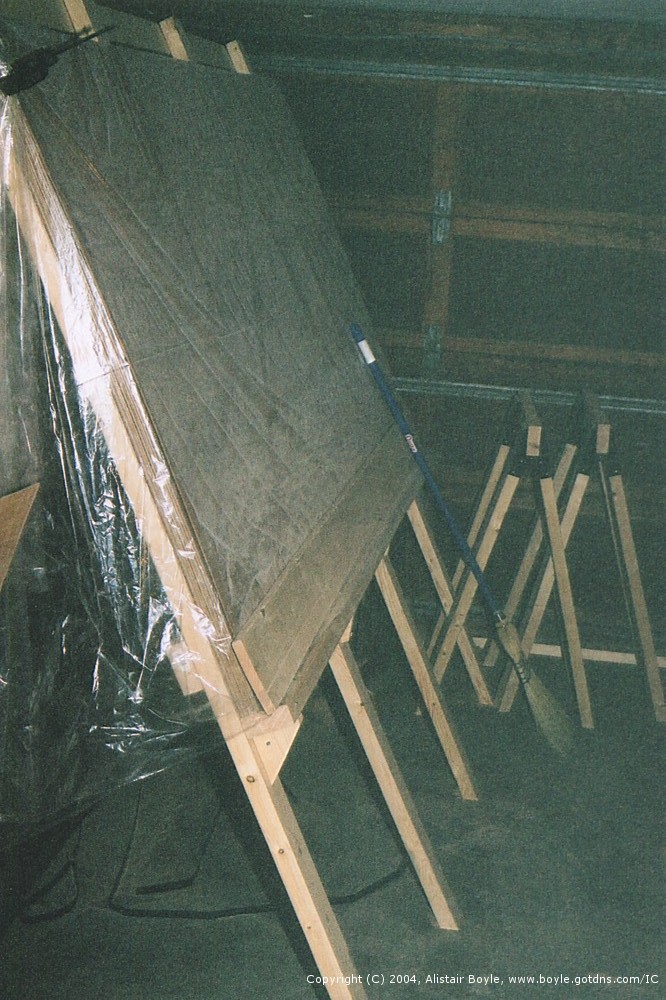
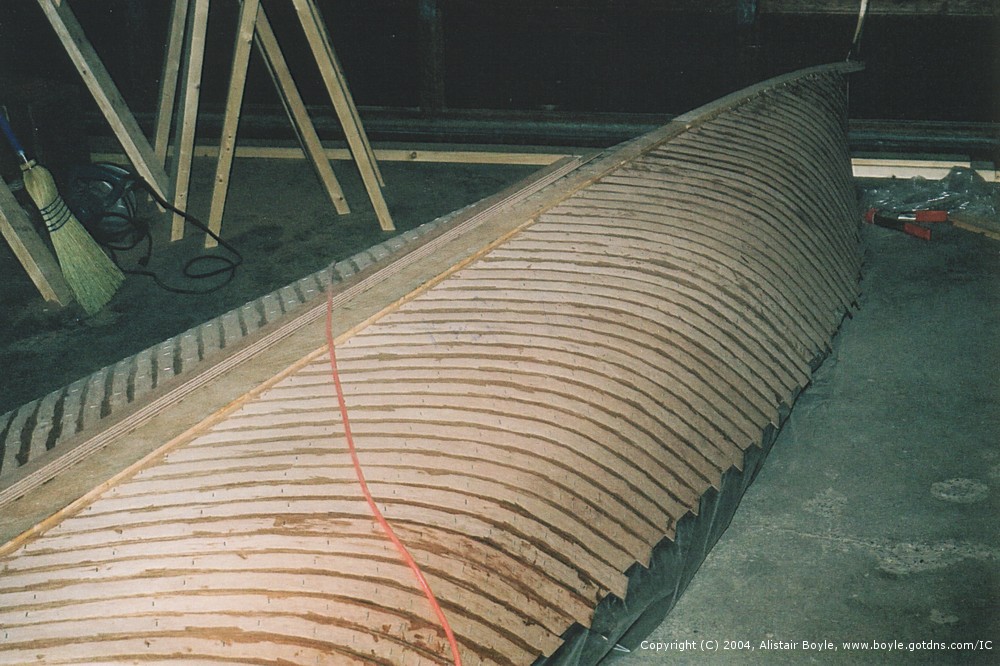
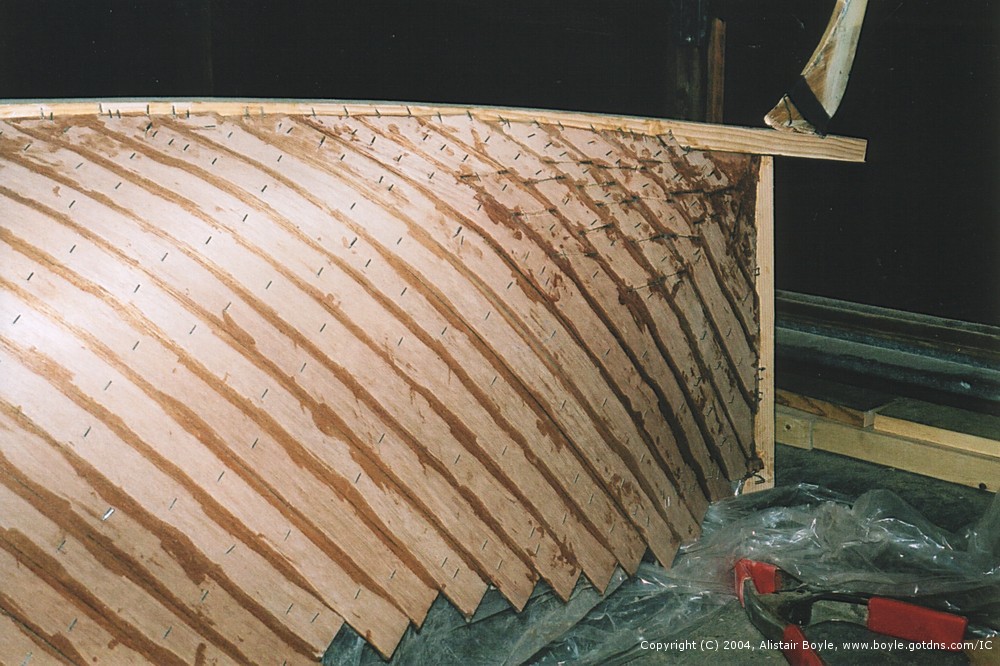
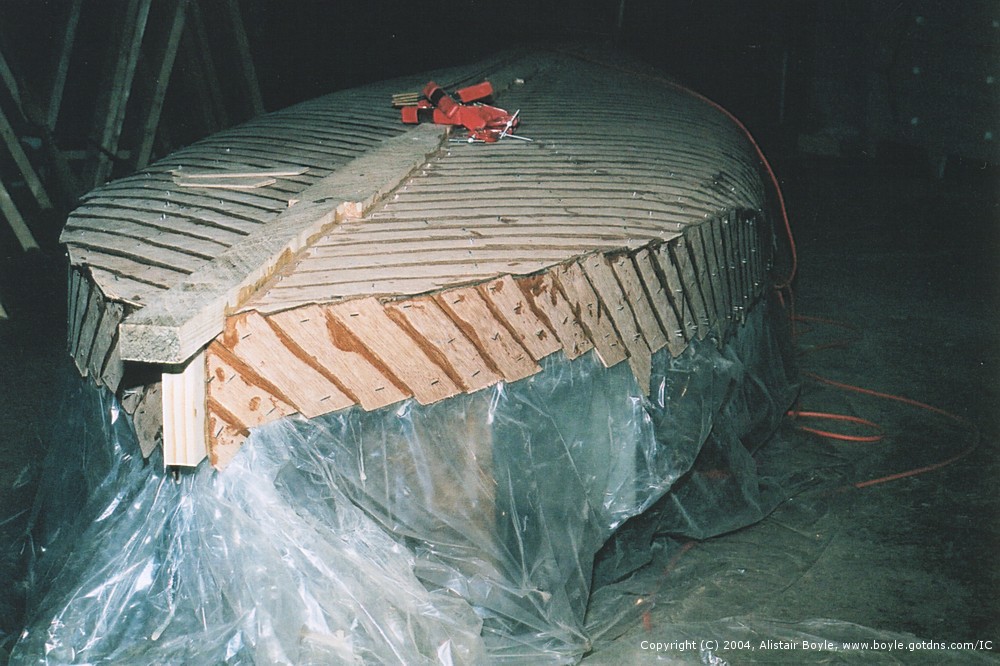
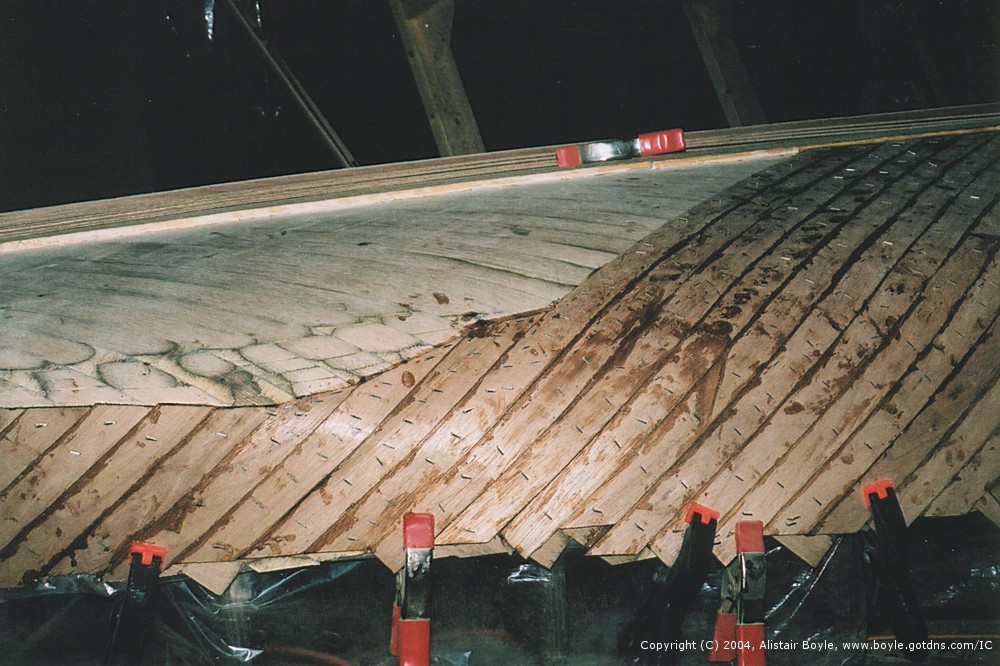
Below is a collection of pictures I took before Christmas. (To see larger versions click on the images) These show the first layer of the shell being done on the mold, followed by the second layer at 90 degrees to the first layer. Each layer is at 45 degrees to the centreline of the boat. There are also some pictures of the seat frame that I mentioned in earlier entries, and an easel like thing which is the jig I use for ripping the strips of plywood. I use a circular saw to slice one and a half inch strips off by running the saw along the ledge.

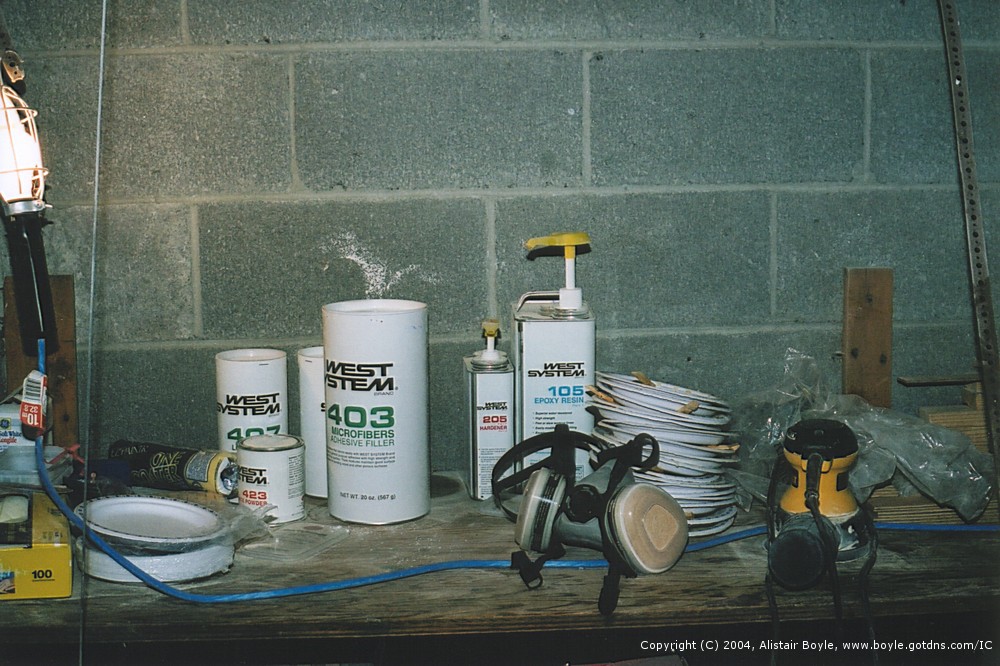
For the epoxy I'm adding the microfiber filler which is supposed to be good for laminating wood. Its generally best when its ketchup-ish since it spreads best that way. I found paper plates, since waxed cups are bad for the epoxy, and clothes-pins that have been split work rather well for mixing and spreading the goop.
The first layer is put on by applying epoxy to the edges that will touch the strip beside it and the centreline, then stapled down. As you can see I had to use a lot of staples in places to get the wood to bend to the tight curves of the mold. The other trick I used when the wood had to bend at too tight of an angle was to cut partially through the wood to relieve the tension. This allows the wood to bend in more tightly before it breaks. These cuts are mostly sanded out before the second layer gets applied.
The second layer is done by removing the staples as we go and sanding. (Pulling all the staples is bad because the edge glued wood is not strongly attached and the first layer will pop apart if all the staples are pulled at once... I know, I tried it.) Each strip of the second layer is applied at 90 degrees to the strips of the first layer. The bottom of the strip is coated with epoxy. Then the edges of the last strip have a bead of epoxy applied to them. Finally the strip is stapled down. When the epoxy has cured the staples can be removed. Then its time to sand...
Oh, before I forget... I had a number of emails back and forth with Rob Michael and Bob Lewis about converting (or in my case building from scratch) asymmetrical spinnaker equipped ICs now allowed by the rules as ACs. Rob sent me a document he has on converting ICs to ACs. I figured this would be a good place to disseminate this information. The info is here.
January 8th, 2003: Had a very busy Christmas and more than ready to get back to construction now. The first layer of the hull is now completed and the second layer is roughly a third of the way done. Lots of staple pulling to be done (somewhere around 2,500 staples used so far -- two packages and counting). The staples are pulled out as the second layer goes on and once the second layer is on the staples in the second layer are pulled out as well.
November 29th, 2002: Things have been going very well. In the last two weeks I've got a lot of work done. The sliding seat is pretty much finished except for having the top and bottom surfaces attached and some final clean up work. The backbone of the boat is done and the first layer of the hull is about 75% complete. It takes about an hour to do a foot of hull. With two sides and 17 feet of length stem to stern I'd estimate the first layer is around 40 hours of work. After this weekend I should be really close to being done.
I've also been spending time figuring out the rigging and starting to estimate how much that is going to set me back. The plan is to put in all the gear for an asymmetric spinnaker while I'm at it. I suppose sometime soon I'll have to start looking at finding some sails too.
November 15th, 2002: Godnabit! Another year gone by.
Well things have come together in the last couple of months. I'm out here in Ottawa now permanently (or as long as I have a job any ways) and I don't have school to worry about any more either. I had the form moved out here to Ottawa from Calgary with my stuff in August. I finally (after a lot of searching) found a heated garage to rent as a boat shop in September. In October I ordered the wood from West Wind Hardwood, and the West Systems Epoxy from Lee Valley Tools (the Canadian distributor).
While I've been waiting I sanded down the work I've done on the seat in preparation for finishing it. The wood arrived a week ago. I built a jig for slicing it into strips that also doubles as a storage thing to keep the wood off the ground and out of the way. The epoxy arrived yesterday. So finally, today is the first official day of construction. First up is shaping and gluing the bow, stern and centreline planks together that form the backbone of the boat.
November 27th, 2001: I'm back in Calgary now since September, to finish up with the school. I went and bought wood and epoxy for the seat and using a jig, made the spars in Sept/Oct.
TODO Pix will be placed here when I get around to scanning them.
Then I glued the whole seat frame together and that's where we're at now. I found a source for the Meranti Marine Ply and the Sitka Spruce I need at West Wind Hardwood Inc. out of Victoria, BC. Hopefully I'll put an order in before the spring. I put power out to the garage in the fall, and the mold for the boat is sitting safely in there now. Basically things are waiting for spring now when I graduate and things warm a little.
April 24, 2001: Well, it's spring and things aren't happening too fast. Pretty frustrating considering how much time I spend thinking about this stuff. The form sits in Calgary and here I am in Ottawa until August. Then I have my last year of university. I am setting aside the four months of spring and summer after I graduate to actually get the hull built. In the mean time I'm trying to come up with ways of getting the smaller items like the seat built. I may still manage to get the seat built here in Ottawa given my need to be building all the time. We'll see if anything actually gets done. Now that I have a car again, at least I can think about doing this stuff.
July 12, 2000: Time's flying here. I went sailing for the first time this year on Monday in a fireball and I race tonight. Later this month I'll be sailing in the first 29er nationals in Canada.
I've been looking into getting materials here. The biggest problem seems to be finding a work space since my room-mates think that wet epoxy resin doesn't make a good kitchen surface. I'll have to dig up access to a table saw too. Renting one is too expensive.
May 2, 2000: I'm moving to Ottawa today to work at Nortel for 16 months on internship. This kind of puts a kink in my boat building plans. The actual hull will have to wait until I get back. It's certainly not getting shipped out there. After talking with Martin it seems like the best thing to do is build the carriage while I'm in Ottawa, since it takes a considerable amount of time to build. The seat should be fairly quick to construct as well.
April, 2000: I eventually managed to get the IC form home on the second attempt. The first time I went with my Dad and a friend. They took one look at it and decided it was too heavy to move. Took a month to round up enough time and friends to try again. This time I went with three buddies and we tossed it in the rusty old trash trailer we have and cruised across town. Turned out it wasn't that heavy in the end.It's now stored beside the house in Calgary awaiting the next step.
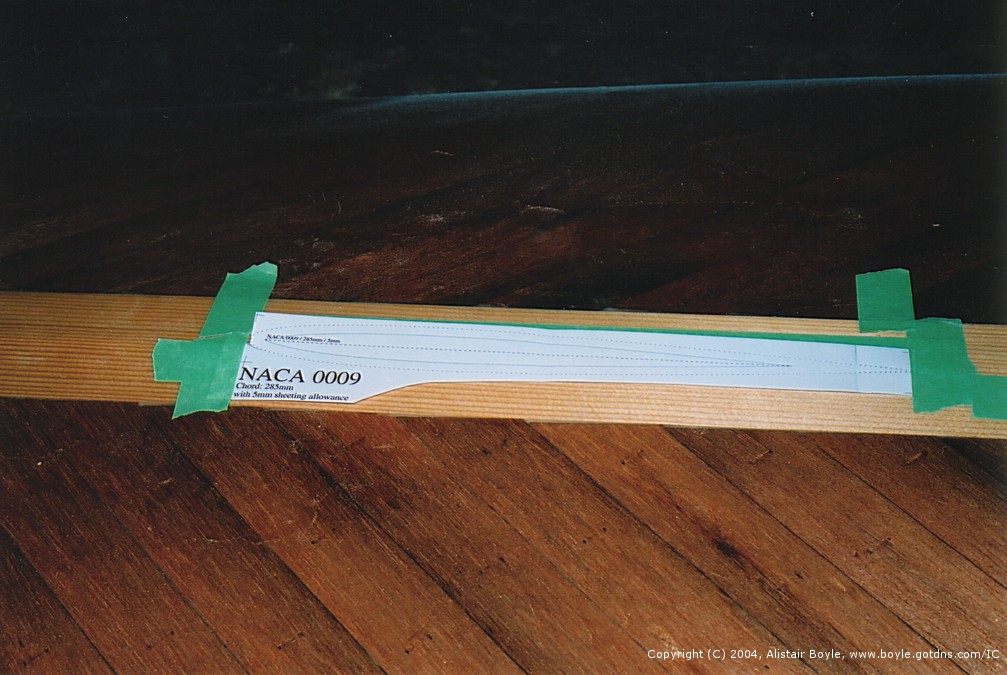
February 22, 2000: I am currently collecting information. This ranges everywhere from the actual Nethercott standard IC plans provided by Martin to more esoteric reading such as that of High Performance Sailing by Frank Bethwaite and the very informative back issues of the "North American CanoesLetter".
In the near future I will be collecting the form from Martin. A 300 pound monster that will take some doing to transport, and ordering the wood for the hull.