
Techniques
There are quite a few methods available to a boat builder working in wood. To name a few; hot molding, cold molding, strip, stitch and glue, and stressed ply.
Hot molding and cold molding involve taking strips of wood and bending them to the shape of the mold. This is generally done on boats that have many complex curves or higher loads on the hull (such as the International Canoe). Hot molding involves steaming the wood, then bending it and fixing it in place. Cold molding involves forcing the wood to the curve, then fixing it in place and relying on the next layer to hold it in place. So no steam for cold molding.
Strip construction is the method familiar to anyone who has seen cedar strip canoes or kayaks. The strips of cedar are laid out along the length of the boat and four or five layers of fibreglass are used on the inside and outside to hold the strips in line.
Stitch and glue involves taking the ply, bending it to shape, then stitching the edges together where they touch with wire. This is done by drilling holes, then feeding copper wire through and pulling it tight. Once the seams are tightly stitched together the outside is taped. Then the seam is glued. Finally the wire is cut and pulled from the holes. Then the boat is cleaned up and finished.
Stressed ply is similar to stitch and glue except the seams are not stitched with wire. Instead the design is cut from the ply in such a way that when the ply is bent up and pulled together with trailer tie downs or similar apparatus, the seams all touch and can be glued. After this, again the boat is cleaned up and finished.
However the hull is made, once the hull is pulled from the mold, it still will have to receive an internal frame and deck.
[TODO sketches for each method to be added]
Cold Molding
Cold molding results in a stronger hull than strip, stitch and glue, and stressed ply because the grain of the wood can be aligned along the direction of the stresses. In addition the wood is laminated, using multiple layers, resulting in a stronger whole than the individual layers.
Hot molding involves a setup for steaming wood and while this is not difficult (a kettle and a tube frequently do the trick) its not necessary if the wood can be bent to the required shape without it.
Cold Molding Method
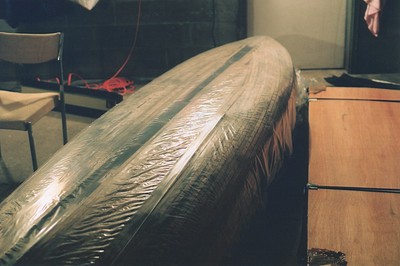
The first and perhaps most important step is to cover the mold with a layer or two of plastic. This prevents the hull from being glued to the mold. Now we can get on with the building.
A backbone, or king plank is needed for the boat. This is a long section of Sitka spruce. Each strip is glued at one end to this king plank. To get this plank to conform to the shape of the mold the wood can be steamed or simply clamped in place.
Very thin plywood is used for most boat building. This stuff is usually two to four millimetres thick. The thinner the better. It also meets some specific standards developed for the aircraft industry. BS1088 and BS6566 specify the quality of wood used in the ply (ie: knots, etc) and how well the ply must be glued together.
This ply is ripped into one to two inch strips along to surface grain of the ply. The job is much easier with a table saw but I did it with a circular saw and a guide since I didn't have a table saw available.
Each of these ply strips is then cut so that one end is approximately 45°. Its best to cut the strips as you go so that each one can be cut to exactly the right angle. It is also helpful to have some form of a jig. I simply used a scrap piece of wood.
The first layer is laid down by butting the angled end up against the king plank. Then the strip is bent down to the shape of the mold and stapled in place. Any edges that touch adjoining wood should be epoxied. For the first layer this will be two edges.
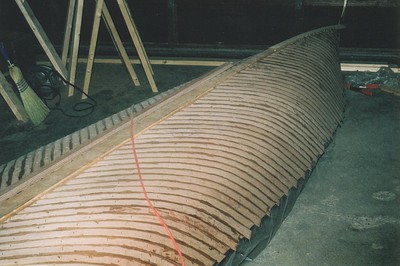
Once the first layer is done on both sides, the first layer needs to be sanded to remove the larger edges. The second layer goes on at an angle of ninety degrees to the first, give or take thirty degrees. So the smoother the first layer is the less epoxy will be needed to fill the gaps between the layers and the lighter the resulting boat.
The second layer is applied in much the same way as the first. On the second layer two edges and the underside must be epoxied. Before each strip is laid down and stapled the staples from the first layer must be pulled out. This must be done strip by strip because the epoxy is not strong enough to hold together the first layer without the second layer epoxied on top.
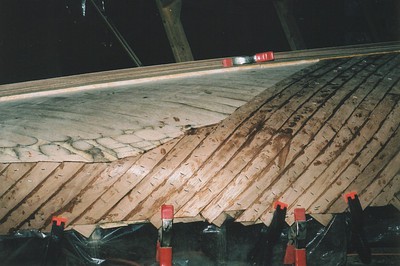
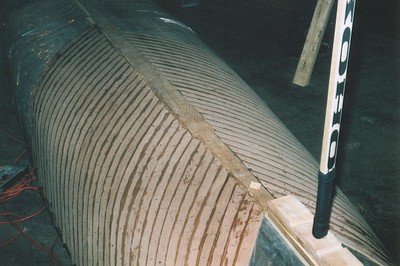
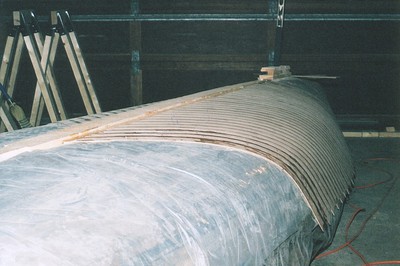
In these pictures you can see the second layer, along the back of the boat, with the first layer underneath. The first layer is exposed here because the back of the boat has an almost ninety degree edge which forms a chine.
This second layer is stapled in place and left to cure. Once its done the staples can be pulled out. If all has gone well, with a bit of prying, the hull can be pulled from the mold now. Inevitably a small amount of epoxy leaks through the staple holes and plastic to cure to the mold so the pulling of the hull can be a pretty stressful event.
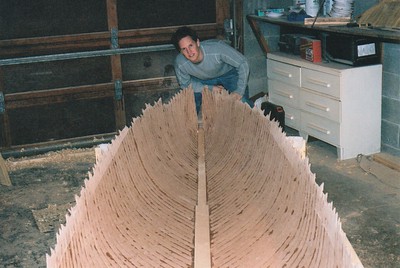
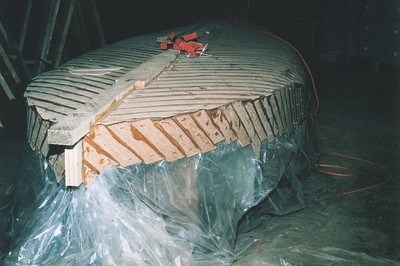
In this picture you see my friend Matt. Exciting, no? Also you can see that I didn't trim the edges of my boat till after I pulled the hull from the mold. This is because the edges of my mold were not suitable to route on. Instead I left the routing until I had glued a lip on the inside edge of the hull.
You can also see that the bow is still open. This is because I miss-calculated the overall length when the hull was on the mold. When the hull was pulled I measured and made the discovery. A quick bit of jigsaw work got the boat to the (thankfully) shorter correct length.
Cold Molding Tips
I used four millimetre ply, which is on the thick end for this method, cut into two inch strips. This made some of the bends challenging and as a result a lot of staples had to be used. This equates to a lot of work later to fill all those holes. The final count was around 7,000 staples used on the hull.
[TODO add a diagram of a kerf and how it helps to bend here.]
For the really challenging curves, that I just couldn't get the wood to bend to without breaking, I made small cuts across the strip at five millimetre intervals on the inner side. These cuts are called kerfs and allow the inside of the layer of the ply to bend until it is touching again while the outside layer bends normally. In retrospect, steaming those small sections may have been a better option. (They were the parts near the bow that had three different curves in them.)
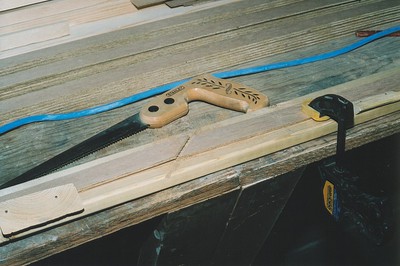
A staple puller is a key tool. Mine consisted of a flat blade screw driver, which I sharpened with a chisel sharpener, and a block of wood eight millimetres high which I used under the screwdriver so I didn't damage the wood.
[TODO staple puller picture]