
Preparation
The prep work for the rudder is similar to the daggerboard, except that a thicker foil section is used because the rudder has to maintain attached flow at greater angles to the flow of water. I used a [TODO look this up] foil section, though an SD [TODO look this up too] is also very popular.
How Long, How Much?
A rudder is a bit more complicated to make than a daggerboard because it has more parts.
[TODO table of cost goes here]
| Time | |
| Wood Blank | 10 hours |
| Rudder Post | 4 hours |
| Preparing Carbon | 2 hours |
| Layup and Vacuum Bagging | 6 hours |
| Fairing and Polishing | 10 hours |
| Rudder Box | 6 hours |
| Tiller | 2 hours |
| 40 hours |
Core
The core of the rudder is made in the same manner as the daggerboard. Once the core is complete the rudder post must be added.
There are a couple of options for making a rudder post; stainless steel rod, stainless steel tube, carbon, titanium, or a stainless steel tube with a carbon core. The rudder post takes a lot of load since the rudder can at times be forced at right angles to the boat in a wipe out. As a result, the post needs to be able to flex a bit. The stainless steel rod tends to be too brittle and develops cracks after being bent. A better solution is to use stainless steel tube. I used 3/8" tube (outside diameter) with a wall thickness of 1/8". This is a sturdy solution but is very heavy. It should survive a few years if I don't bend and straighten it too many times.
Carbon shafts, if thick enough, are strong and light but wear out very quickly. Titanium is light, but too brittle and tends to crack. Combining stainless steel and carbon can result in a very strong and long lasting shaft, but its time consuming to make. Rob Michael makes his from thin walled stainless steel (19mm diameter, 22swg) with a unidirectional carbon fibre shaft pressed into the tube. I may try this after I bust my current rudder shaft.
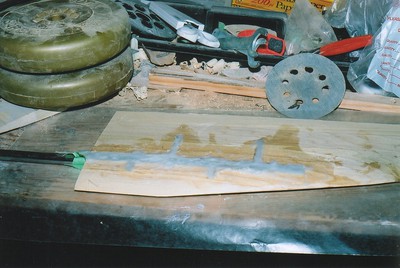
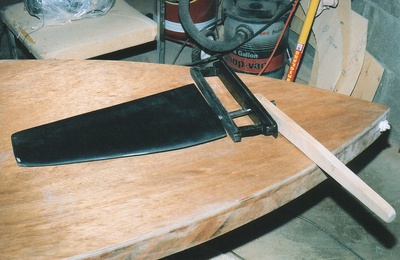
Once an appropriate shaft has been manufactured, it must be attached to the rudder blade. Holes are drilled through the shaft and bolts are installed. This assembly is then laid on top of the rudder core. The shape is traced with a pencil, then cut out using a jig saw. The underside of the core is taped up and thickened epoxy is used to fill the space. Once the epoxy has set the rudder can be flipped over and the other side can be filled. Then the excess epoxy can be sanded down so that the epoxy is flush with the rudder core. Now the core is ready to have a skin applied.
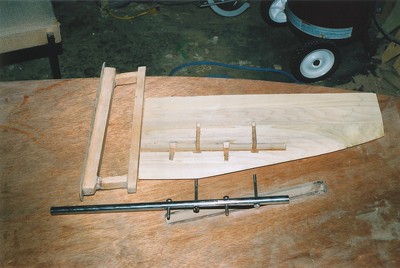
Rudder Box
I made my rudder box from scrap bits of Sitka spruce. These were glued into a shape such that it fits snuggly into the rudder slot. A top piece of Meranti ply is glued to the top to seal the top of the box. I didn't seal the sides of the box since I figure water will leak in through the bushings anyways. It might be sensible to put some sealed cell foam in the gap though.
Once the box is complete, holes have to be made for the rudder shaft. Using bearings is an option, though I opted for bushings since they are simpler. I made bushings by drilling a larger hole than I needed, filling the hole with epoxy thickened with graphite, then drilling the correct size hole (3/8") through the plug. The graphite should keep the rudder turning smoothly. This method resulted in a very tight fit, important if excess rudder play is to be removed.
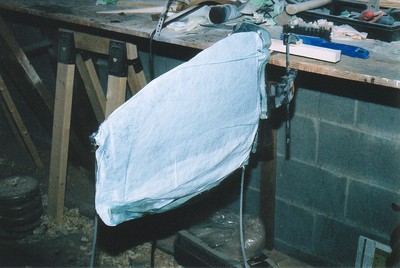
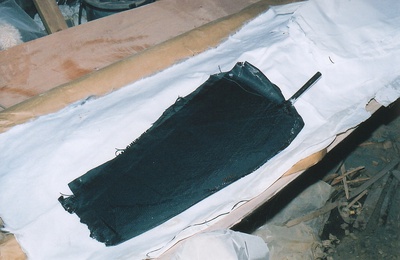
Skin, Fairing, Finishing, and Polishing
The skin is applied in exactly the same way as the daggerboard. This job should be easier since the rudder is smaller and the rudder post provides a convenient hold to clamp the work to a workbench. The rudder is faired, finished, and polished in the same manner as the daggerboard. Care must be taken to ensure that the upper edge of the rudder (the edge that will be against the underside of the hull) is straight to minimize the amount of drag.

Tiller and Tiller Extension
The tiller is made from a shaped piece of Sitka spruce. The tiller is bolted through the rudder post. There is also a gap at the rear of the rudder and a tightening bolt through the gap. By roughing up the top of the rudder post, a tight fit between the rudder post and tiller, with no play, should be achievable.
The tiller extension is made from HE30 aluminium alloy and is 2400mm long. I chose aluminium for my first tiller extension because it can be bent back to shape when I land on it. After I get through the learning phase I'll upgrade to a carbon tiller. Most carbon tiller extensions are 16mm in diameter.
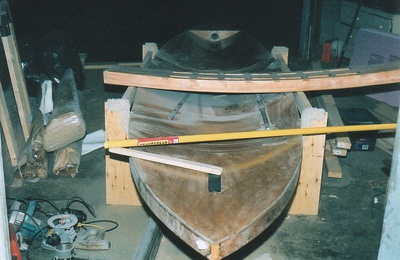
Here's a mock up of what the rudder will look like installed.